Sitemaps for Dynamic Content
As you may know, sitemaps are an important part of any website or application. A sitemap is a useful list of all the pages that are part of a website and it helps search engines to crawl them indicating its internal structure.
This blog focuses on showing you how to create a sitemap that will include dynamic pages. First of all, what is dynamic content? It is the type of content that is constantly adapting its information according to the way the user interacts with the page; using some parameters that determine the content that is shown.
Table of contents
- Sitemaps for Dynamic Content
- How to create a sitemap with Python
- Why you should have a sitemap for your dynamic content?
In essence, you have a page that can load different kinds of information; for example, a user page that receives params like user_id or slug_user (https://mysite.com/user/123 or https://www.mysite.com/users?user_id=123 or https://www.mysite.com/user/user_example).
Although this information is continually changing, you may want to add them to your sitemap. It’s important to note that is not going to affect your rankings but definitely can help search engines to crawl those pages and make it easier to index them. Now, you can make a sitemap for dynamic content with Python using a simple script to crawl your site and create a XML file. We will show you how to implement in more detail in this blog.
How to create a sitemap with Python
1. We’ll use python 3.x, MySQL, Linux, some python modules (included below) and your XSL stylesheet for your XML file is optional.
2. In our python script we will include the modules that we are going to need, so the easiest way to install them is via pip. You can install pip with the next command:

How do I use pip command?
To install new python package type:
pip install <packageName>
To uninstall python package installed by pip type:
pip uninstall <packageName>
so this is the basics about PIP.
3. Then, when we have pip installed, we are going to install the following packages:
- MySQLdb.
- xml.
- lxml.
- StringIO.
- datetime.
3.1 And we are going to import these modules on our python script.

* note: sys is not required to install via PIP the python libraries also include this module.
[ import MySQLdb
import xml.etree.cElementTree as ET
from lxml import etree
import datetime
import sys
from xml.dom import minidom
from xml.dom.minidom import parse
from StringIO import StringIO ]
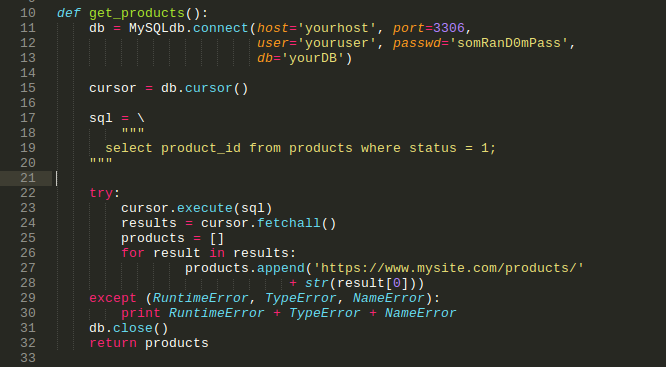
4. next we are going to make a function that will help us to get the products from our database (DB),
[def get_products():
db = MySQLdb.connect(host='yourhost', port=3306,
user='youruser', passwd='somRanD0mPass',
db='yourDB')

cursor = db.cursor()

sql = \
select product_id from products where status = 1;
try:
- cursor.execute(sql)
- results = cursor.fetchall()
- products = []
- for result in results:
- products.append(‘https://www.mysite.com/products/‘
- + str(result[0]))
- except (RuntimeError, TypeError, NameError):
- print RuntimeError + TypeError + NameError
- db.close()
- return products]

So, here is the explanation of this piece of code:
Our variable DB receives the MySQLdb.connect object; inside of that function, we are going to set your params according to your database authentication, like a host, port, user, password, and your DB. Next, we declare another variable that will receive the object db.cursor that help us to manage the current DB connection. Then we report our SQL query, in this case, we have in our system that the page products just receive the product_id stored in our database.
*important we need to declare the try catch clause
5. Then we use the cursor object with the execute method and pass the SQL query text variable, in the next line the results variable get all the products obtained from our query; for this, we are going to need an array to store the information.
5.1 next we use a for loop to go through every product in the results object, so the products.append function allow us to add the result to the products array. In this case, we add the URL by concatenating the product id, you can see result[0] which is the product id.
5.2 Now, the except clause is our catch method that follows our try, in python we use the try: except. The params that this clause receives are the time when the error happens, the error-type, and the name’s error, this is for debugging purposes, and next we print the error variables.
5.3 if there is an error, then we close the DB connection and return the products array which contains the product URLs.
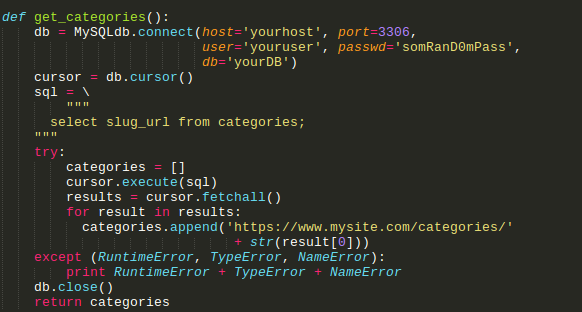
6. The next case is about the same function, but it just changes the URL format that will be performed for categories that receive the slug_url.
- [def get_categories():
- db = MySQLdb.connect(host=’yourhost’, port=3306,
- user=’youruser’, passwd=’somRanD0mPass’,
- db=’yourDB’)
- cursor = db.cursor()
- sql = \
- “””
- select slug_url from categories;
- “””
- try:
- categories = []
- cursor.execute(sql)
- results = cursor.fetchall()
- for result in results:
- categories.append(‘https://www.mysite.com/categories/‘
- + str(result[0]))
- except (RuntimeError, TypeError, NameError):
- print RuntimeError + TypeError + NameError
- db.close()
- return categories]

Here is an example of the URL type: https://www.mysite.com/categories/example_category
So, the explanation about it is the same as above.
7. Also, we can have extra or static URLs like: about page, contact us, etc…
e. g. https://www.mysite.com/about_us or https://www.mysite.com/contact_us. So, we’re going to do this by writing the following code:

*This is useful for that content which doesn’t come from DB.
- [def get_extras():
- extras = []
- extras.append(‘https://www.mysite.com/about_us‘)
- extras.append(‘https://www.mysite.com/contact_us‘)
- return extras]
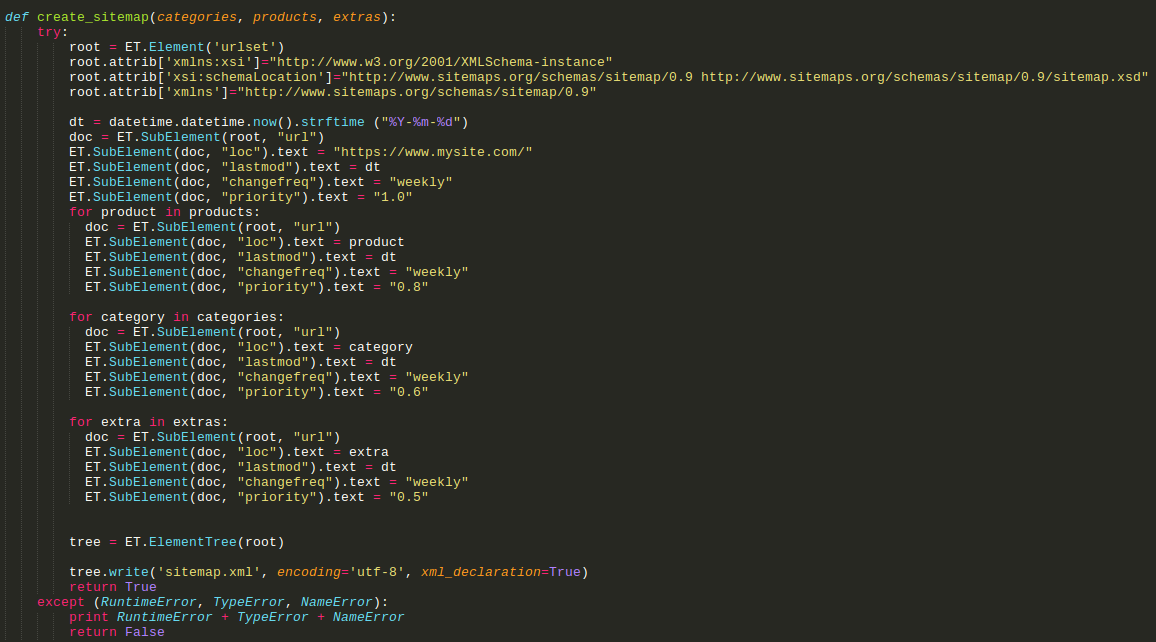
8. Ok, we are on the tricky part. Here we’re going to create the function that will parse all data to XML format as python XML requires.
[def create_sitemap(categories, products, extras):
try:
root = ET.Element('urlset')
root.attrib['xmlns:xsi']="http://www.w3.org/2001/XMLSchema-instance"
root.attrib['xsi:schemaLocation']="http://www.sitemaps.org/schemas/sitemap/0.9 http://www.sitemaps.org/schemas/sitemap/0.9/sitemap.xsd"
root.attrib['xmlns']="http://www.sitemaps.org/schemas/sitemap/0.9"

dt = datetime.datetime.now().strftime ("%Y-%m-%d")
doc = ET.SubElement(root, "url")
ET.SubElement(doc, "loc").text = "https://www.mysite.com/"
ET.SubElement(doc, "lastmod").text = dt
ET.SubElement(doc, "changefreq").text = "weekly"
ET.SubElement(doc, "priority").text = "1.0"
for product in products:
doc = ET.SubElement(root, "url")
ET.SubElement(doc, "loc").text = product
ET.SubElement(doc, "lastmod").text = dt
ET.SubElement(doc, "changefreq").text = "weekly"
ET.SubElement(doc, "priority").text = "0.8"
for category in categories:
doc = ET.SubElement(root, "url")
ET.SubElement(doc, "loc").text = category
ET.SubElement(doc, "lastmod").text = dt
ET.SubElement(doc, "changefreq").text = "weekly"
ET.SubElement(doc, "priority").text = "0.6"
for extra in extras:
doc = ET.SubElement(root, "url")
ET.SubElement(doc, "loc").text = extra
ET.SubElement(doc, "lastmod").text = dt
ET.SubElement(doc, "changefreq").text = "weekly"
ET.SubElement(doc, "priority").text = "0.5"


tree = ET.ElementTree(root)

tree.write('sitemap.xml', encoding='utf-8', xml_declaration=True)
return True
except (RuntimeError, TypeError, NameError):
print RuntimeError + TypeError + NameError
return False]

8.1In this code fragment we create the XML file and assign the correct tags for our sitemap.
You’ll see in the first lines:

This will add the next XML tags to our sitemap:
[<?xml-stylesheet type="text/xsl" href="sitemap.xsl"?>
<urlset xmlns="http://www.sitemaps.org/schemas/sitemap/0.9" xmlns:xsi="http://www.w3.org/2001/XMLSchema-instance" xsi:schemaLocation="http://www.sitemaps.org/schemas/sitemap/0.9 http://www.sitemaps.org/schemas/sitemap/0.9/sitemap.xsd">]
8. 2 The “dt” variable gets the actual time in year-month-day format, and it’ll be added to each XML block.
The “doc = ET.SubElement(root, “url”)” specifies a new xml block that will contain the next info.
- ET.SubElement(doc, “loc”).text = “https://www.mysite.com/“
- ET.SubElement(doc, “lastmod”).text = dt
- ET.SubElement(doc, “changefreq”).text = “weekly”
- ET.SubElement(doc, “priority”).text = “1.0”
This code is for the main URL, which will contain the URL as loc (location), the datetime as lastmod (last modification), weekly as changefreq (change frequency). The priority level, in this case, is 1.0, it will depend on your criteria.
8.3 The next lines create the same structure, including those arrays that contain all our info gotten from our DB. Also, the output will be a file named sitemap.xml that will have the next basic structure.

- [
- <?xml-stylesheet type=”text/xsl” href=”sitemap.xsl”?>
- <urlset xmlns=”http://www.sitemaps.org/schemas/sitemap/0.9” xmlns:xsi=”http://www.w3.org/2001/XMLSchema-instance” xsi:schemaLocation=”http://www.sitemaps.org/schemas/sitemap/0.9 http://www.sitemaps.org/schemas/sitemap/0.9/sitemap.xsd“>
- <url>
- <loc>https://www.mysite.com/</loc>
- <lastmod>2016-11-03</lastmod>
- <changefreq>weekly</changefreq>
- <priority>1.0</priority>
- </url>
- <url>
- <loc>https://www.mysite.com/products/1</loc>
- <lastmod>2016-11-03</lastmod>
- <changefreq>weekly</changefreq>
- <priority>0.8</priority>
- </url>]
9. Now we are going to create our primary function that will call the other methods, those we already see.
- [if __name__ == ‘__main__’:
- categories = get_categories()
- products = get_products()
- extras = get_extras()
- created=create_sitemap(categories, products, extras)
- if created==True:
- print “created”
- add_styleshet()
- prettyPrintXml(“./sitemap.xml”)
- else:
- print “failed”]

Ok, so first, you’ll see the variables categories, products and extras, they will receive the arrays from their respective functions. Next, we will invoke the create_sitemap function and pass the variables to be parsed and added to our XML file named as “sitemap.xml”. At this point, we have a condition, in case that the sitemap has been created or not. We also have two more functions “add_stylesheet” and “prettyPrintXml”. These will be optional, because if you already have a stylesheet for your XML file, I recommend you to add it, and also to pretty Print your XML file. Here is the code for both functions:
[
def prettyPrintXml(xmlFilePathToPrettyPrint):
assert xmlFilePathToPrettyPrint is not None
parser = etree.XMLParser(resolve_entities=False, strip_cdata=False)
document = etree.parse(xmlFilePathToPrettyPrint, parser)
document.write(xmlFilePathToPrettyPrint, pretty_print=True, encoding='utf-8')
]

This function will help us to format the XML file in a readable way.
[def add_styleshet():
doc = parse('sitemap.xml')
pi = doc.createProcessingInstruction('xml-stylesheet', 'type="text/xsl" href="sitemap.xsl"')
doc.insertBefore(pi, doc.firstChild)
file = open('sitemap.xml', 'w')
file.write(doc.toprettyxml())
file.close()]

If you have your XSL file to add style to the XML file, just replace the name in the second line on the href tag, as easy as that.
Why you should have a sitemap for your dynamic content?
As we saw, in this blog we have learned how to create our sitemap file for dynamic content that was previously recorded in our database. This kind of files are very helpful to index entirely our site and to get more visits with better ranking in Google, or any search engine. Another tip to recommend you is to set correctly the meta tags for description, title and keywords of the page; and thus let our visitors see how is in a short brief the main content of it.
Here is an example to see how are the title and description indexed in Google.

Now you know how to do it, I hope you apply it right away since is an essential part of your SEO practice. In a few days I will be posting more about better SEO management in our systems. Remember that better SEO means more visitors and that ClickIT is always your best option when it is about IT services. Contact us!


