Amazon Relational Database Service (Amazon RDS) works as a web service that facilitates the operation and configuration in our database for high scalability.
However, why would we need a managed relational database service? Because RDS is responsible for many complex and tedious tasks, this means that as a consequence we would waste a lot of time and resources. In addition, RDS is an instance optimized for its purpose, the management of databases.
In this tutorial, we start with the creation of the Amazon RDS as an instance dedicated to the database.
Requirements for Amazon RDS Instance :
Before starting, consider that you must have an account in AWS and a VPC with public and private subnets.
We have been creating a series of blogs with the aim of creating a high-performance WordPress and scalable self, review the series of blogs to learn more.
Step by Step:
1. Log in to your AWS account.
2. Verify the region in which the infrastructure will be created.
In the upper right corner, click on the button with the city name and choose the region, in this case, it is Virginia.

3. Select the RDS service.

4. Select “Get Started Now.”
5. Choose the database manager, in this case, “MySQL”. Press “Select”.

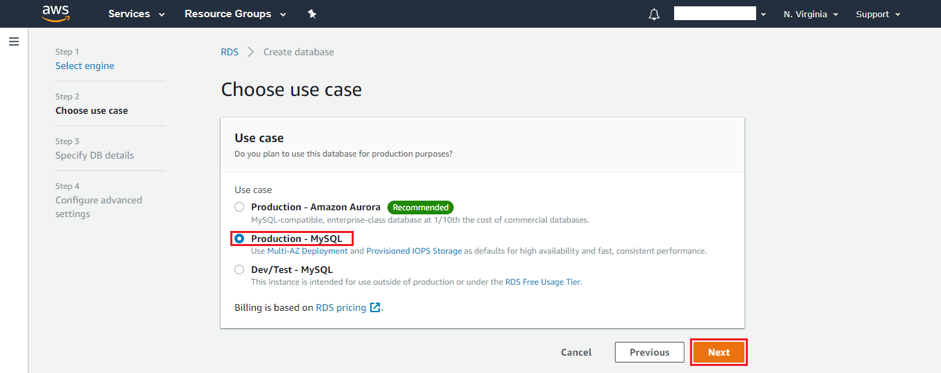
6. Choose whether the instance will be used for production or Dev / Test environment.
In our case, it’ll be for production, so we select the option and we continue.
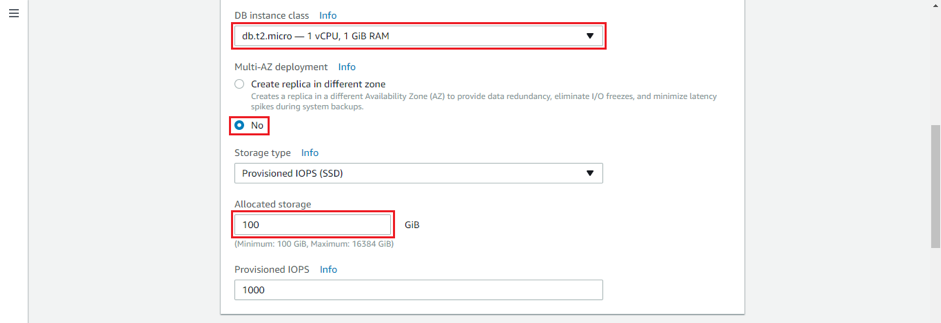
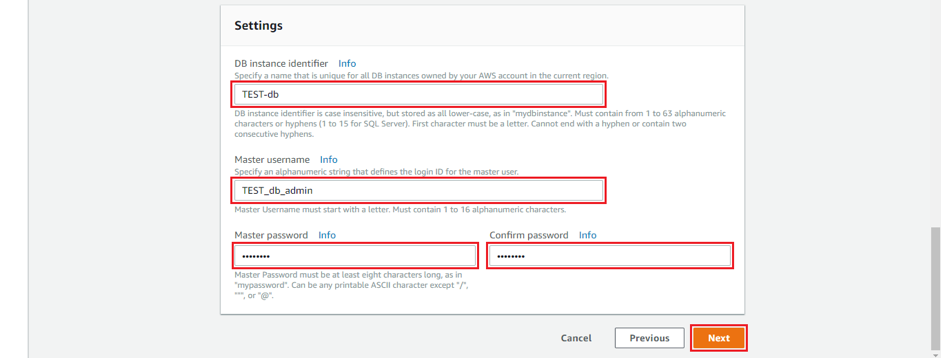
7. Select the database version, the type of instance (in this case, db.t2.micro), we disable Multi-AZ (for demonstration purposes of our tutorial), the capacity of the database in Gb, the name of the instance, the master user (master) and your password. Multi-AZ is the replication of the instance in another zone if the database has any problem.

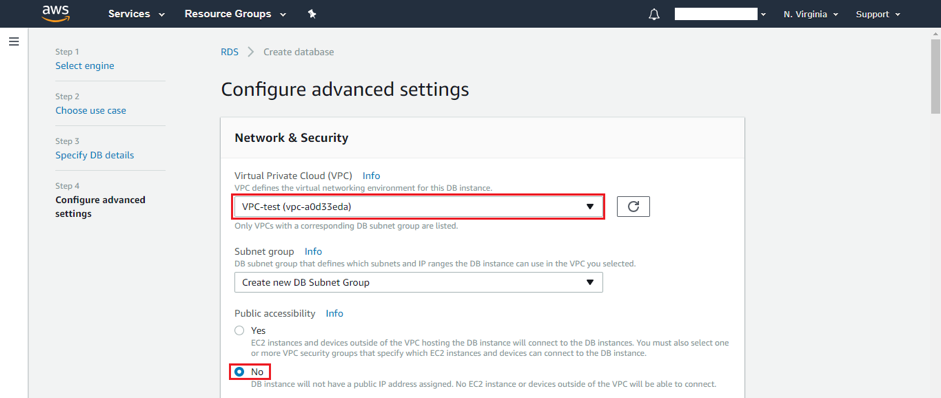
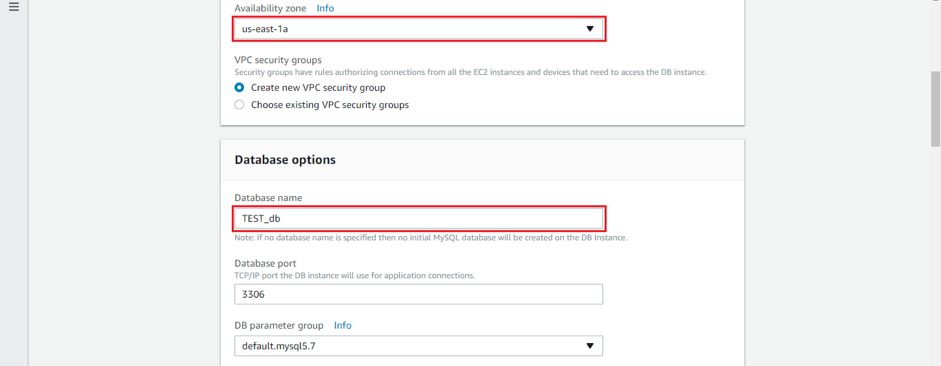
8. Select the VPC of the infrastructure, determine if the instance will be publicly accessible or not. Assign an availability zone. Add a name to the database and enable or disable monitoring (in this case it will be disabled); immediately proceed to create the instance.

9. Finally, verify that the status of the instance is available. This will take few minutes, so do not despair.

Note: This instance does not have IP, but the ENDPOINT fulfills the same function for the connection.
Ready! We have finished the creation of our RDS instance. If you have any questions leave it in our comments, we can help you solve it.
Remember that the objective of this tutorial is The creation of a high-performance WordPress. Do not forget to go to see the whole process and the other tutorials we have prepared for you.
Also, wait for the next tutorial, we will help you with the creation and configuration of the EFS.

Amazon RDS FAQs
AWS RDS pricing is influenced by several factors, including the database engine chosen (e.g., MySQL, PostgreSQL, Oracle, SQL Server), the instance type and size, storage capacity, and any additional features like Multi-AZ deployments for high availability. Data transfer and backup storage costs also contribute to the overall pricing. AWS provides a pricing calculator to estimate costs based on specific configurations.
Yes, AWS RDS allows easy scalability. You can vertically scale by changing the instance type or horizontally scale by utilizing Read Replicas for read-heavy workloads. While scaling enhances performance, it’s essential to consider the potential impact on costs. Larger instances and additional features may result in higher expenses. Evaluate your application’s performance requirements and budget constraints to choose the most cost-effective scaling options.
It simplifies database management tasks such as hardware provisioning, database setup, patching, and backups. With RDS, users can focus on application development and data modeling without the hassle of managing underlying database infrastructure.