Have you ever launched an EC2 instance and don’t know how to log in to your brand-new instance? It may sound difficult if you are a beginner, but it’s pretty much simple. Let’s take a look at how to connect to an EC2 instance using SSH, following the next simple steps whether you are using Linux or Windows.
Table of content
- Requirements
- How to connect to an EC2 instance using SSH using Linux
- How to connect SSH into EC2 instance using SSH using Windows
- Conclusion
Requirements
- SSH Key (.pem file) provided by Amazon. This SSH key is provided by Amazon when you launch the instance.
- IP address. IP address assigned to your EC2 instance.
- Username. The username depends on the Linux distro you just launched. Usually, these are the usernames for the most common distributions:
-Ubuntu: ubuntu
-Amazon Linux: ec2-user
-Centos: root
Only for Windows Users
- Putty SSH Client installed on your PC. You can download the latest version here: https://www.chiark.greenend.org.uk/~sgtatham/putty/latest.html

How to connect to an EC2 instance using SSH using Linux
1. Open your terminal and change directory with command cd, where you downloaded your pem file. In this demonstration, pem file is stored in the downloads folder.

2. Type the SSH command with this structure:
ssh -i file.pem username@ip-address
This is the explanation of the previous command:
- ssh: Command to use SSH protocol
- -i: Flag that specifies an alternate identification file to use for public key authentication.
- username: Username that uses your instance
- ip-address: IP address given to your instance
3. After pressing enter, a question will prompt to add the host to your known_hosts file. Type yes. This will help to recognize the host each time you’re trying to connect to your instance.

4. And that’s it! Now you’re logged in on your AWS instance

How to connect SSH into EC2 instance using SSH using Windows
1. Open your PuttyGen (it is included with your Putty Client installation) on your PC.
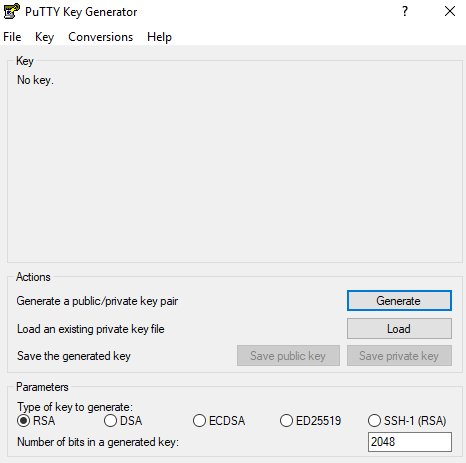
2. Make sure the checkbox “RSA” is selected.

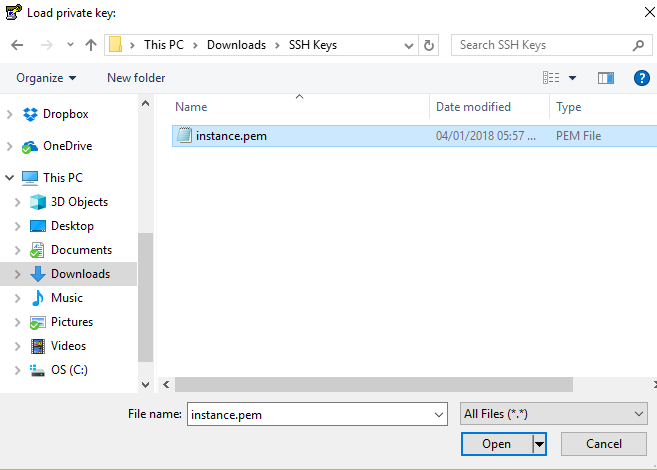
3. Click load and go to the folder where you have stored your pem file, select it and choose open.

4. You will see this message.
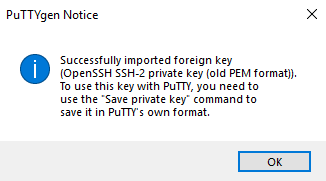
Click OK
5. After the Key is loaded, click on save private key. Then a message will prompt, select yes.
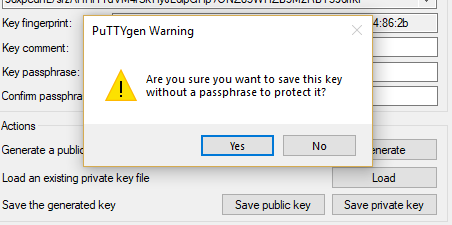
6. Now type a name for your key. For this example, the key will be named “instance” (it is not necessary to add the .ppk to the name file, Putty will do it)

7. Now close PuttyGen program and open Putty. Go to SSH section and double-click it.
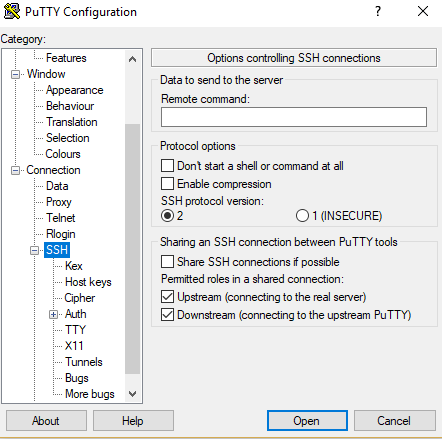
8.Go to Auth section and select the ppk file that we just created.

9. Go back at the top in the Session section. Fill the field Hostname (or IP address) with the IP address given to your AWS instance and click open.
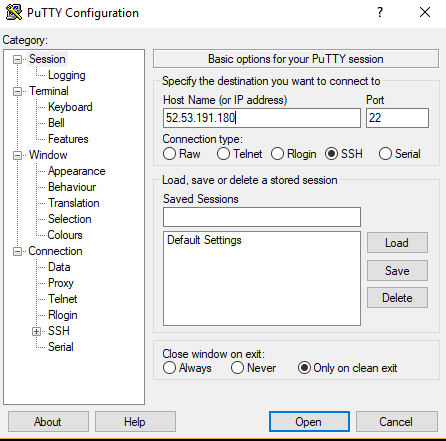
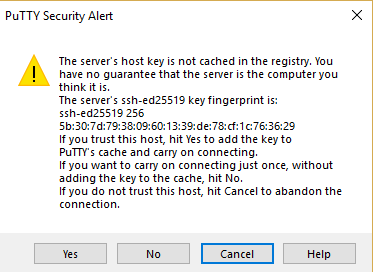
10. A warning will prompt. The server host is not registered on our PC, so we must add it. Click yes.
11. A window will prompt asking for the username, type your distro username, in this demonstration, username is ubuntu.

12. And there you go! Now you’re connected to your AWS instance using Putty on your Windows OS.

You might also like: What is AWS ECS? – Run Docker in Production
Conclusion of How to Connect to ec2 Instance SSH
As you can see, the steps to connect to EC2 instance SSH are quite simple, but sometimes we can mess up the SSH conversion on Windows or how to get your instance information. In case that happens or you forget any step, feel free to come back and take a look at this tutorial on how to connect to Amazon EC2 instance ssh.
Now you will not be facing doubts the next time you launch your amazing AWS instances. Perhaps you want to take a look at how much you will spend on these brand-new instances; feel free to read How AWS Pricing works or read more awesome blogs on our website!
Remember that ClickIT is always ready to help you; we’ll find the best AWS solution for your business!
Also read: AWS Security Tools
This blog is also available on our DZone profile
FAQs
EC2 (Elastic Cloud Compute) is a service where you can create servers to launch your websites or applications. One of the first things you will find when you create an EC2 instance is the instance type/size. Learn more about creating and choosing the best EC2 instance for your project here.
Since many other providers on the network can host your app, we choose Amazon EC2 because it offers a lot of possibilities. You can start with a small instance, then, when you get more traffic, grow it up to a bigger option, making EC2 more flexible and adaptable than other technologies to host your application.
– High availability level.
– High-reliability level.
– Scalable in memory space and server size.
– The hard disk space is independent of the instance size, so it can be set according to your requirements and increased using the AWS service EBS (Elastic Block Store).
– It offers “double” security since, in addition to the default firewall, AWS Security Groups restrict the ports you prefer.
Secure Socket Shell (SSH) enables public-key-based authentication and facilitates encrypted connections between two endpoints in a network. Generating SSH keys to access containers and servers is highly recommended for securing your IT resources, and it is one of many DevOps security best practices.

