Introduction to migrate WordPress
Are you using WHM / cPanel to manage your server or hosting? Is your site slow and optimizing the server is an impossible task? Are you considering changing your hosting provider? Then this tutorial about how to migrate WordPress to AWS is for you.
We know that cPanel is useful when it comes to managing your infrastructure and maybe it has been part of your basic toolkit since forever. But with no emotional feelings, it is time to move on to the next level of innovation for your environment. We present a better hosting to migrate WordPress; this is Amazon Web Services (AWS). In this blog, you are about to see the reasons to Migrate to AWS, its benefits and more importantly how to perform the migration.
Most people start using CPanel because it provides an effortless way to configure and access the server from an intuitive panel, at least more intuitive than a console. But everything has its pros and cons, for example, the server customization is too limited since only the functions provided by CPanel are available and, in case you try to configure it from the console, CPanel will ignore this configuration and the will replace by default.
CPanel is a control panel that manages your hosting and server, has a moderately intuitive design, it seizes the server and installs everything that is commonly necessary, such as MySQL, FTP, Cron Jobs, etc., but it is difficult to customize it since WHM / CPanel takes full control of it.
Amazon Web Services (AWS) is a cloud service provider that, among many other solutions, offers all the necessary services for a high performance hosting and it is adjustable to your needs and budget.
Among the services mentioned in this blog we can find:
- Elastic Compute Cloud (EC2): Virtual servers.
- Relational Database Service (RDS): specialized servers for databases.
- Route53: DNS Administrator.
An EC2 instance of AWS is a virtual server with the following characteristics:
- High availability level.
- High stability level.
- Scalable in memory space and server size.
- The hard disk space is independent of the instance size, so it can be set according to your requirements and increase it if desired.
- It offers “double” security since, in addition to the default firewall, there are AWS Security Groups which restrict the ports you prefer.
NGINX is a faster web server than Apache, for this reason, we prefer the implementation of this one.
As a code language we will use PHP version 7.0 since it is the most recent and stable version of PHP; keep in mind that NGINX needs PHP-FPM to interpret this code.

Why is AWS better than CPanel?
Benefits of AWS:
- Total control of the EC2 instance.
- Optimized database.
- Greater security.
- Ability to customize the EC2 instance.
- AWS support.
Disadvantages of CPanel:
- Although it has a tool to upload files, the CPanel is not widely used for this function since it uses an FTP client such as Filezilla.
- It doesn’t support NGINX.
- It has a vulnerability. (You can get total access to databases with just typing “mysql”)
How to migrate WordPress?
To migrate WordPress from CPanel to AWS you need:
- A CPanel account
- The WordPress to migrate in the account
- An AWS account

Step 1. Get your site ready
The first step is to obtain the compressed directory and the database. The compressed directory, where you will find the WordPress to migrate, should be located as a “tar.gz” file, and the database will be in “sql.gz” format. To obtain the compressed directory of WordPress (document root) and the database, you can go to the CPanel section called “Backup” and select the database to be exported, just like the document root.
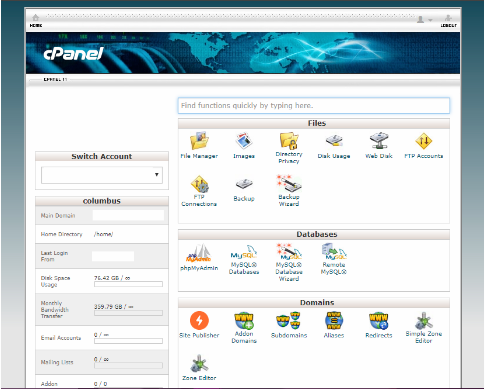
Step 1.1 Login to Cpanel
Go to your account in CPanel, entering in the browser http://111.111.111.111:2083 (change 111.111.111.111 by the IP of the server or domain). The number 2083 is the port through which the CPanel is accessed.

Step 1.2 Enter the “Backup” section
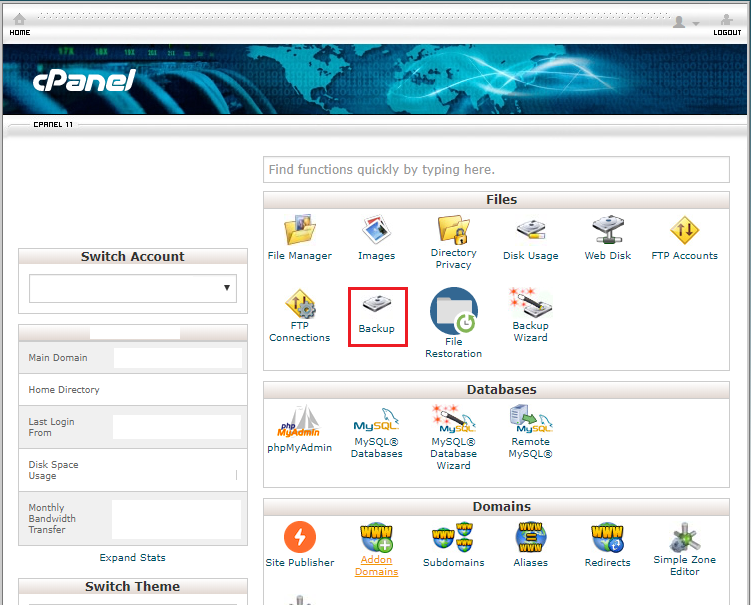
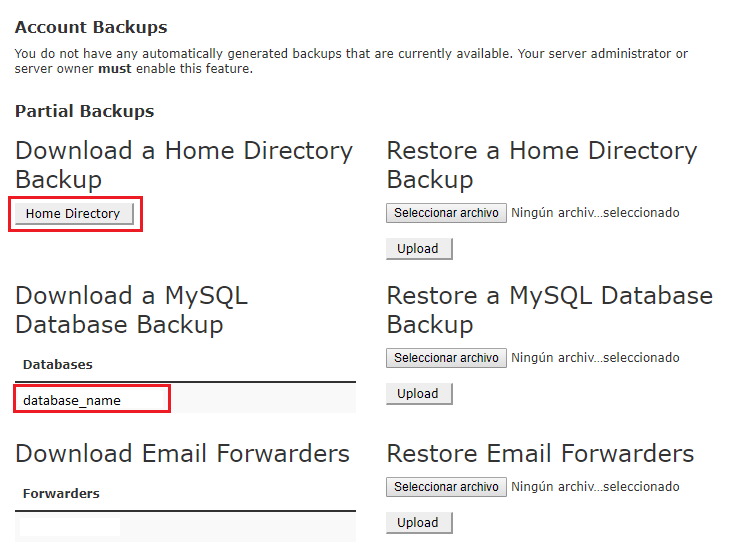
Step 1.3 Download your Backup
In the “Account Backups” section, click on the “Home directory” button and add the name of the database to start the download.
After having downloaded the WordPress files and database, you should start the creation of the EC2 instance and RDS that are going to be used to migrate WordPress on AWS.
Note: The database can be hosted on the same server as WordPress (instance EC2), but it is recommended to use an RDS since it is optimized.
Step 2. Create the EC2 Instance
Next, we will create instance EC2:
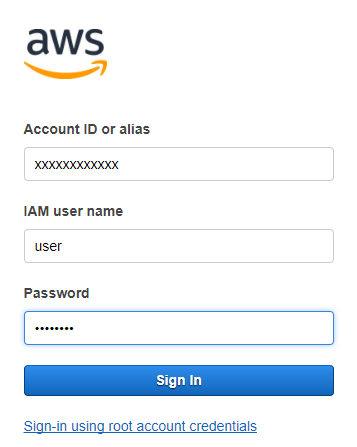
Step 2.1 Login to AWS
Login to the AWS account through the link https://xxxxxxx.signin.aws.amazon.com/console with username and password.
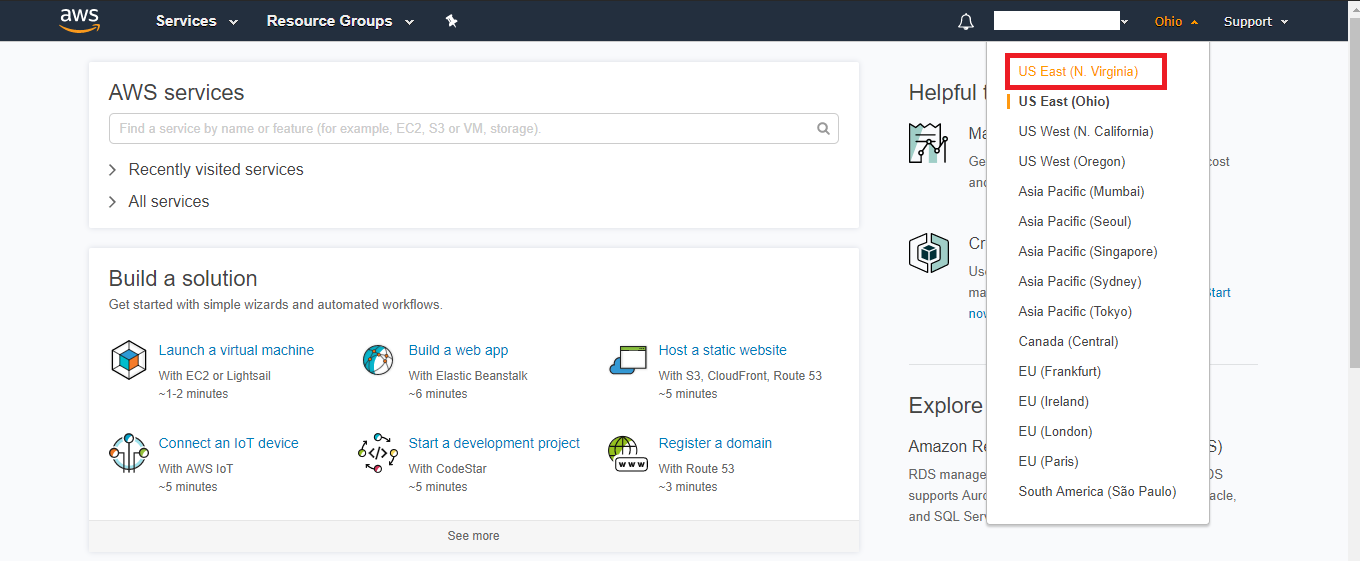
Step 2.2 Select the AWS Region
Before starting to create instances, we need to make sure to do it in the desired region. In this case, we will do it in US East (N. Virginia), since it is the most used and some services are cheaper than others.
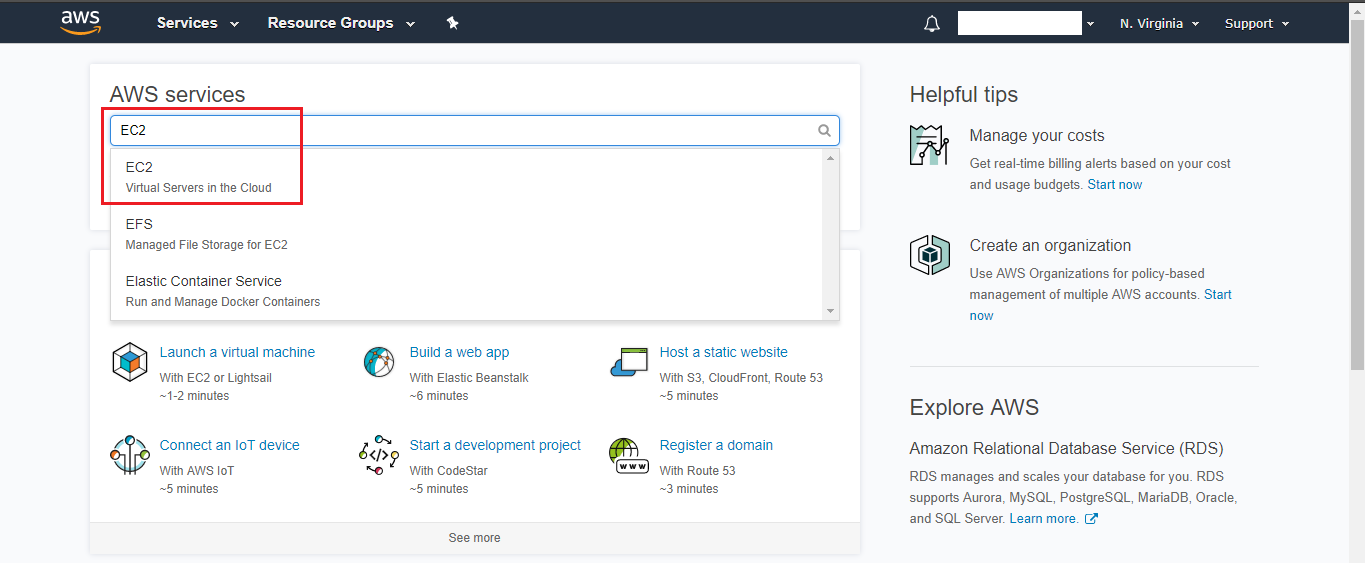
Step 2.3 Go to EC2
In the next screen look for the EC2 service.
Step 2.4 Go to Instances
Click on “Instances” in the left menu.

Step 2.5 Launch your instance in AWS
Press the “Launch Instance” button to start the creation of the EC2 instance.

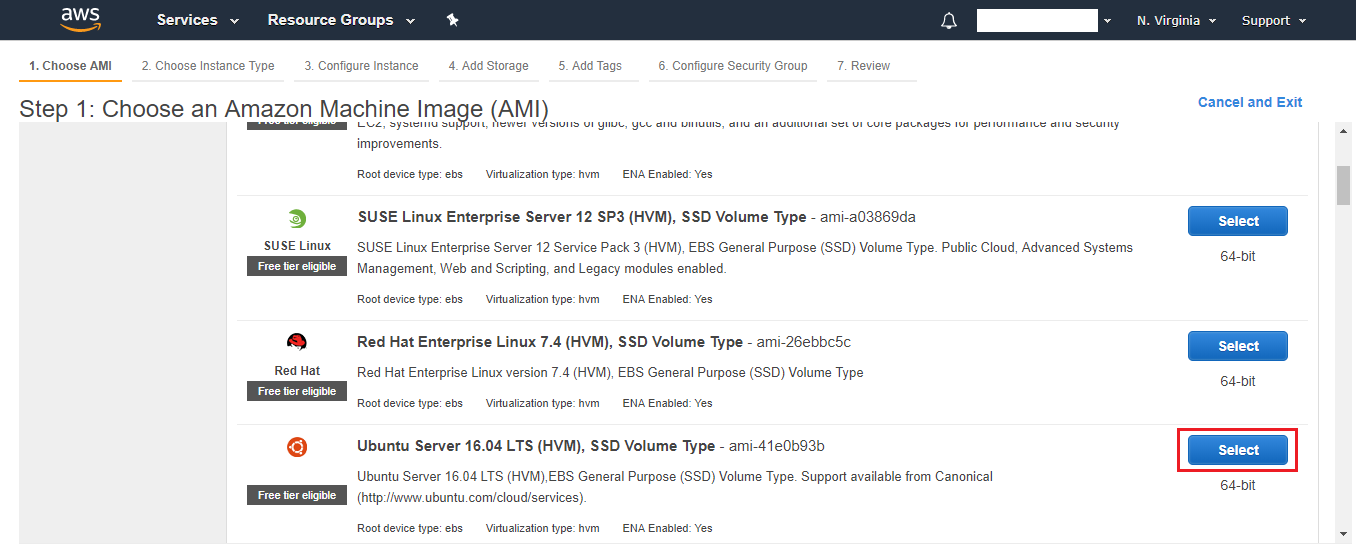
Step 2.6 Choose Ubuntu
Choose the operating system of the instance, in this case it will be “Ubuntu Server 16.04 LTS”.
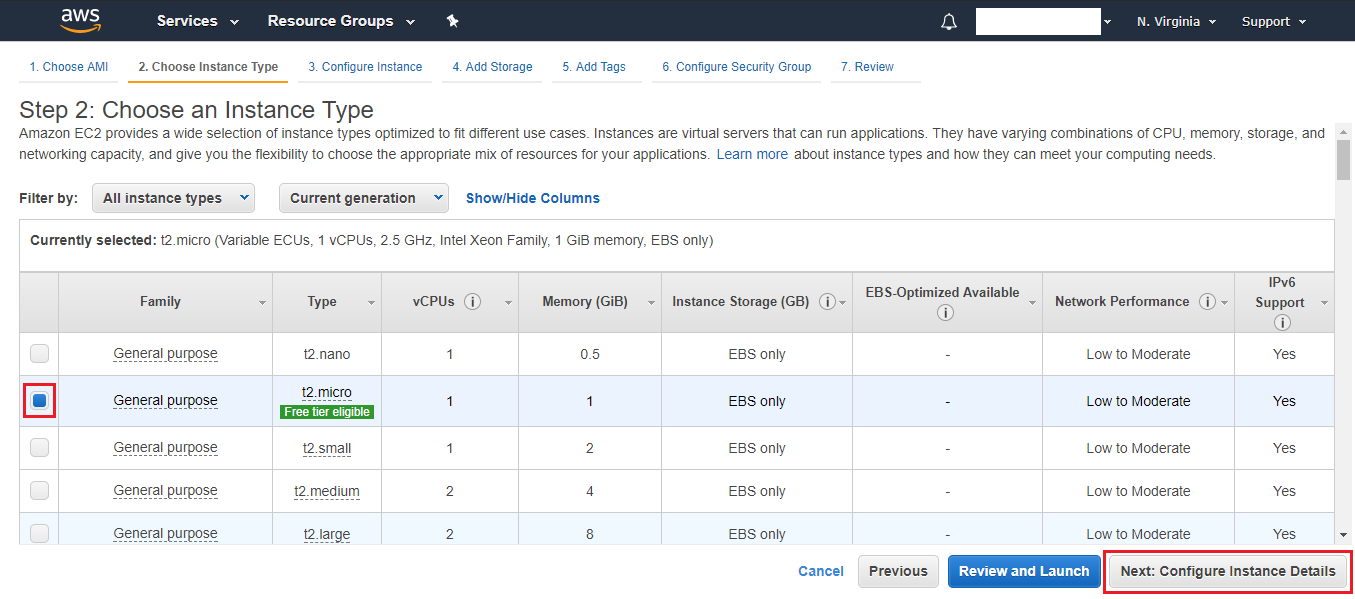
Step 2.7 Select an Instance Type
Choose the size of the instance based on the needs of your site. In this demonstrative case, we will choose an instance type t2.micro. (For more information regarding the types of instances, visit “https://aws.amazon.com/ec2/instance-types” and costs at “https://aws.amazon.com/ec2/pricing“)
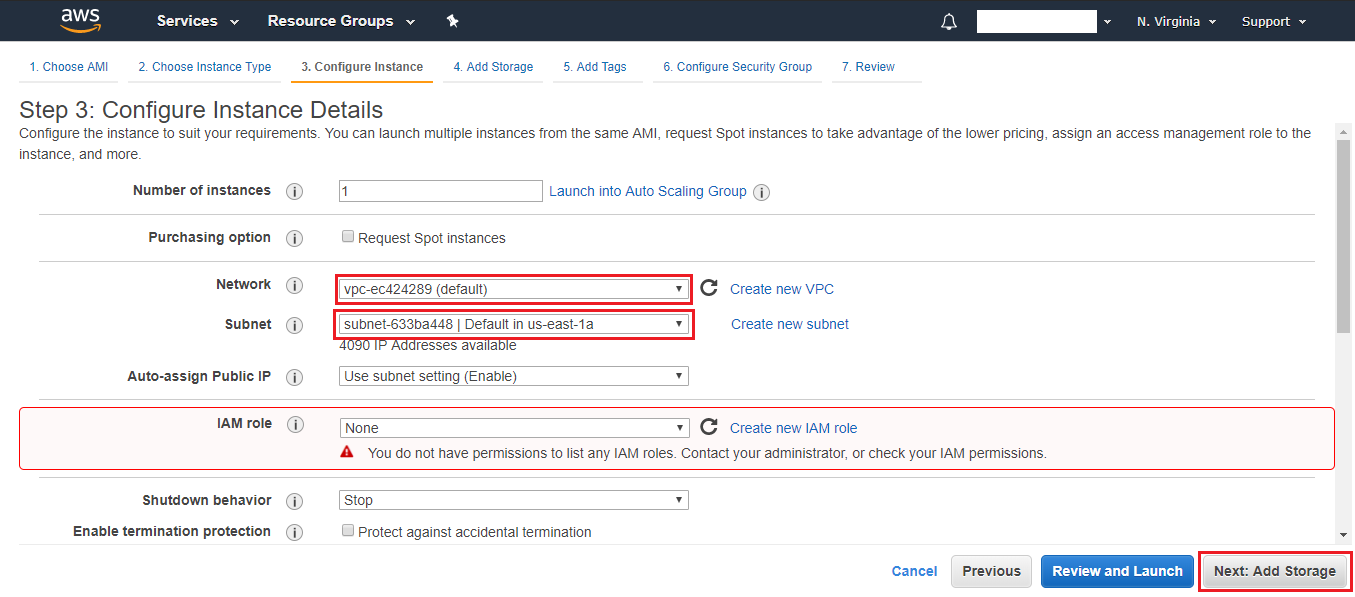
Step 2.8 Configure the Networking
Configure the network (VPC) and subnet as shown below.
Step 2.9 Assign Storage
Determine the size of the instance disk. To calculate it, it is recommended to add the size of the root document and the database (in case you want to host it in the same instance and not use AWS RDS) and multiply it by 3. Thus guaranteeing 60% of the free disk; in this demonstrative case, 8Gb were determined since it is the minimum required.

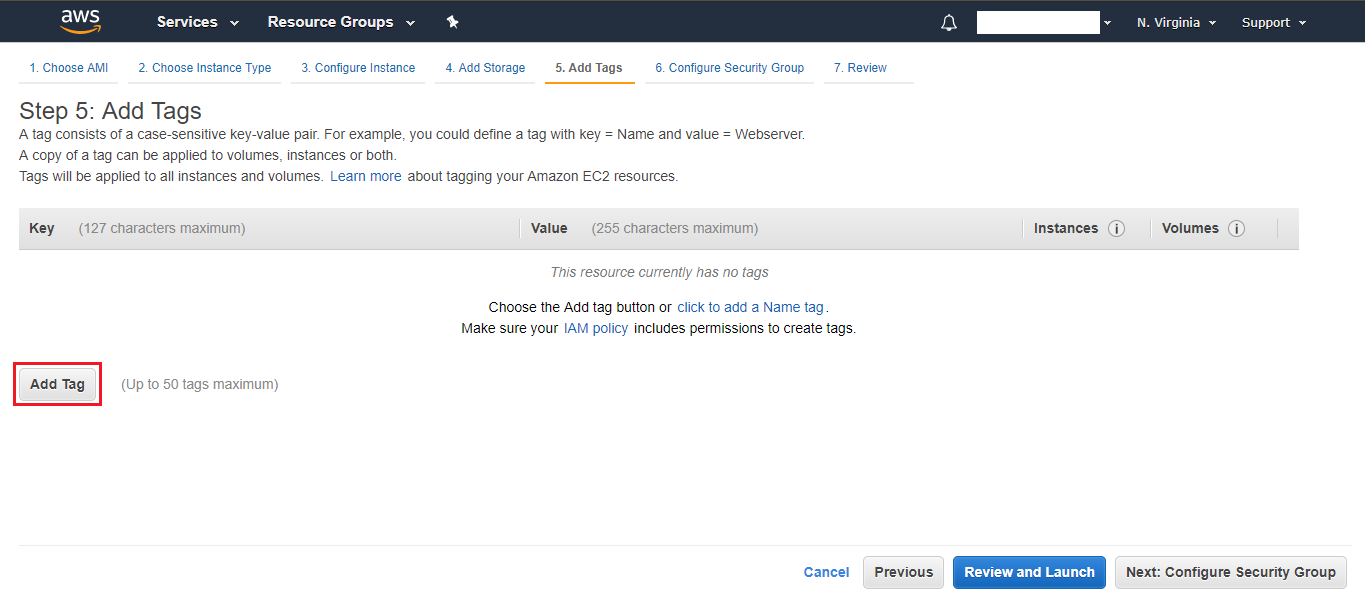
Step 3 Tag your instances with a recognizable name
Optional. We recommend assigning a representative label to the instance for easy identification, as shown below.
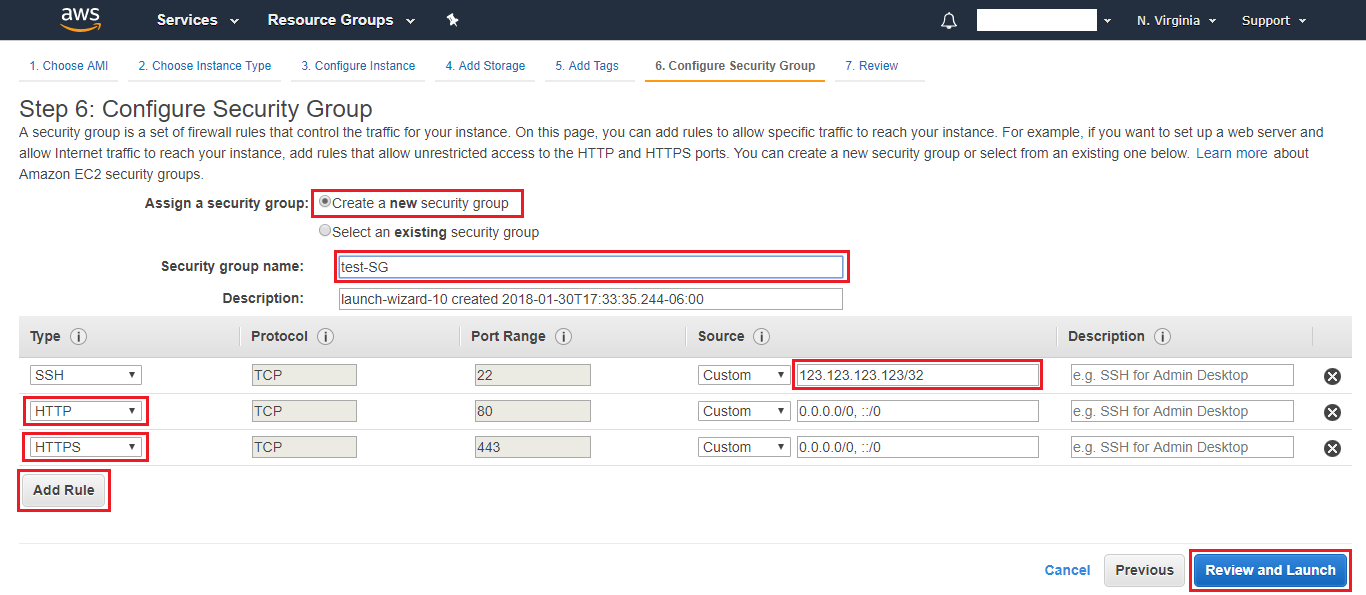
Step 3.1 Configure your Security
When creating the security group (Security Group or SG), it is recommended to add your IP to the SSH rule, this in order that only you can connect via SSH to the instance; it also adds two rules to open ports 80 (HTTP) and 443 (HTTPS), as shown below.
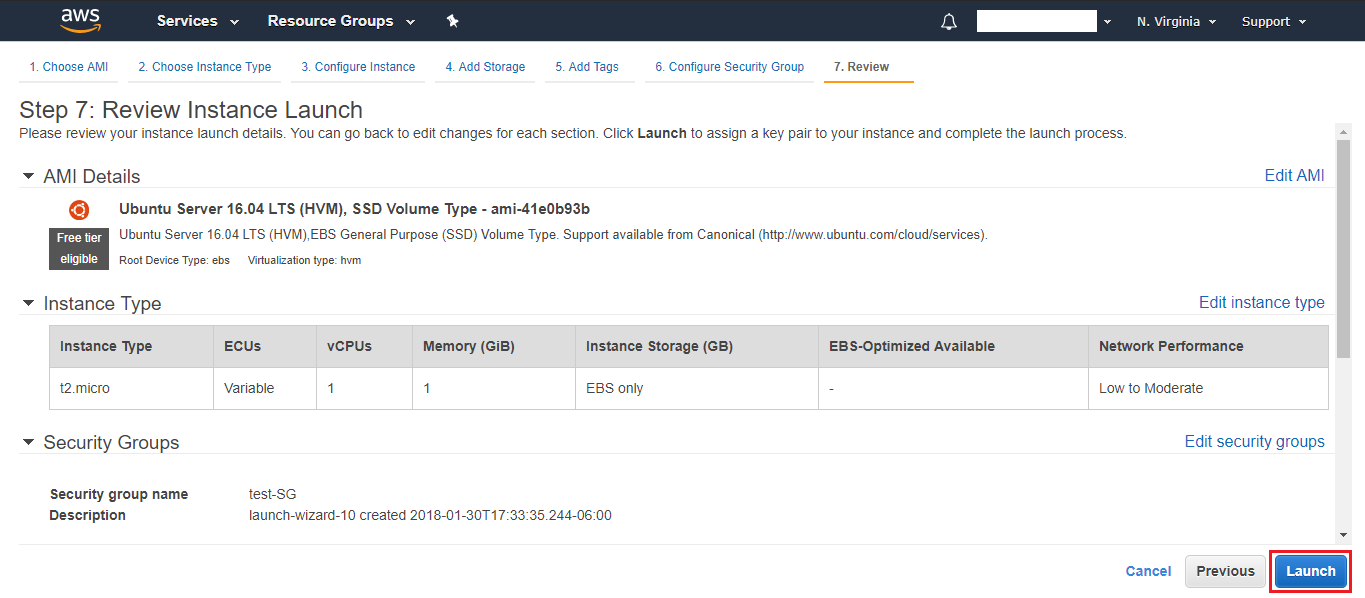
Step 3.2 Click on launch
Check the configurations and launch the instance.
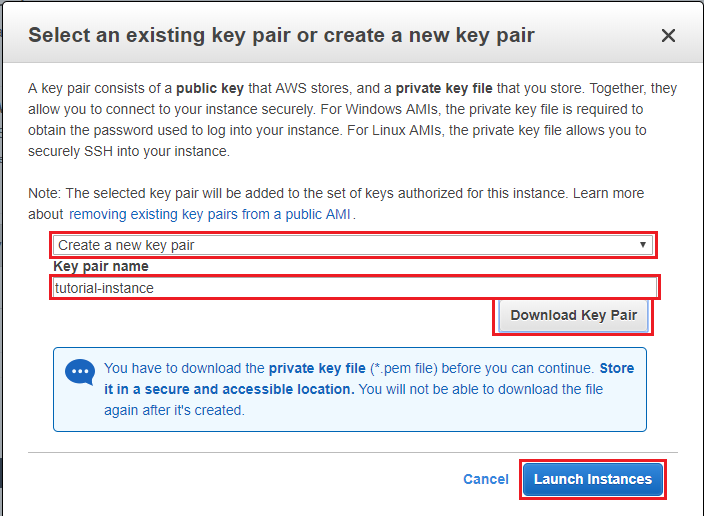
Step 3.3 Download the .PEM key
Before AWS launches the instance; you must create or choose an SSH key because, for security, AWS by default allows only SSH connections with a key, not a password.
In this case, we create a new key and assign a representative name, download it and launch the instance.
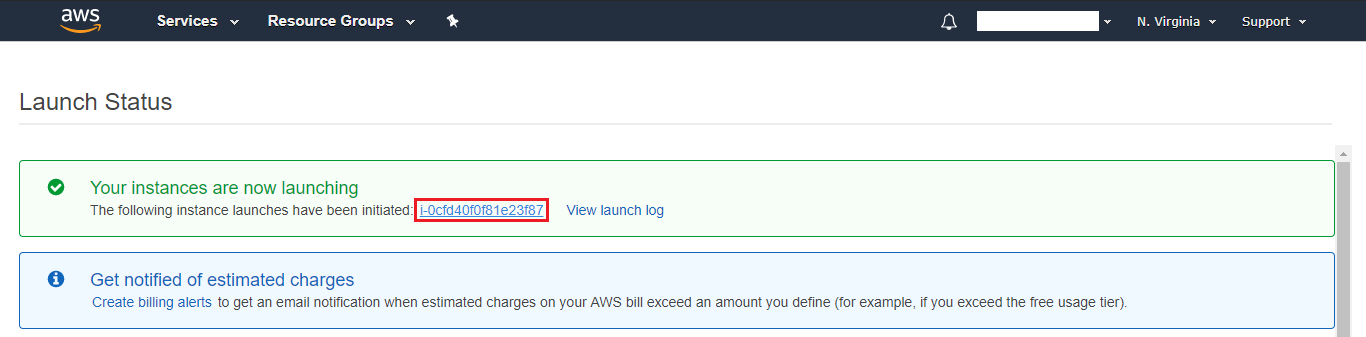
Step 3.4 When the instance is being launched, check its status by clicking on the instance ID
Step 3.5 When the state of the instance is “Running”, you can connect to it

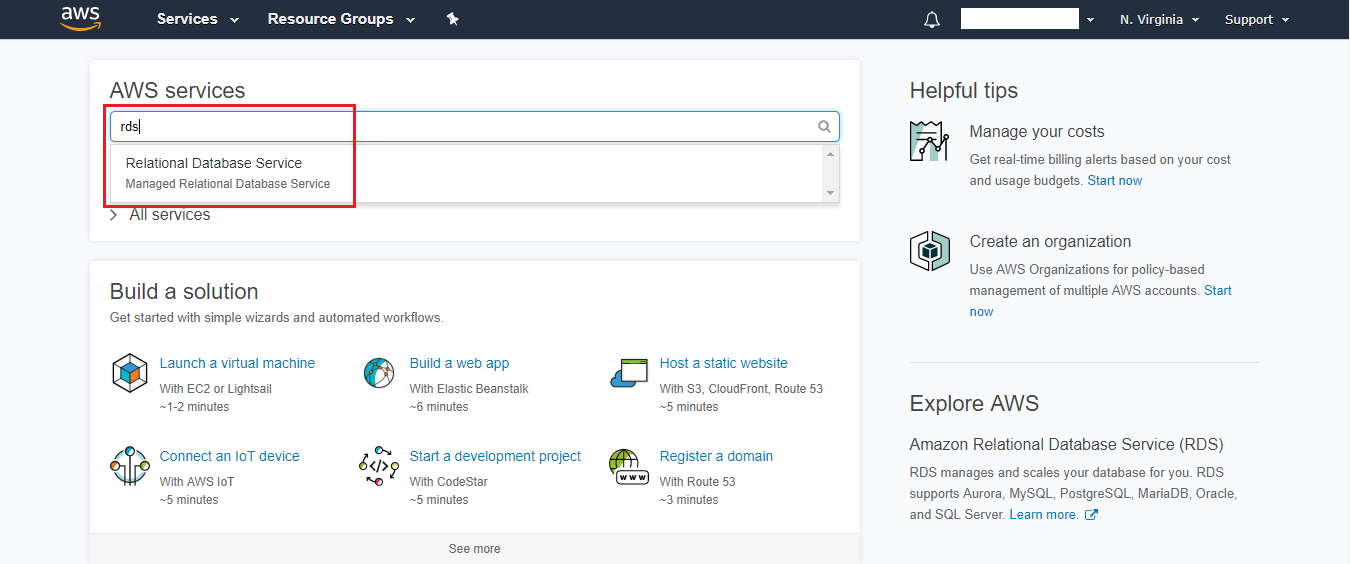
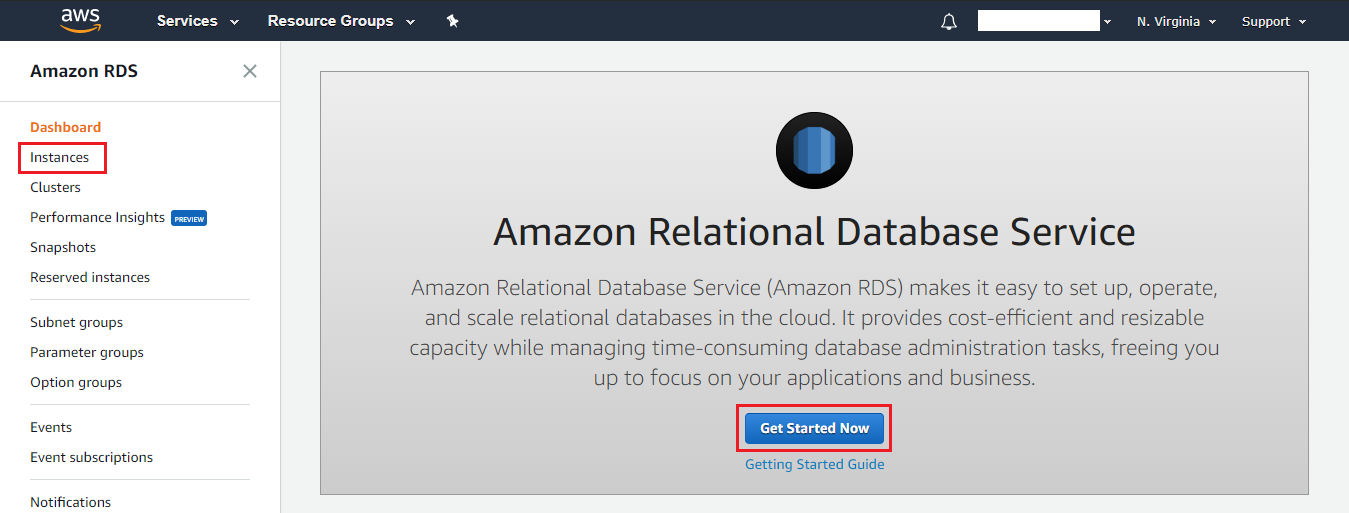
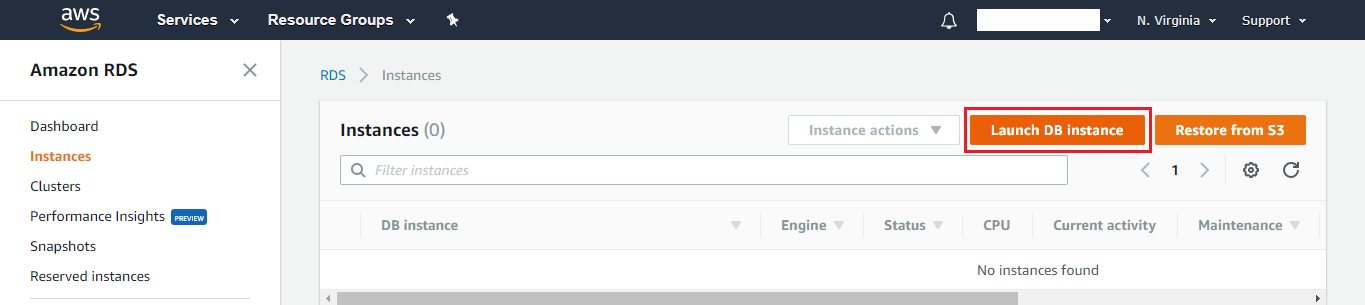
Step 4.0 Launch your Database
Now it is necessary to create and configure the RDS for the database. Search and navigate to the RDS service, Click on “Instances” or “Get Started Now”. Start the creation of the RDS by clicking on “Launch DB instance”.
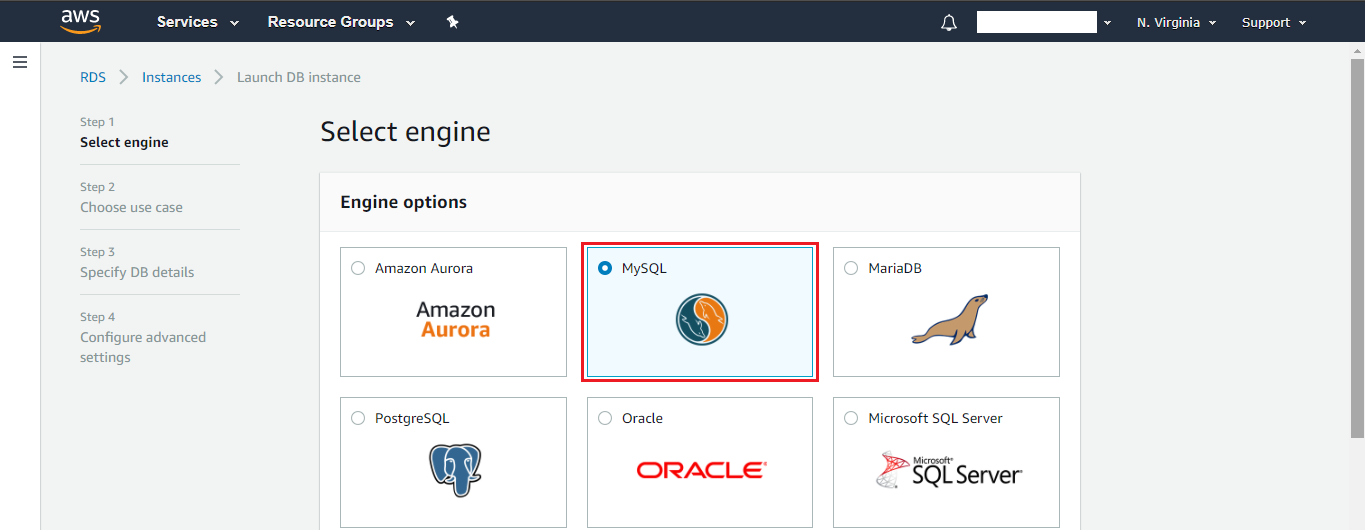
Step 4.1 Select your DB Engine
In this case, we will select MySQL as the database engine.

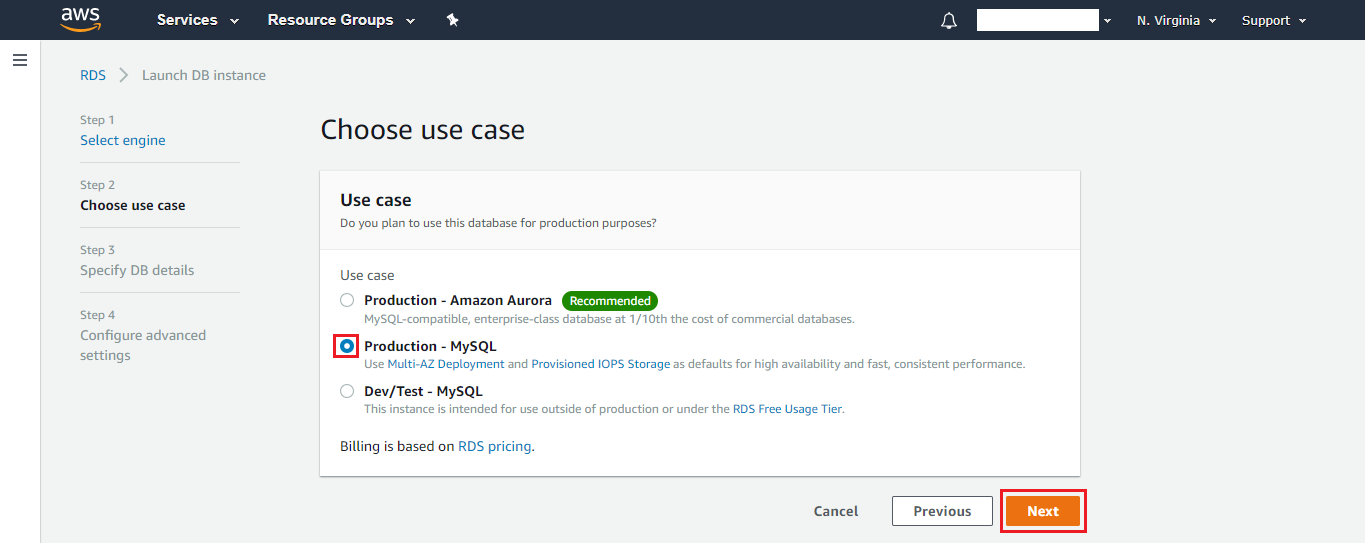
Step 4.2 Choose the Type
Choose the case in which the database will be used; in this case, it will be “Production – MySQL”. In case you want to use Amazon Aurora, you can do it too.
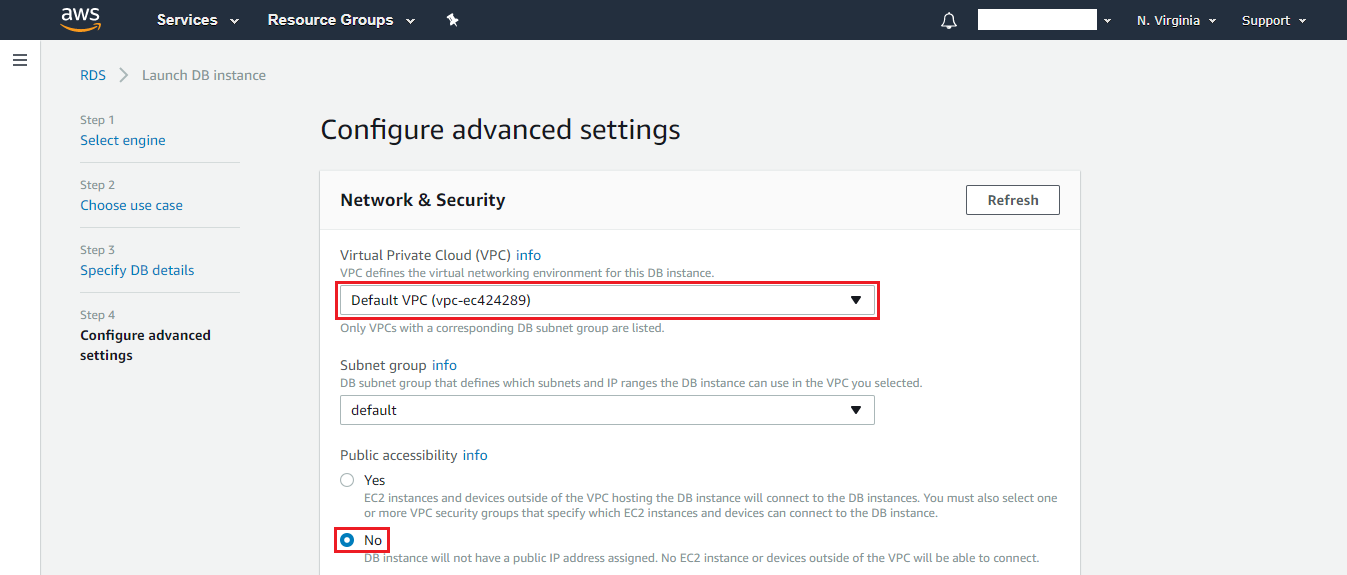
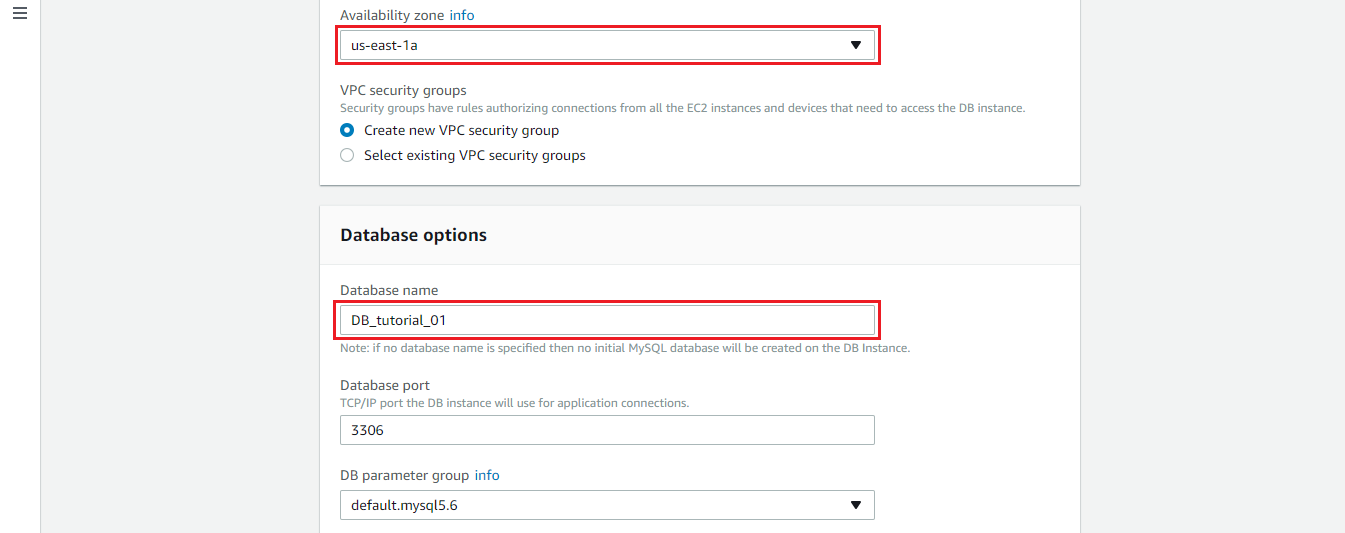
Step 4.3 Specify the details of the instance as shown below:
- DB engine version: MySQL version.
- DB instance class: Type of instance (in this case, the smallest one was selected)
- Multi-AZ deployment: This option allows replication of the instance in another zone while automatic backups are performed. It is recommended to enable this option if it is a production environment, in this case, it was omitted since it is demonstrative.
- Storage type: For a WordPress, it recommends the type of SSD storage since it is written and frequently read from the database and this storage is optimized for I / O.
- Allocated storage: For demonstration reasons, the minimum disk space was assigned to the instance, it is recommended to review the size of the database and decide the size regarding that amount.
- DB instance identifier: Determine the identifier/name of the instance.
- Master username: Set the name of the administrator/root user of the database; “root” or “admin” is not recommended for security reasons.
- Master password and Confirm password: Determine password for the administrator user.
Note: Leave the remaining values by default.
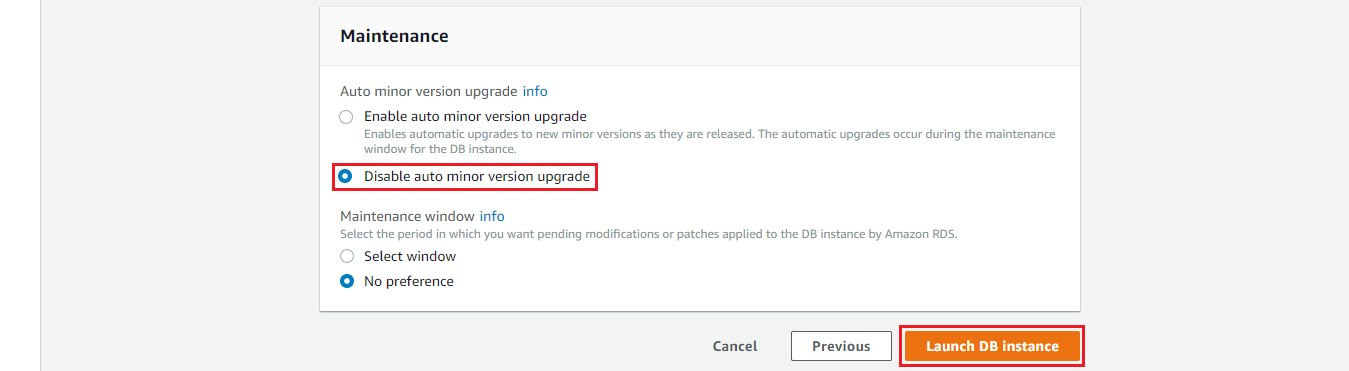
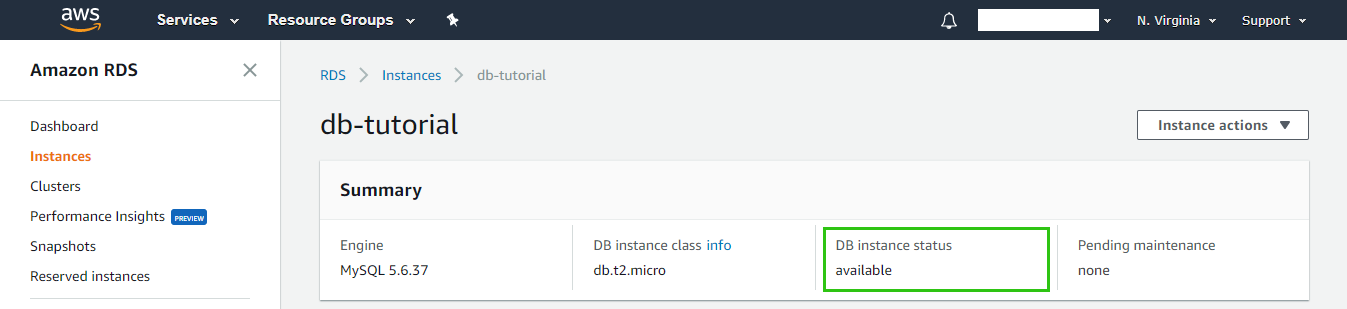
Step 4.4 Once the instance has been launched, check its status
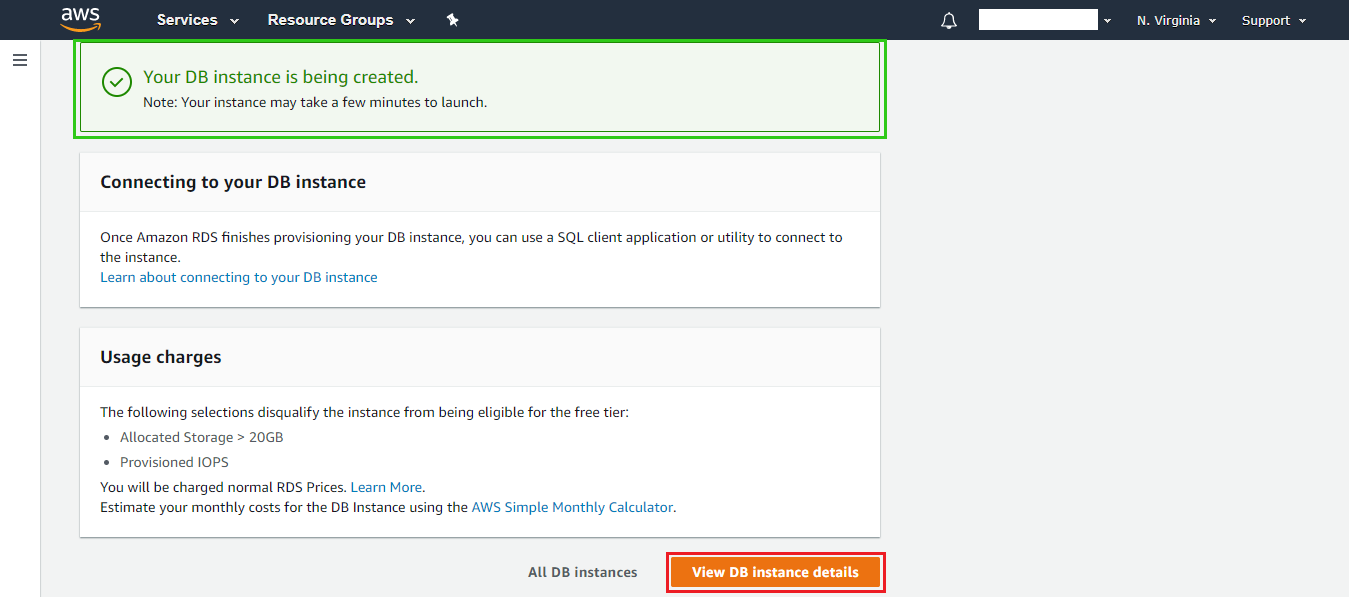
Step 4.5 When the state of the instance is “available” it is ready to be used
Step 5.0 Establish the connection with your RDS
The next thing is to test the connection to the RDS from the instance.
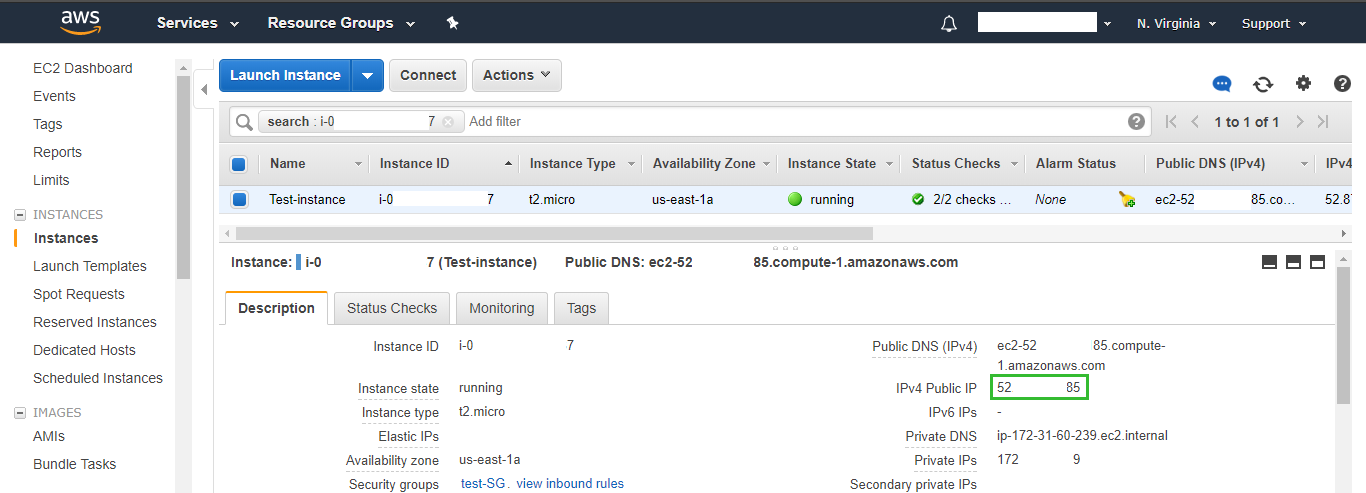
ssh-i/path/keySSH/created ubuntu@IP
Note: The IP of the instance can be observed in the details of the instance when selecting it in the AWS dashboard.
Install MySQL-client to establish the connection with the RDS.
sudo apt install mysql-client-core-5.7
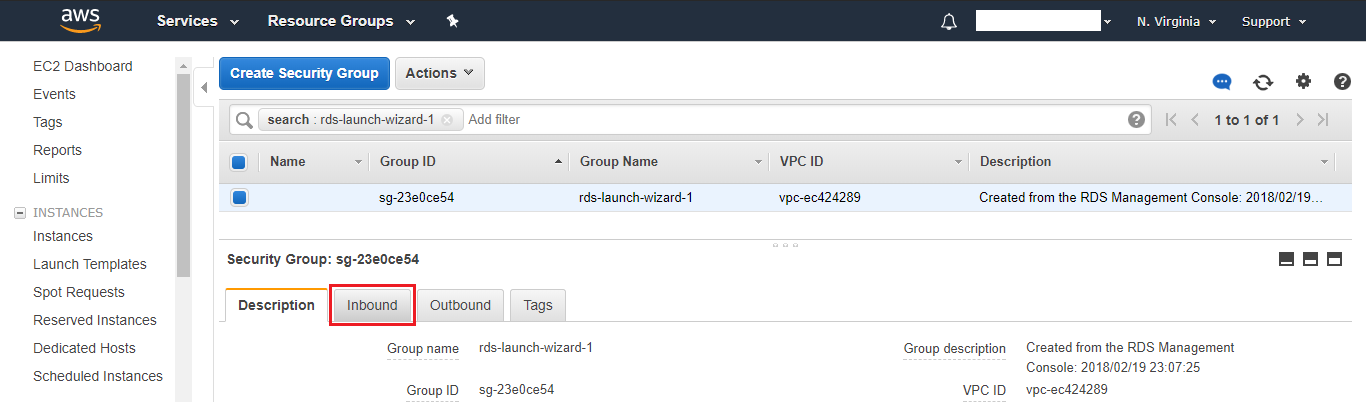
Make sure that the Security Group allows the connection from the instance.
a) Navigate Services > RDS > Instances > Select Instance > Select Security Group
b) Select the entry rules (Inbound).
c) Edit the rules.
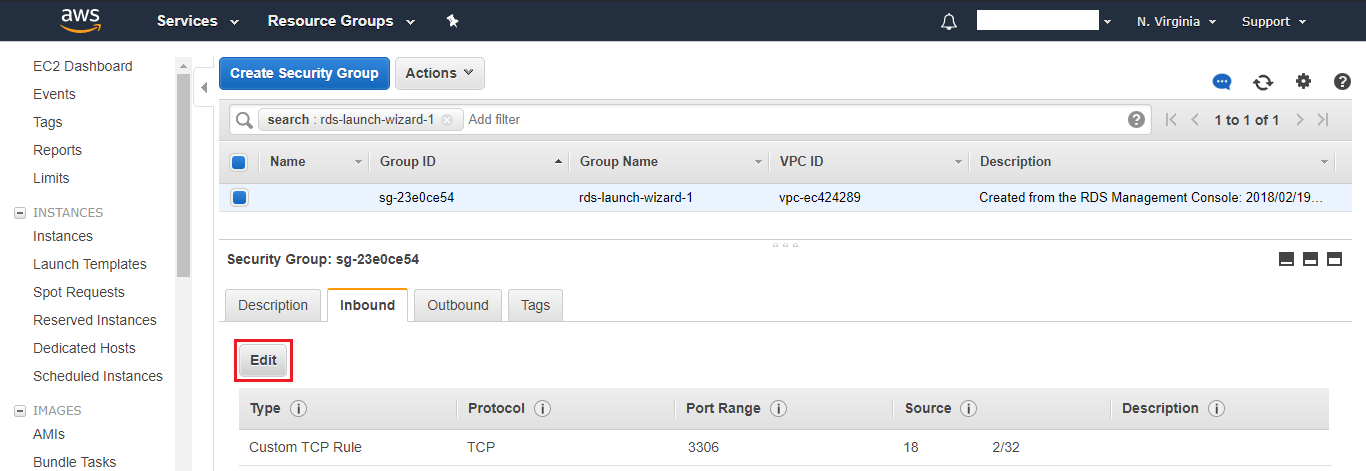
d) Add the necessary rules to allow access to the public and private IPs of the instance.

Step 5.1 Connect to the RDS with the corresponding user, password and host/endpoint
mysql -h ENDPOINT -u USER -p
Enter password: **********
Note: The RDS endpoint can be observed in the details of the RDS endpoint by selecting it in the AWS dashboard.

Step 5.2 It is time to transfer the root document and the compressed database to the EC2 instance
Send the .tar.gz file to the instance.
Option A:
If you are using Linux on your computer, from console run the following command:
scp -i /route/keySSH/created /route/wordpress.tar.gz ubuntu@IP:/home/ubuntu/
scp -i /route/keySSH/created/route/db_name.sql.gz ubuntu@IP:/home/ubuntu/
Option B:
If you are using Windows on your computer, you can use the WinSCP tool by following this tutorial https://www.youtube.com/watch?v=58KmUBaEW34 .
Create the directory where the WordPress will be located.
sudo mkdir -p /var/www/domain.com/public_html/
Change the owner of the created directory.
sudo chown -R ubuntu:www-data /var/www/domain.com/
Unzip the .tar.gz file in/home/ubuntu/.
cd /home/ubuntu/
tar -xzvf /home/ubuntu/wordpress.tar.gz
Move the content to the directory created before.
mv /home/ubuntu/wordpress/* /var/www/domain.com/public_html/
Change permissions and owner to all WordPress.
a) Change the owner user to “ubuntu” and the group to “www-data”
sudo chown -R ubuntu:www-data /var/www/domain.com/
b) Change permissions to directories to allow reading, writing, and execution to owner and group, but only read and execute “all others”:
find /var/www/domain.com/public_html/ -type d -exec chmod 775 {} \;
find /var/www/domain.com/public_html/ -type d -exec chmod 775 {} \;
c) Change permissions to the files to allow the owner and group to read and write, but only read “everyone else”:
find /var/www/domain.com/public_html/ -type f -exec chmod 664 {} \;
Edit the wp-config.php file by changing the host to the RDS endpoint.
vim /var/www/domain.com/public_html/wp-config.php
...
define('DB_HOST', 'ENDPOINT');
...
Exit saving changes.
Step 6.0 Next, we will import the database to the RDS
The first thing is to unzip the file “.sql.gz” to leave it in “.sql” format and facilitate its import.
cd /home/ubuntu/
tar -xzvf db_name.sql.gz
Connect to the RDS with the user and password of the administrator, and the corresponding host / endpoint.
mysql -h ENDPOINT -u USER -p
Enter password: **********
Take note of the data in the WordPress wp-config.php file.
vim /var/www/domain.com/public_html/wp-config.php
…
define('DB_NAME', 'db_name’);
define('DB_USER', 'db_user');
define('DB_PASSWORD', 'password');
...
Create the WordPress database.
CREATE DATABASE db_name;
Create the user in the database ..
CREATE USER 'db_user'@'IP_EC2_instance' IDENTIFIED BY 'password';
Note: It is necessary to replace “IP_EC2_instance” with the IP of the EC2 instance (I recommend the private so that the traffic is minimal and it doesn’t need to leave the internal network), and thus increase the security in the connection to the RDS.
So, only the connection between the EC2 instance and the RDS through that user will be possible, from no other IP this connection will be possible.
Give user privileges on the database.
- GRANT ALL PR8IVILEGES ON db_name.* TO ‘db_user’@’IP_EC2_instance’;
- FLUSH PRIVILEGES;
Use the newly created database.
use db_name;
Import database.
source /home/ubuntu/db_name.sql;
Step 7.0 Now, it will be necessary to install some services and make some configurations in the instance
Update the packages.
sudo apt update
Install NGINX, PHP and PHP-FPM.
sudo apt install nginx php7.0 php7.0-common php7.0-curl php7.0-mysql php7.0-mcrypt php7.0-fpm
Configure the Virtual Host or VHOST in “/etc/nginx/sites-available/domain.com”
Before continuing, I want to explain what VHOST is; is a file in the configuration of the web server, in this case NGINX, to be able to host several sites on the same server; Its main function is to route each domain to its respective root directory.
Its most basic and functional configuration is the following:
- server {
- listen 80;
- server_name domain.com www.domain.com;
- root /var/www/domain.com/public_html/;
- index index.php index.html;
- access_log /var/log/nginx/domain-access.log;
- error_log /var/log/nginx/domain-error.log;
- location / {
- try_files $uri $uri/ /index.php?$args;
- index index.php index.html;
- }
- location ~* \.(jpg|jpeg|gif|css|png|js|ico|html)$ {
- access_log off;
- expires max;
- }
- location ~ \.php$ {
- fastcgi_split_path_info ^(.+\.php)(/.+)$;
- fastcgi_pass unix:/run/php/php7.0-fpm.sock;
- fastcgi_index index.php;
- include fastcgi_params;
- fastcgi_param SCRIPT_FILENAME $document_root$fastcgi_script_name;
- }
- }
We explain each directive in a general way:
listen 80: The port through which NGINX will “listen”, if you use SSL certificate it would listen by 443.
server_name domain.com www.dominio.com: The name or domain of the site to which it will respond.
root /var/www/domain.com/public_html/;: The path to the directory where the WordPress is located is specified.
index index.php index.html: The order in which you will search / read the index files.
access_log and error_log: Routes for log files.
location /: Settings that are within “{}” apply to the entire site (/).
location ~* \.(jpg|jpeg|gif|css|png|js|ico|html)$: Settings that are inside “{}” apply to all files with jpg, jpeg, gif, css, png, js, ico and html.
location ~ \.php$: Settings that are inside “{}” are necessary for the server to interpret the PHP code.
fastcgi_pass unix:/run/php/php7.0-fpm.sock: Port or socket through which PHP-FPM listens.
Enable the VHOST.
sudo ln -s /etc/nginx/sites-available/domain.com /etc/nginx/sites-enabled/
Verify NGINX syntax.
sudo nginx -t
Restart NGINX.
sudo service nginx restart
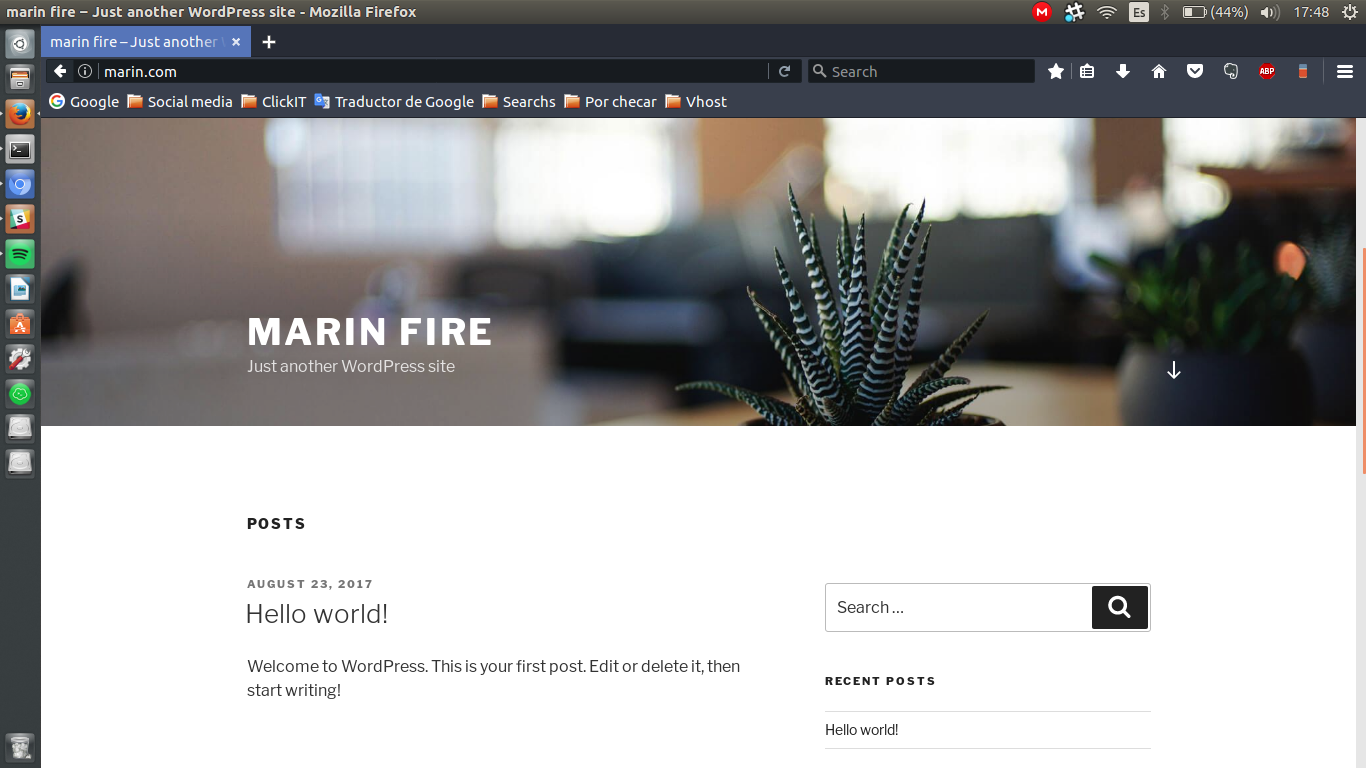
Emulate the site; if you have doubts about how to do this, you can check it in How To Emulate Your Hosts File (DNS Trick)
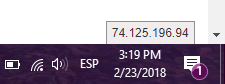
Optionally, you can install the extension for Google Chrome called “Website IP” to check the IP of the server where you are loading a site.
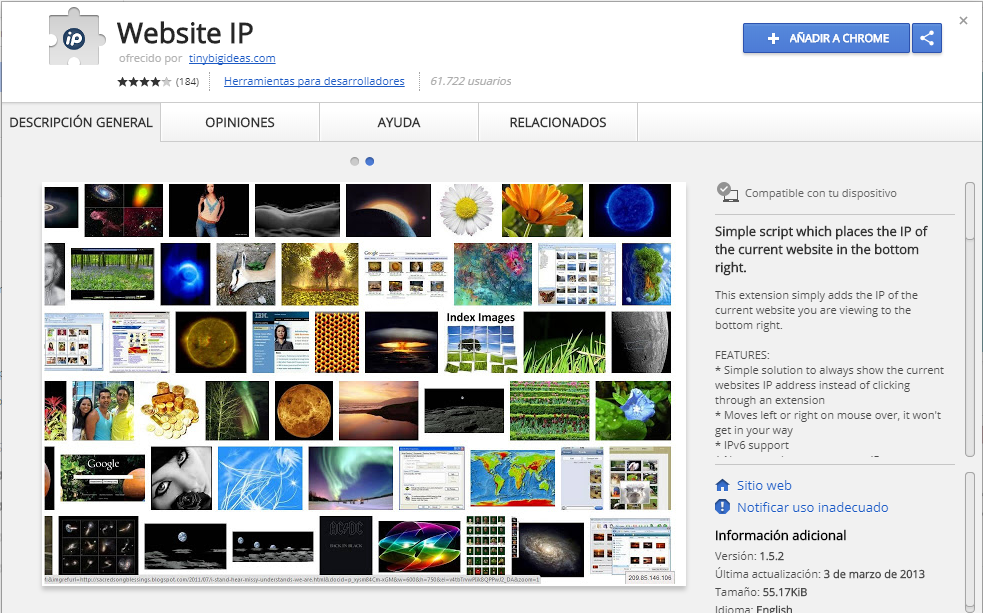
And the IP will appear in the lower corners of the browser.
Step 7.1 Test the site by entering the domain in the browser (example)
Step 7.2 Finally, once the correct functionality of the migrated site has been verified, the DNS should be changed by pointing to the new server
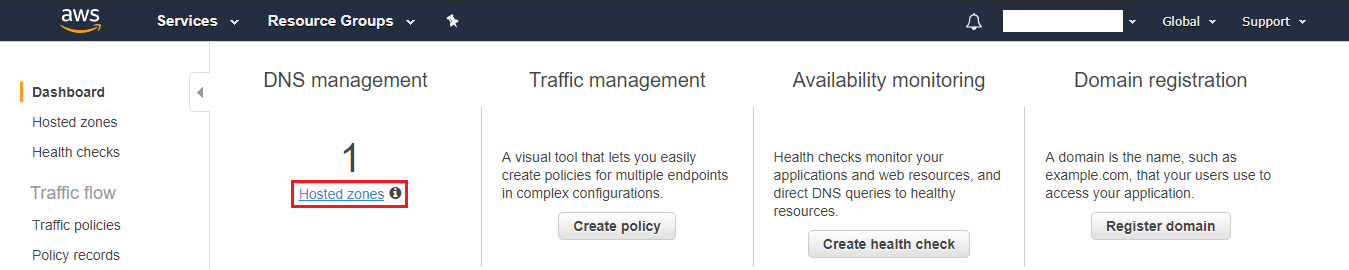
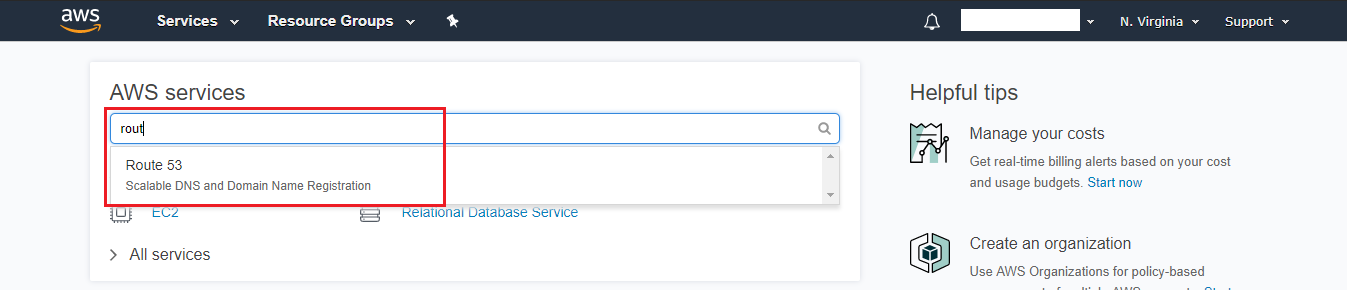
In this case, demonstratively, it will be done in AWS Route53. In the AWS console, navigate to the Route53 service.
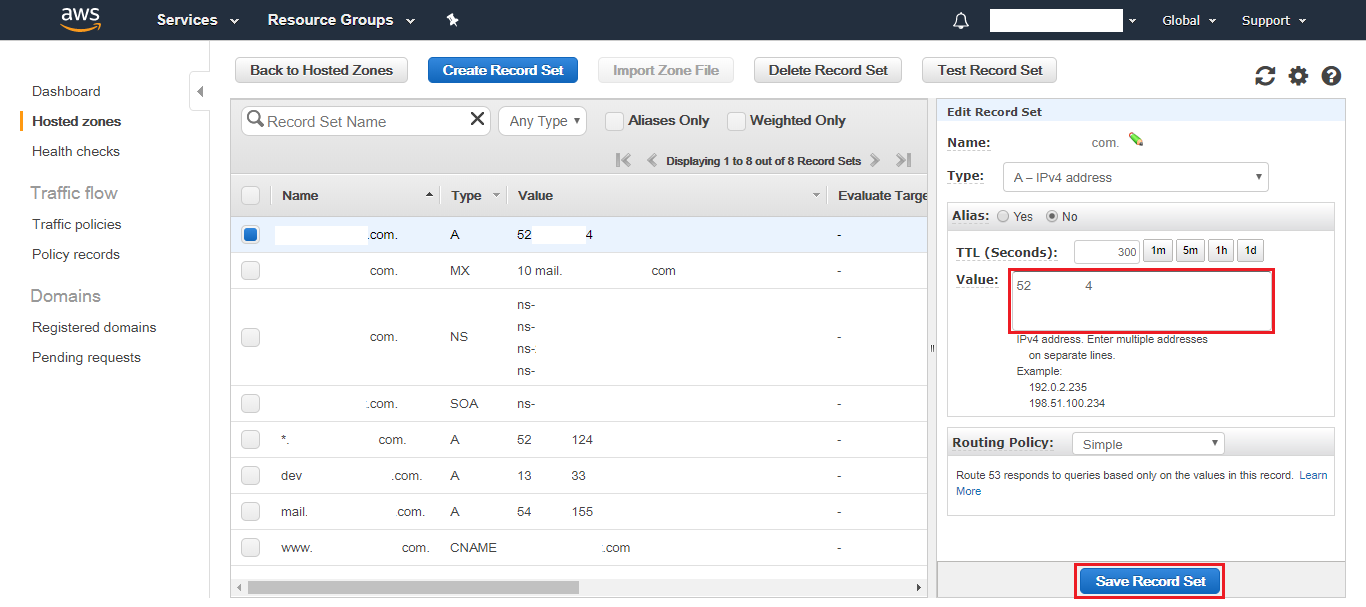
Step 8.0 Select the domain to modify

Step 8.1 Select the A record of the main site and change the IP for the new server. Save Changes
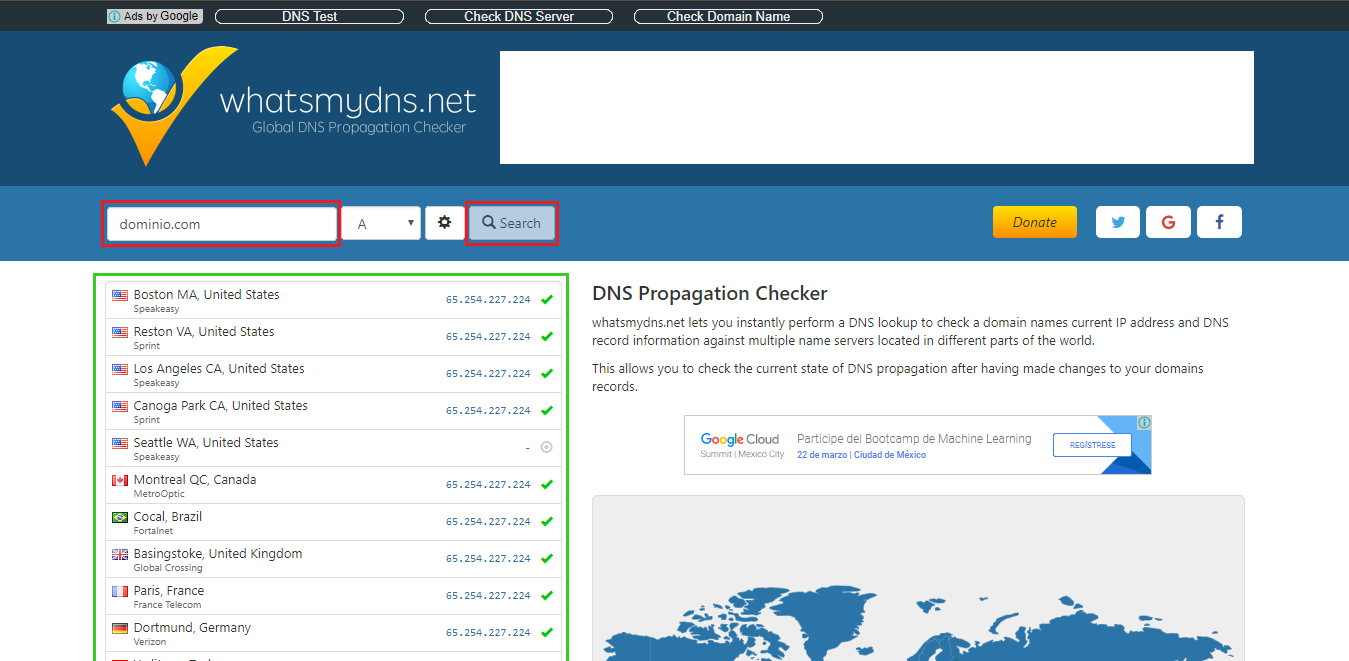
Step 9.0 Wait for the change to spread, this may take several minutes, you can check the progress of this spread on the page https://www.whatsmydns.net/.
Conclusion
As a result, the migrate WordPress (in this case) can be configured for its optimization based on the requirements of the site. But most importantly, with Nginx as Web Server, makes WordPress faster and it has full control of EC2 instances since it is not shared and neither has an invasive control panel installed.
As next steps I recommend the optimization of the EC2 and WordPress instance, hardening, better Google PageSpeed, automated backups, etc. You can find this information in our blogs and tutorials section.
At Clickittech, we are familiar with all these tools and trained to migrate WordPress, always looking for your complete satisfaction.