Elastic Load Balancing is an AWS application that automatically distributes incoming application traffic across multiple targets, such as Amazon EC2 instances, containers, IP addresses, and Lambda functions. For this AWS Load Balancer tutorial, we have created the Elastic Load Balancer to redirect the domain traffic to all instances created by autoscaling. Discover how to create a load balancer in AWS.
Keep in mind that this is just the 5th Part of the sequence of How to create a High-Performance WordPress with Autoscaling on AWS.


Requirements to Create Load Balancer in AWS
- Account in AWS
Step by step:
- Log in to the AWS account.
- Verify the region in which the infrastructure will be created. In the upper right corner, click on the button with the city name and choose the region. In this case, it will be Virginia.

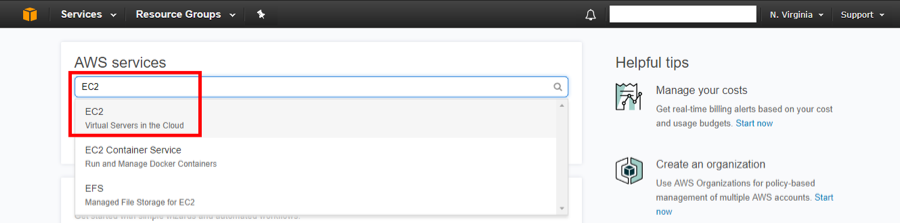
3. Select the EC2 service.
4. Go to the “Load Balancer” section of the left side menu.
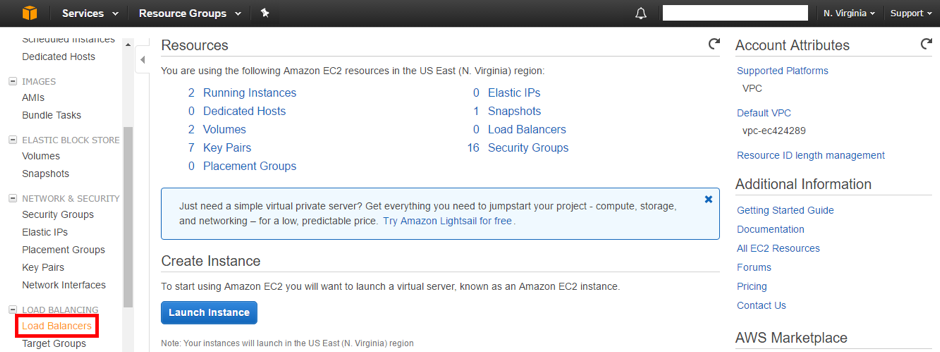
5. Press on the button “Create Load Balancer”.

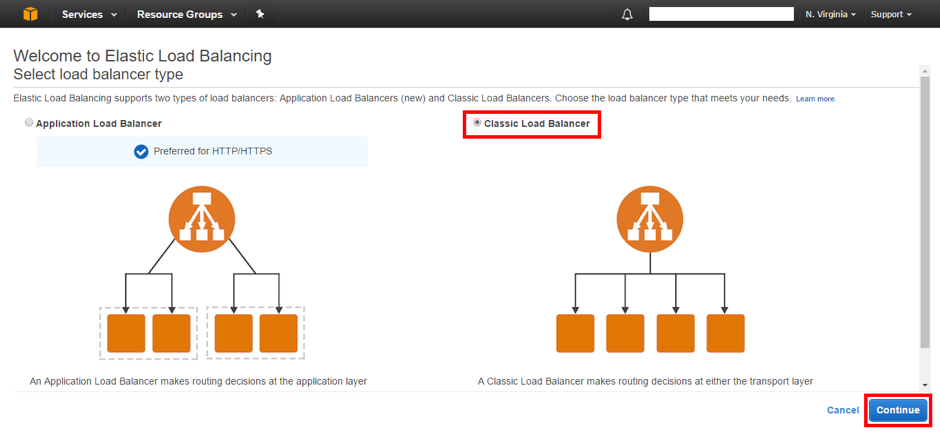
6. Select “Classic Load Balancer”, and “continue”.
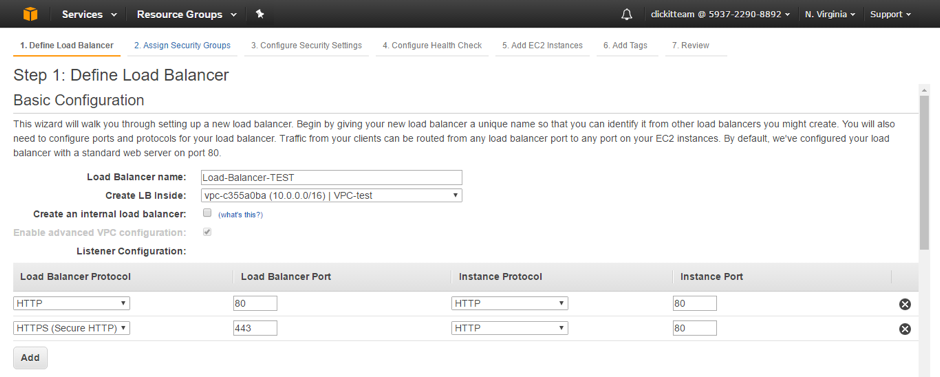
7. Assign it a name, VPC and the “listener”. These two are the ports where it will accept the traffic and the ports where it will be redirected.
8. Establish the subnet.
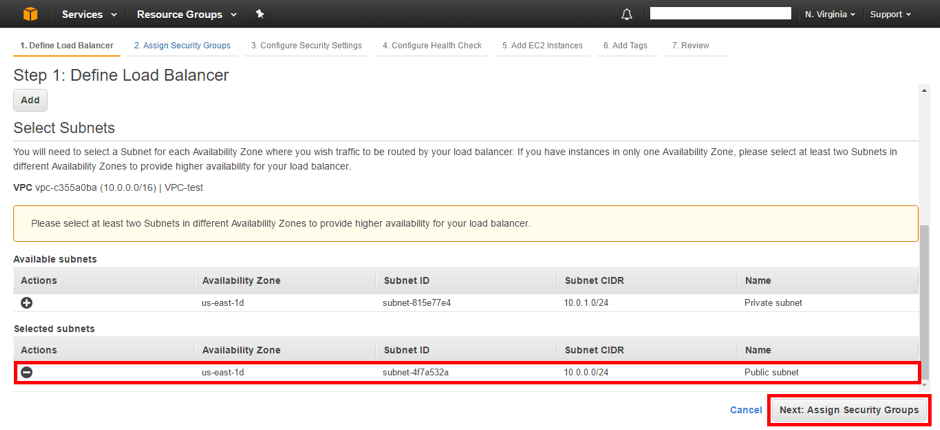
*Note: Select only one subnet because all instances are in it and the private subnet does not have internet access.
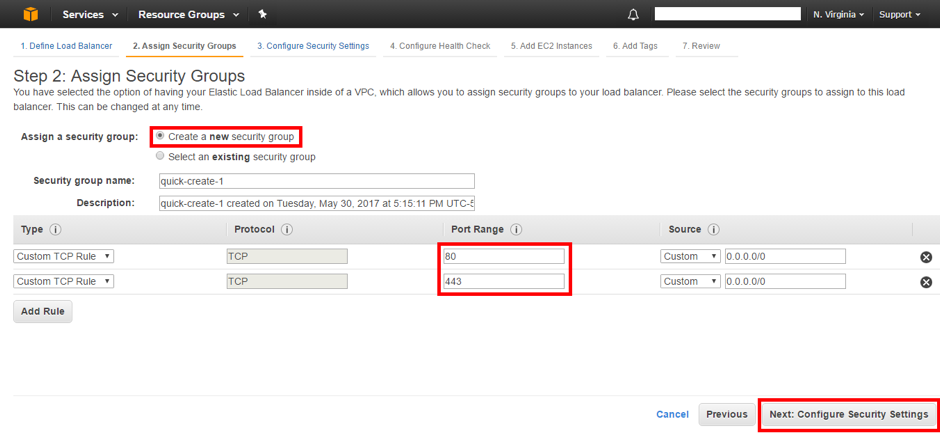
- Create Security Group especially for the Load Balancer, only open ports 80 and 443.
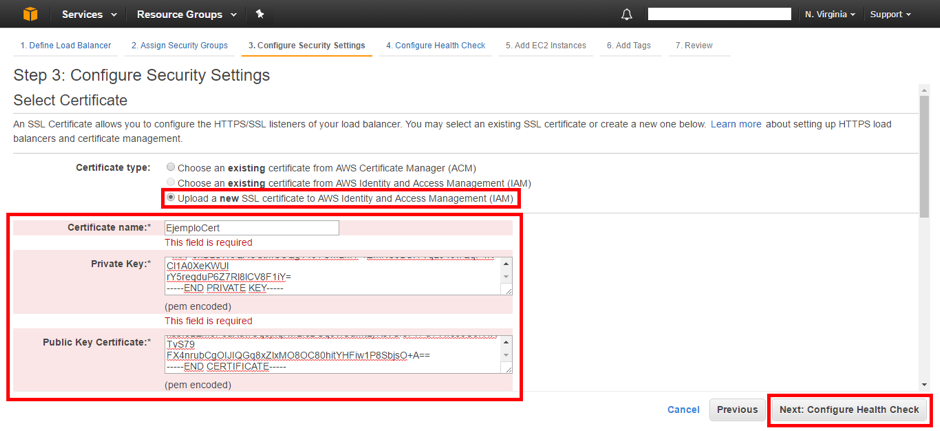
10. Assign / upload SSL certificate.
12. Select the instance previously created.
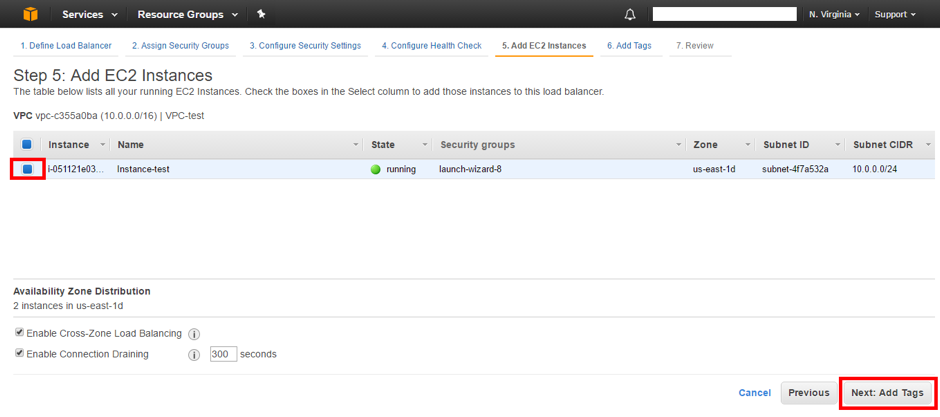
*Note: The other instances to which the traffic will be distributed, are gonna be added while creating the auto scaling group.
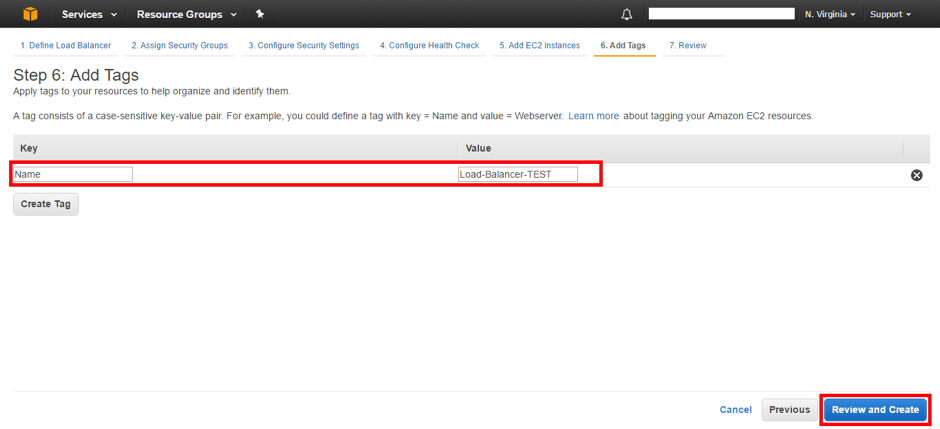
- Label the load balancer.
14. Review the settings and create.
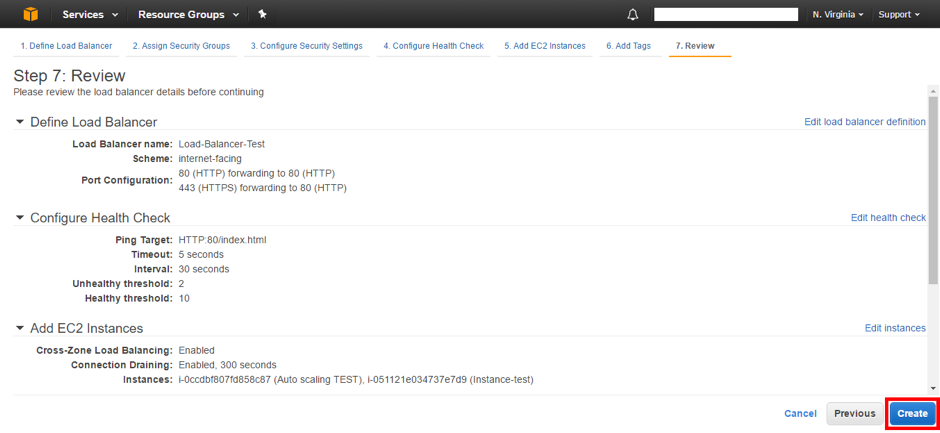
- Check that the Load Balancer is correctly created.
Conlusion
After this, the process has finished.
Those are all the steps that you need to follow to create a Load Balancer. Do not forget to see the complete process of how to create a high-performance and Auto-scalable WordPress, and the other tutorials we have prepared for you (I, II, III, IV).

How to Create Load Balancer in AWS FAQs
An AWS load balancer is a service that distributes incoming application or network traffic across multiple targets, such as EC2 instances, containers, IP addresses, or Lambda functions, to ensure high availability, fault tolerance, and scalability of applications.
ELB, or Elastic Load Balancing, is a service AWS provides that automatically distributes incoming application traffic across multiple targets, such as EC2 instances, to ensure high availability and fault tolerance.
ALB, or Application Load Balancer, is a specific type of ELB that operates at the OSI model’s application layer (Layer 7), allowing for more advanced routing and traffic management features compared to the Classic Load Balancer and Network Load Balancer.
The three types of AWS load balancers are:
Classic Load Balancer (now referred to as Network Load Balancer)
Application Load Balancer (ALB)
Network Load Balancer (NLB)