I figured it would be a great idea to make a quick migration guide for you. In this blog, we are going to learn about how to migrate from Godaddy to AWS Route53. First, is necessary to buy a domain in Godaddy and later on migrate it to Amazon’s DNS system, which is Amazon Route 53. Transfer a Godaddy Domain to AWS Route53.
Buy a Domain on Godaddy
First things first. In case you do not own a domain yet, you should buy one. Check this blog to learn how to do it.
1. Godaddy DNS Management
Okay, so once we already have the Godaddy domain, we will log into our account and access to manage our domain. On GoDaddy products we will be able to see the domains we own, additional products, and recommendations.
In this step, we are going to click on the “DNS” button to access the DNS Management console from Godaddy. Since the account is new, or still on Godaddy DNS, we will be able to see different sections.
- Records
- Name Servers
- Additional Functionalities
- Forwardings
Okay, that’s a lot of information/records and something we don’t want to look at here…
The DNS Management is in charge of routing all your domains traffic to the specified server or available service, depending on your configuration.
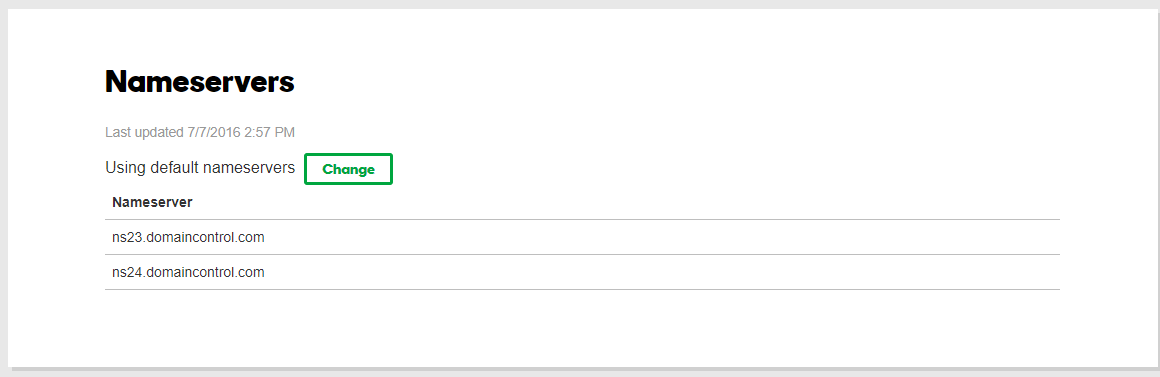
What we actually want to take a look at is to the Server Names block. We will see that there are 2 nameservers specified in the current Godaddy DNS block.
Usually, Godaddy Name servers are:
- NS#.domaincontrol.com
- NS#.domaincontrol.com
Like these:

These are the ones to be changed once we have created our hosted zone in AWS. Right now we are going to leave it as it is, and go to AWS to create our Route 53 hosted zone.
2. AWS
As in Godaddy, we need an account on Amazon Web Services. Make an account here.
Once you are registered, we are going to log you into the AWS management console. There would be a HUGE list of AWS services. But, DON’T PANIC. We will use Route53 to help you set up your first hosted zone and migrate your Godaddy Domain to AWS Route53.

3. AWS Route 53
Route 53 is one of the main services of AWS since it offers the DNS management for your domains in the AWS platform. Route 53 is very useful because it provides a lot of features, as well as failover and latency reduction functionality for a different type of records.
If you want to learn more about AWS Route53 pricing you can check it here.
4. Creating a Hosted Zone
What is a hosted zone? Simple, it will be the Domain Manager on Route53 for your own domain. At this point, we are going to navigate to the Route 53 console and create it. Transfer a domain to AWS has many business benefits… adds flexibility, redundancy and more availability.
a. Route 53 Console
Here we will be able to create and manage our hosted zones and records and to setup up any domain.
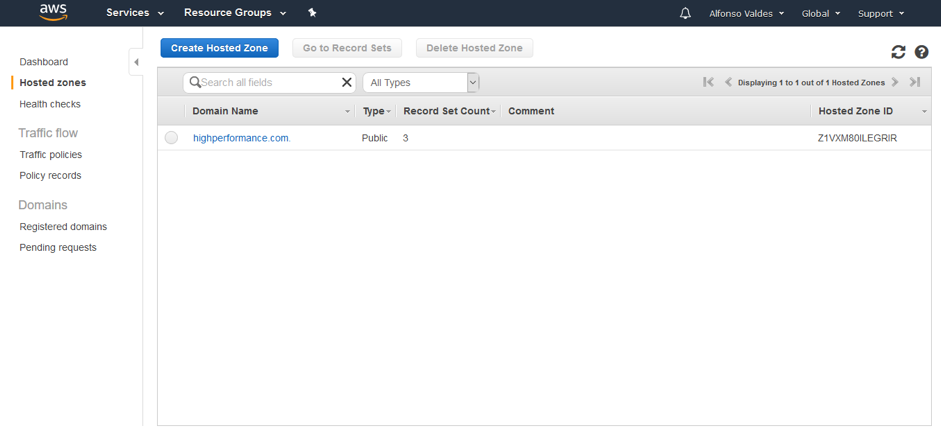
b. Create Hosted Zone
Click on “Create Hosted Zone” and you will see a windows prompting on the right side. Make sure to set your zone domain without “www”. Later on, you will be able to add records. You can also add comments in case you need them.
After creating the Hosted zone, you will be redirected to the Hosted Zone set of record, and there you will be able to see the table with all their records. You will notice that there will be NS records and an SOA record.
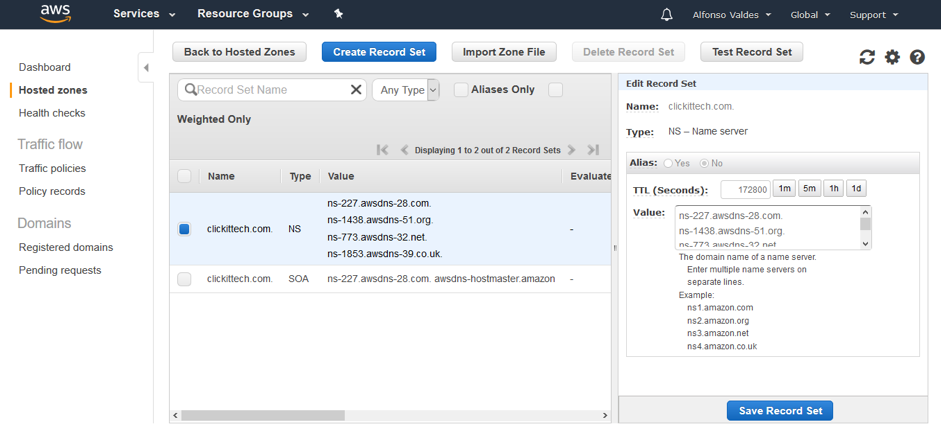
Note: We will need the NS records to set them in Godaddy.
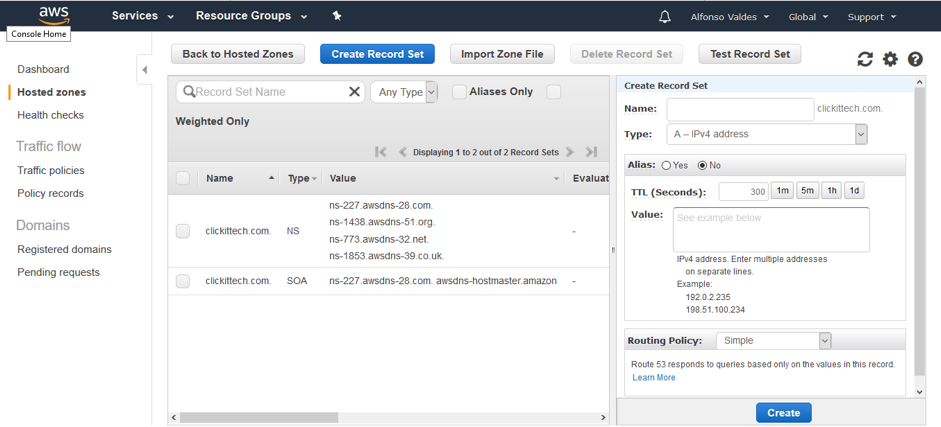
5. How to set up records
Okay, here is the tricky part, in which we need to copy our existing record (if any) on Godaddy with their proper type, name and value.
There could be different types, but AWS tells you which you can set for the specified type. Some examples could be:
A Record: IPV4 Address
CNAME: Canonical Name
MX: Mail Exchange
TXT: Text
PTR: Pointer
Quick Tip: We want our domains to be served as fast as possible through Amazon’s Route 53, that’s why we need to set the lowest Time to live (TTL) possible.
6. Change the DNS
Now is the time!!
After copying over all our records, we will need to change the Nameservers for the ones that Amazon provided.
After pointing our new Name Servers to the Route53 hosted zone, we won’t be able to see the DNS Records such as IPs, CNAME or MX Records in Godaddy. Instead, we will now require going to Route53 to view our setup.
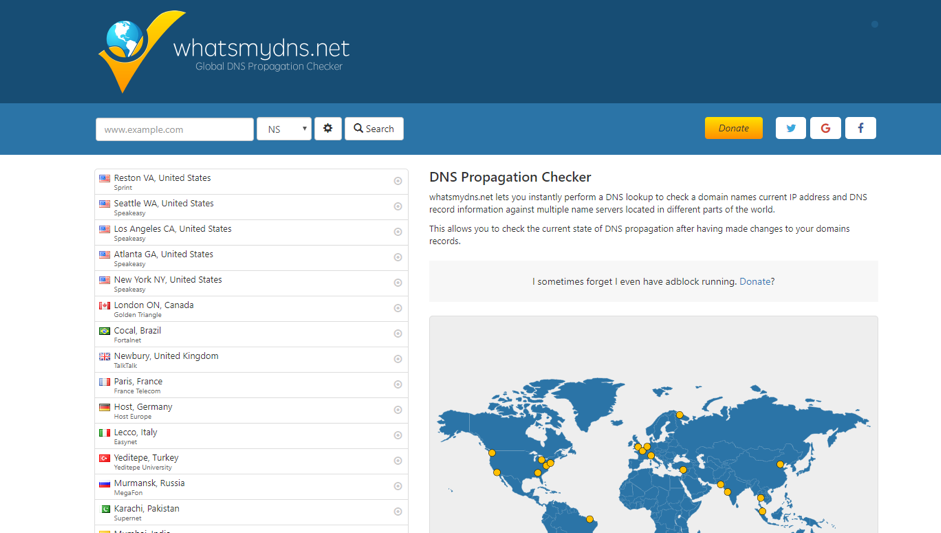
7. Review Propagation
After changing our DNS, even before changing them we can see where in the world it is propagated and where it is missing.
If you test the “NS” and search your domain, it will tell you the main zones where it is resolving to.
And that’s it. After you have migrated your Name Servers, it is only a matter of time to see the changes. Now you have transferred your DNS and domain from Godaddy to AWS successfully. We are done with this Godaddy to AWS Article.
IMPORTANT NOTE: It can take up from minutes to 48 hours to see the nameservers migrated depending on the TTL specified.
Frequently Asked Questions
You can migrate any type of application. We try to automate all of our processes and also perform manual migrations helping to transform your application with AWS services.
Using Route53 you are able to migrate the DNS. We can help you to perform an easy and seamless migration to AWS.
Depending on the type of project. We can create a quote for you.