Good news! A React app is static. This means that once you have built all your files, you won’t need to execute any instructions. Another piece of news to share is that it almost costs nothing to deploy a React App to S3 and CloudFront. And finally, I would add the easiness that Amazon S3 provides to users at the moment of updating and deploying. This next blog will show a tutorial to deploy React app to AWS using these two services.
So, let’s start!
The entire process
Step by Step Deploy a react app to AWS
Create DNS Record
- Go to Route 53
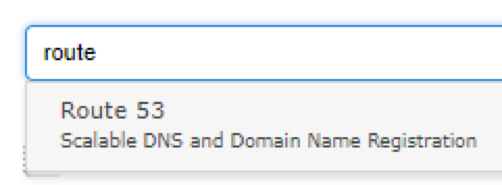
- Select your hosted zone and create a new record
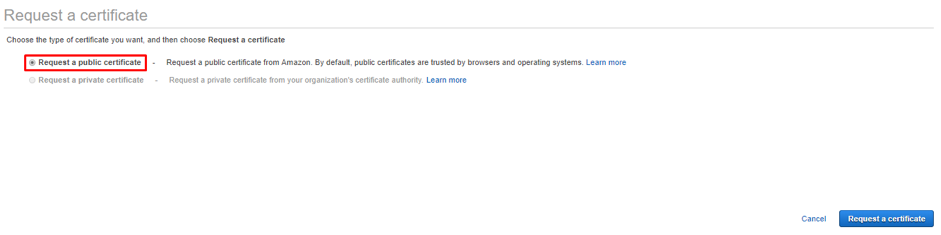
Request SSL certificate
- Go to Certificate Manager

2. Click “Request a certificate”

3. Select “Request a public certificate” and click “request a certificate”
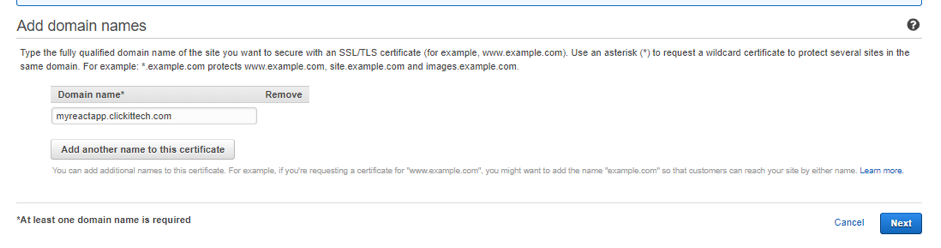
4. Choose a domain name, in this Deploy a react app to AWS tutorial, we’re going to use a subdomain but you can choose a domain as well. Click “Next”.
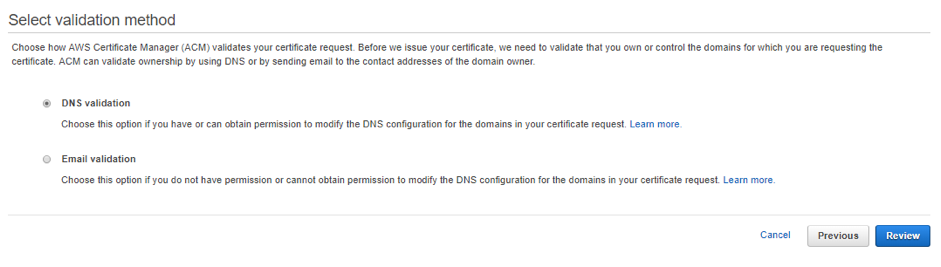
- Now we have to validate that we’re the owners of the domain, to do so, let’s select a validation method. You can choose two methods:
- DNS Validation: AWS will provide you some records that you will need to add on your DNS settings.
- Email Validation: AWS will send you an email with instructions to validate the SSL
On this step, if you don’t have access to your DNS records, it’s preferable to use the Email Validation, if not, you can use DNS validation method.
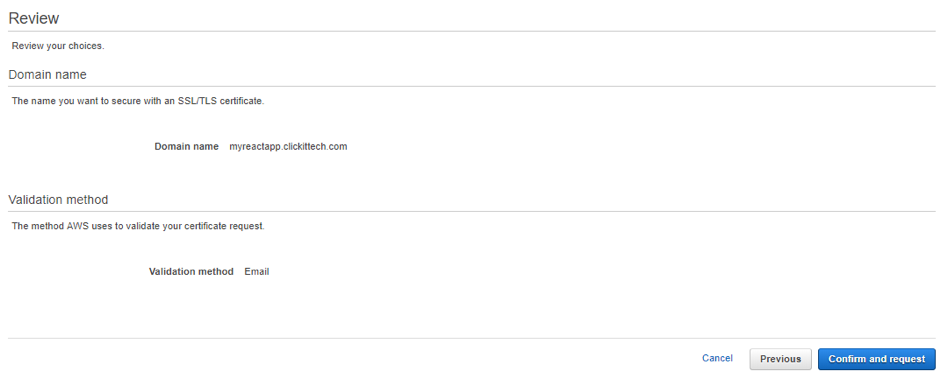
Review your settings on the summary page at the end. Click “Confirm and request”. Make sure to follow the instructions of any of both methods, so we will have our SSL provided successfully and ready to use.
You will see that our Request is in progress, go to your DNS settings or your email to validate your certificate. Finally, click “Continue”
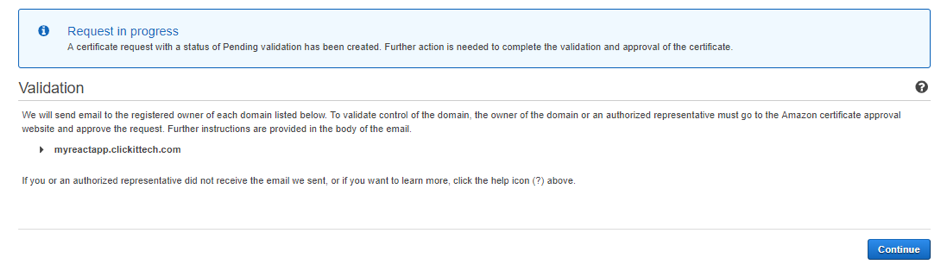
Once you have validated your SSL, you will notice that SSL has an “Issued” status, this means it’s ready to use!

Create Bucket
- Go to Amazon S3

2. Click on “Create bucket”

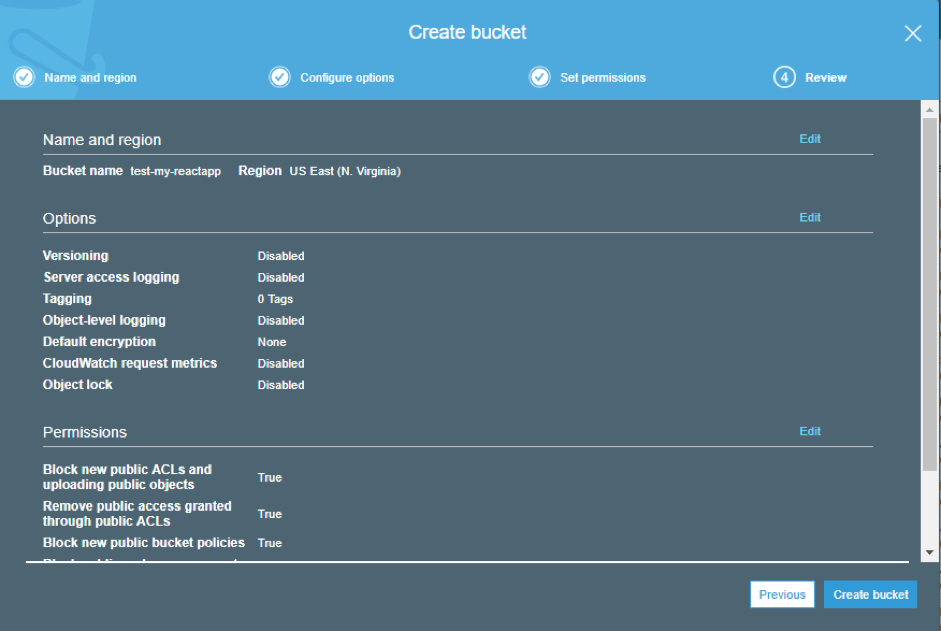
3. Configure the bucket with desired settings, such as name, region, the rest of settings can use default values

4. When you have finished your bucket configuration, you will see a summary of your bucket settings. Finally, click on “Create bucket”
Now we can leave S3 aside by the moment, let’s move to CloudFront. We are going to need a CloudFront distribution so we can link it to our bucket.
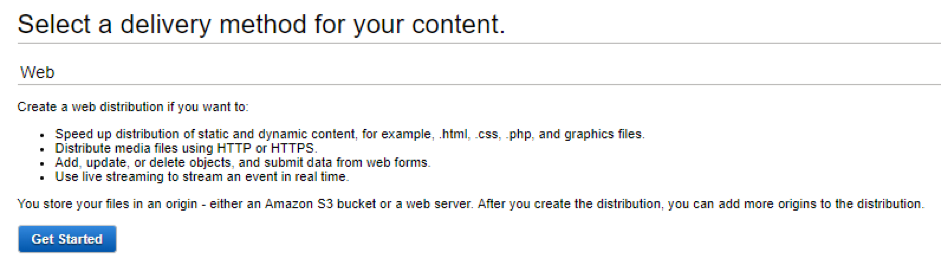
Create Distribution
- Go to Cloudfront
2. Create a new distribution, click “Create Distribution”

3. Select the Web type and click “Get started”
The distribution settings are quite long, so let’s review each section individually.
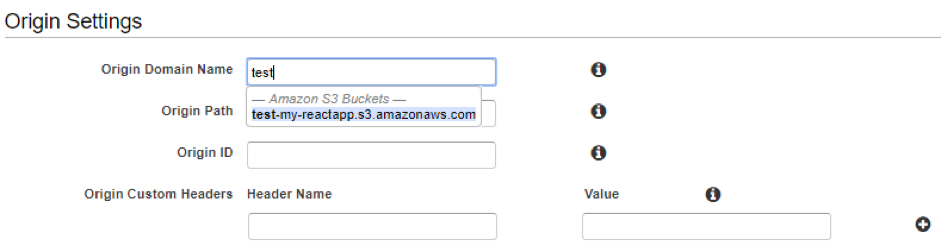
4. On origin name, the list of buckets on your account will be listed, select the bucket previously created on the list
On origin path, leave the path blank (we can modify this value later)
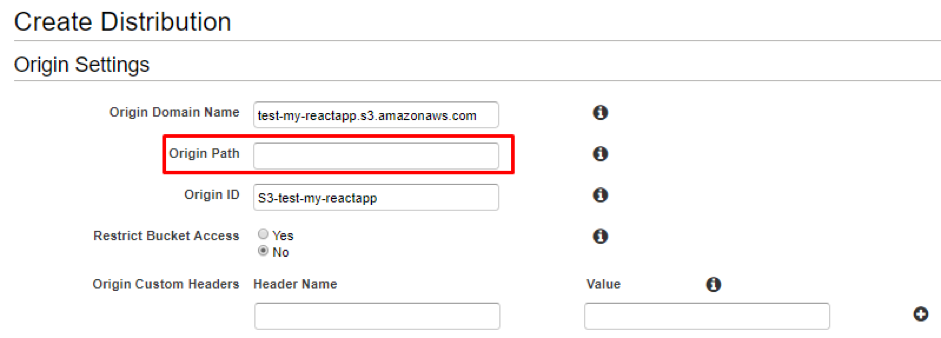
Origin ID is automatically generated; do not modify it.
Change the setting from “No” to “Yes” on Restrict Bucket Access
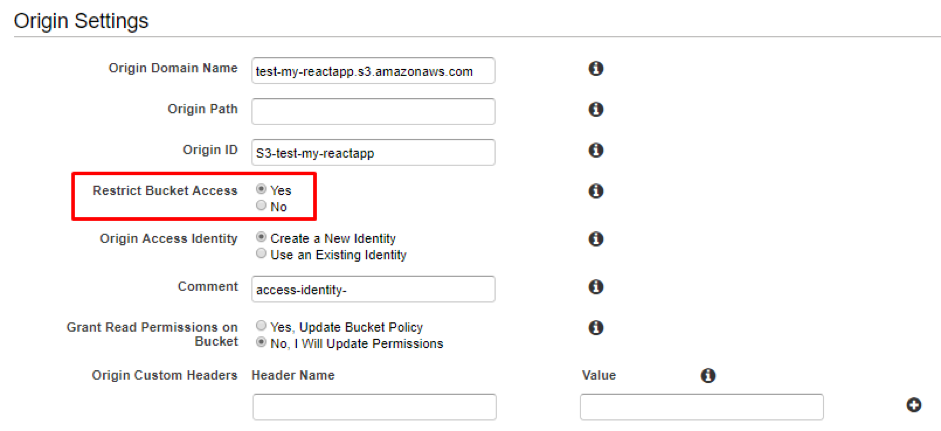
Optional, assign a comment on the distribution, so we can know what’s the purpose for such distribution

On Grant Read Permission on Bucket, select “Yes, Update Bucket Policy” (we’re changing the Bucket policy later but we need the Identity ID)

Optional. Add Headers if needed.

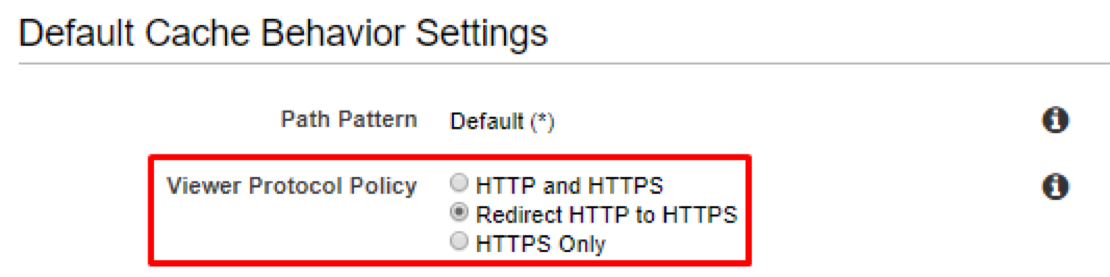
Let’s move to “Default Cache Behavior Settings” section, as a best practice, make sure to use the option “Redirect HTTP to HTTPS” to enable HTTPS.
Leave the rest of settings by default, and move to Distribution Settings.
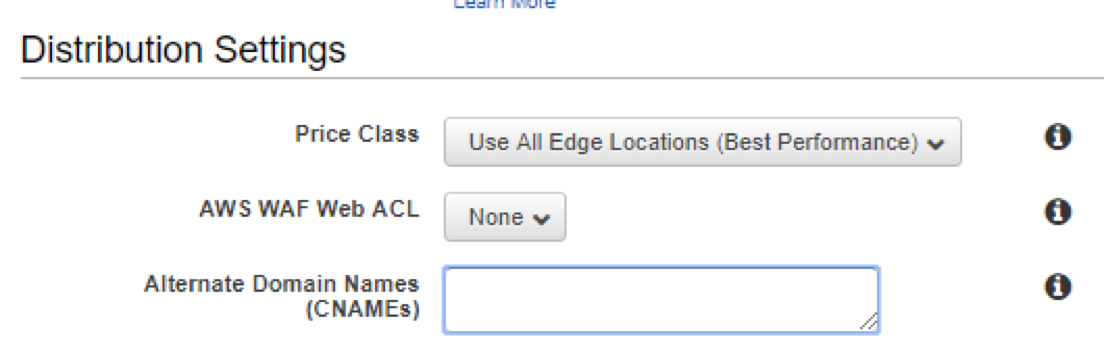
On “Alternate Domain Names(CNames)” add your custom domain/subdomain, for this example, we’re using “myreactapp.clickittech.com”

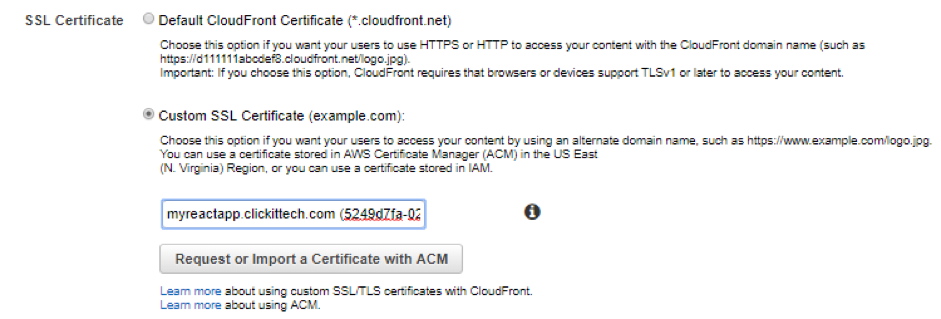
On SSL Certificate, choose the “Custom SSL Certificate” option and select the certificate that we created previously
At “Default Root Object”, let’s set “index.html”, but it may vary depending on your app settings (generally it’s index.html)

Make sure that Distribution State is “Enabled”

Finally, click
Conclusion
Easy enough, right?
Well, now that you have a react app running within the AWS Cloud, you can definitely use all the features that the AWS Cloud has to offer you. To deploy react app to S3 and CloudFront AWS is not as difficult as you might think, even if you have any obstacles, like How to use AWS Cloud Features or Which Cloud to choose? Then don’t doubt on contacting us, we want your infrastructure to be as optimized as possible.

FAQs
Hosting a react app on Amazon S3 costs almost nothing and is not as difficult as you might think; for its deployment, you need to:
-Create a DNS Record
-Request SSL certificate
-Create Bucket
Although React is known for developing web apps, it is also helpful for building mobile apps and native-rendered apps. React has strong characteristics. Global corporations like Facebook, Instagram, Netflix, and the New York Times use React in their projects.
To deploy a React app on AWS using Amazon S3 and CloudFront, you will need a CloudFront distribution to link it to your bucket.
1. Go to Cloudfront
2. Create a new distribution; click “Create Distribution.”
3. Select the Web type and click “Get started.”
4. On the origin name, the list of buckets on your account will be listed; select the bucket previously created on the list
5. Let’s move to the “Default Cache Behavior Settings” section; as a best practice, make sure to use the option “Redirect HTTP to HTTPS” to enable HTTPS.
6. On “Alternate Domain Names(CNames),” add your custom domain/subdomain
7. On SSL Certificate, choose the “Custom SSL Certificate” option and select the certificate that we created previously
8. On “Default Root Object,” let’s set “index.html”, but it may vary depending on your app settings (generally, it’s index.html)
9. Make sure that Distribution State is “Enabled.”