
If you are already thinking on how to create an eCommerce or have a Woocommerce installed on your WordPress but looking on how to accept credit card payments with Stripe, this blog is what you are looking for. I will teach you how to correctly configure your online store to be able to charge your customers through credit card using Stripe.

To do this, we will use a robust platform built for WordPress, known as WooCommerce, and an online payment processing called Stripe; which can be easily integrated with a plugin that I will explain later on this blog.
It may sound a little complicated, but do not worry, here we will guide you step by step so that you can correctly create your online store with its respective method of payment by credit card. Keep reading to know exactly how to setup stripe on WooCommerce.
Table of content
- WordPress for eCommerce sites
- What do I need in my eCommerce?
- What is Stripe and why to use it in your eCommerce?
- Why use Stripe?
- Stripe with WooCommerce
- How to Setup Stripe in WooCommerce
WordPress for eCommerce sites
The use of WordPress is fascinating since you can create pages, blogs and in this case products in a fast and simple way; that’s why we recommend it for eCommerce sites. By using WooCommerce combined with WordPress, creating your online store becomes an easy task to do.
The creation and delivery of your products, order management, and even the design of the page are things that a WordPress with WooCommerce allows you to do without problems.
What do I need in my eCommerce?
Well, first of all, you must do your market research and all that financial aspect that you need to create your eCommerce, but here we will only tell you what you need to be able to create your page from the technical perspective.
You must have installed on the server of your website:
- WordPress
- The WooCommerce plugin for WordPress
- The WooCommerce Stripe Payment Gateway plugin
You will find the download link to the plugins when we get to that part. This last plugin is the one that will help us to make the payments through credit card, using Stripe as a service to do the payment processing online.
What is Stripe and why to use it in your eCommerce?
Stripe is one of the best software platforms where you can manage your own company online. Here you can increase your income with specially designed payment options so that you can reach customers anywhere in the world. In the same way, you can optimize the conversion of the currency during the purchase process and thus increase your purchases without the need to interfere with the exchange rate.

Why use Stripe?
This question is essential, from our point of view it is better to use Stripe because it integrates the most modern technologies, the easy use of the platform and its updates that every time includes improvements in plugin; These are the main reasons why we opt for this technology. Stripe adapts to your needs as your business grows and the industry evolves.
Stripe with WooCommerce
As mentioned above, online payments of credit or debit cards are allowed, and through Stripe, customers remain on their page during the payment process.
We consider these as the main characteristics of Stripe in Woocommerce:
- You can quickly capture authorizations and process reimbursements from your WooCommerce dashboard.
- It supports recurring payments with various payment methods through WooCommerce Subscriptions.
- Take advantage of free updates, and new innovative characteristics as Stripe launches new features and products.
How to Setup Stripe in WooCommerce
Now, we are going to add Stripe in WooCommerce.
Step 1: You must first create your Stripe account, you can go directly here. You should see a page similar to the following. In which you must enter your information and the Captcha.

After completing your registration, it will show you the control panel of your Stripe account as seen in the next image.
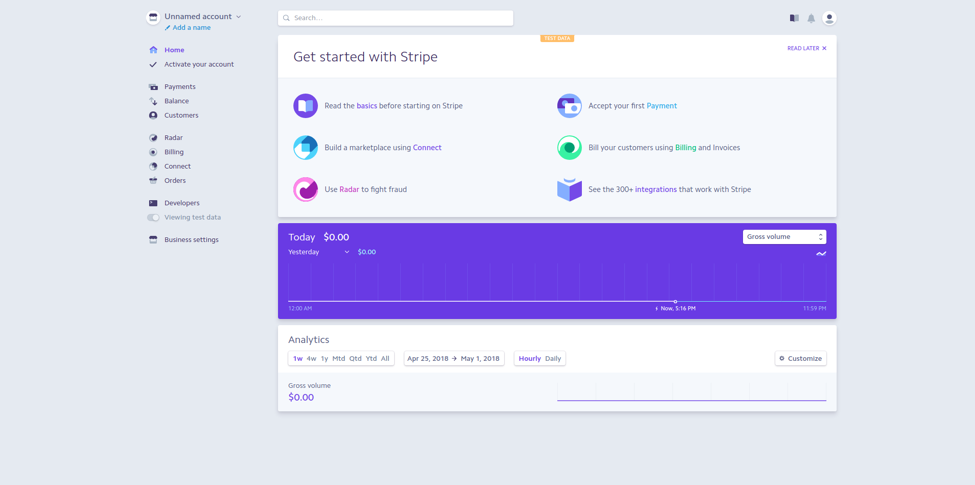
Once you see this screen, your registration is complete.
Step 2: Install the WooCommerce Stripe Payment Gateway plugin, you can download it here. You have to press Download to get this plugin.
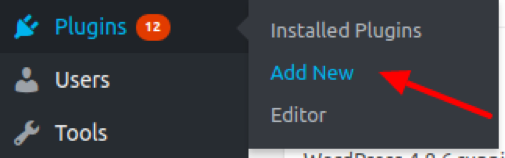
Add it to your WordPress from Plugins > Add New section.
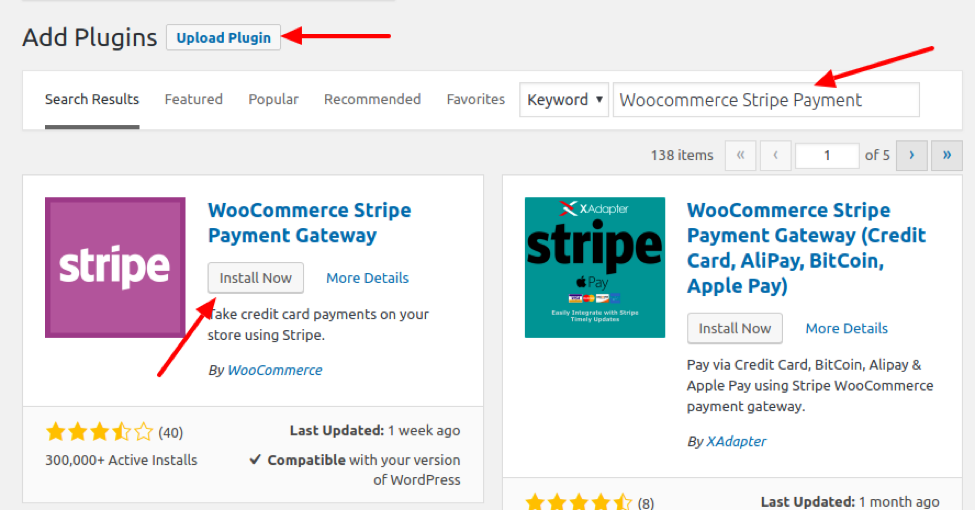
In the next screen we have two installation options, we can upload the plugin or install it from the same WordPress installer. As seen in the following image:
After installing the plugin, the next screen appears:
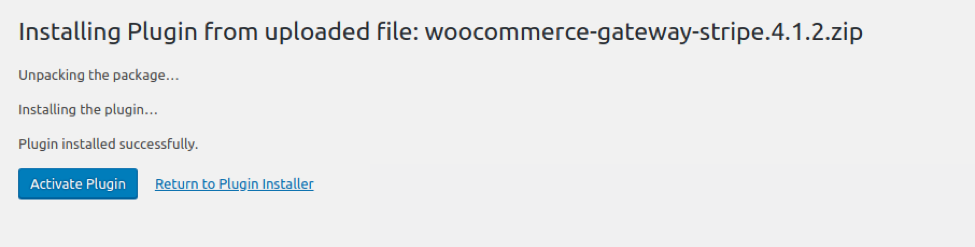
You only need to click on “Activate Plugin”.
Step 3: Plugin configuration.
To activate the payment by Stripe in our online store, we must correctly configure the plugin, which is done as follows.
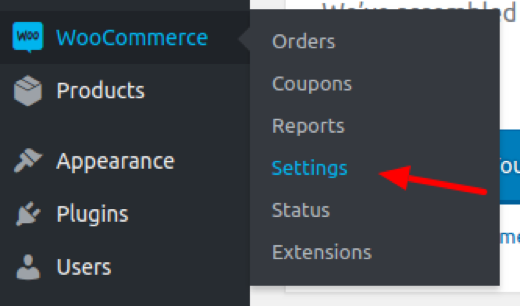
To access the Stripe configuration, we must first enter WooCommerce> Settings.
Once inside Settings, we select the Checkout tab and click on the Stripe link that is shown on the Checkout tab.

Upon entering this section, a screen like the following will be displayed:

In this tab you must activate the Enable Stripe box, enter the Publishable Key and the Secret Key, and to activate the use in production you must disable the Test Mode box.
To obtain the Publishable Key and the Secret Key, we enter in the Stripe account that we created in step 1. You can click here or in the section of your menu Developers> API Keys. You will be shown a screen like the following:
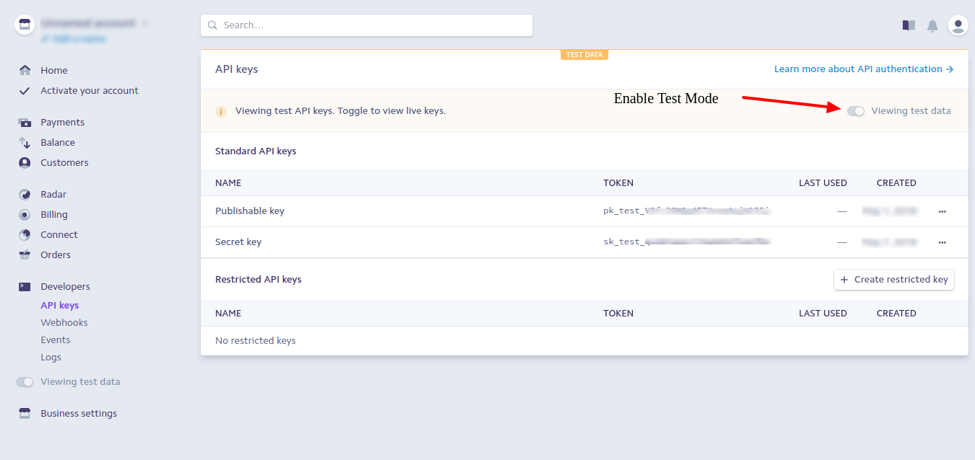
If necessary, you can activate your Test Mode to test your site. However, in this section, you must copy your Keys to be able to enter them in your plugin configuration.

Save the changes. Now we must enable payment through Stripe.
Step 4. Corroborate that payment has been enabled through Stripe.
We return to the Settings window within our WooCommerce plugin. We click on the Checkout tab and then select the Checkout options link.

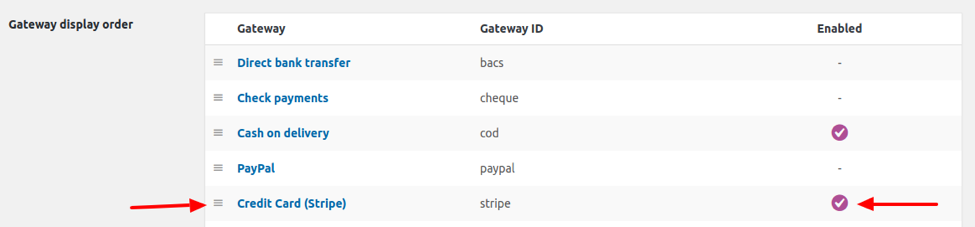
Then, we go to the bottom of the window, where we must locate the Gateway display order section, in which we must see that Credit Card (Stripe) with the enabled signaling as shown in the following image.
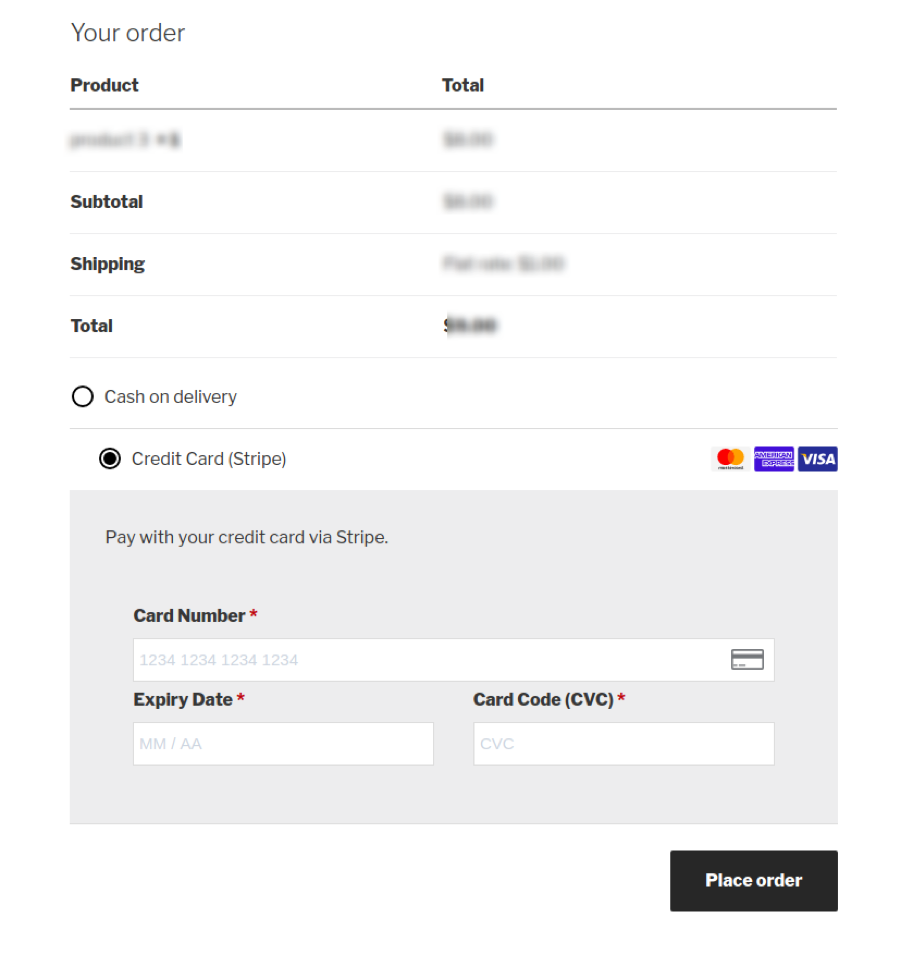
Step 5. Check the Credit Card (Stripe) option at the checkout.
As an additional review, we can perform the entire purchase process to review the appearance of the payment option through Stripe on our Checkout page. Something similar to the following image.
Now we have finished with the installation and configuration of Stripe in WooCommerce.
As you can see, WordPress is a good start for those who want to start an eCommerce site, since it has the flexibility to build it yourself. By using the WooCommerce plugin and Stripe integration, you are assuring reliable transactions and proper management of the sales.
So now that you know how to install it, just make sure that you optimize and secure your new eCommerce site to give your users the best shopping experience.