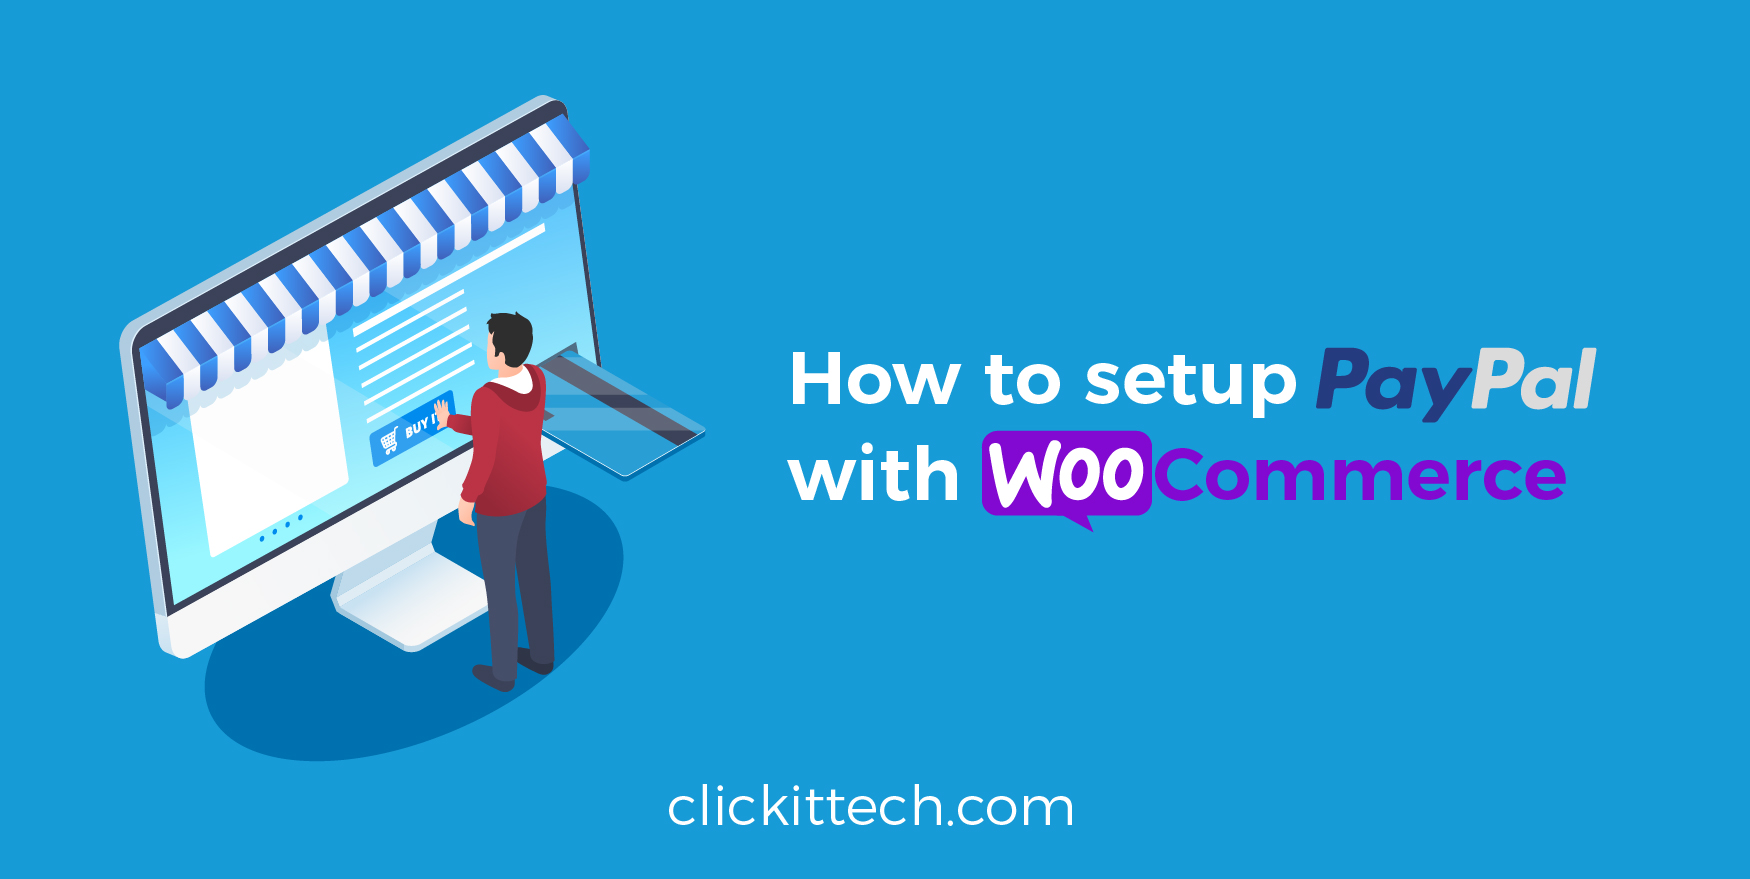
Paypal is the default payment method on WooCommerce when you first install it, so we are going to learn how to configure it if you don’t know so much about the whole e-commerce stuff, you will use the default WooCommerce settings to set your first store.
Table of contents
- Configure the PayPal Checkout Gateway
- Woocommerce Paypal Sandbox
- Adding Products and Checkout
- Making the payments
Let’s start, What do you need:
- WordPress installed on your server
- WooCommerce plugin
- A PayPal Business Account
If you don’t have a business account, you can create one here. We are not going to show how to configure it but, what I want to show you is that you have two options. PayPal offers you information about the e-commerce solutions they work with and the Setting up buttons to embed by your own. Be careful with the second option.ALSO READ: WooCommerce vs Shopify: The big winners of 2018 on E-commerce Platforms.

NOTE: Setting up the buttons on your own will require to edit your template files in the WordPress theme you are using so they can be shown in any part of your website. If you are very new to WordPress and don’t know what is a template file or you don’t have basic knowledge of HTML I don’t recommend you to use this method.
Configure the PayPal Checkout Gateway
Go to your WooCommerce Settings and select the Payments option
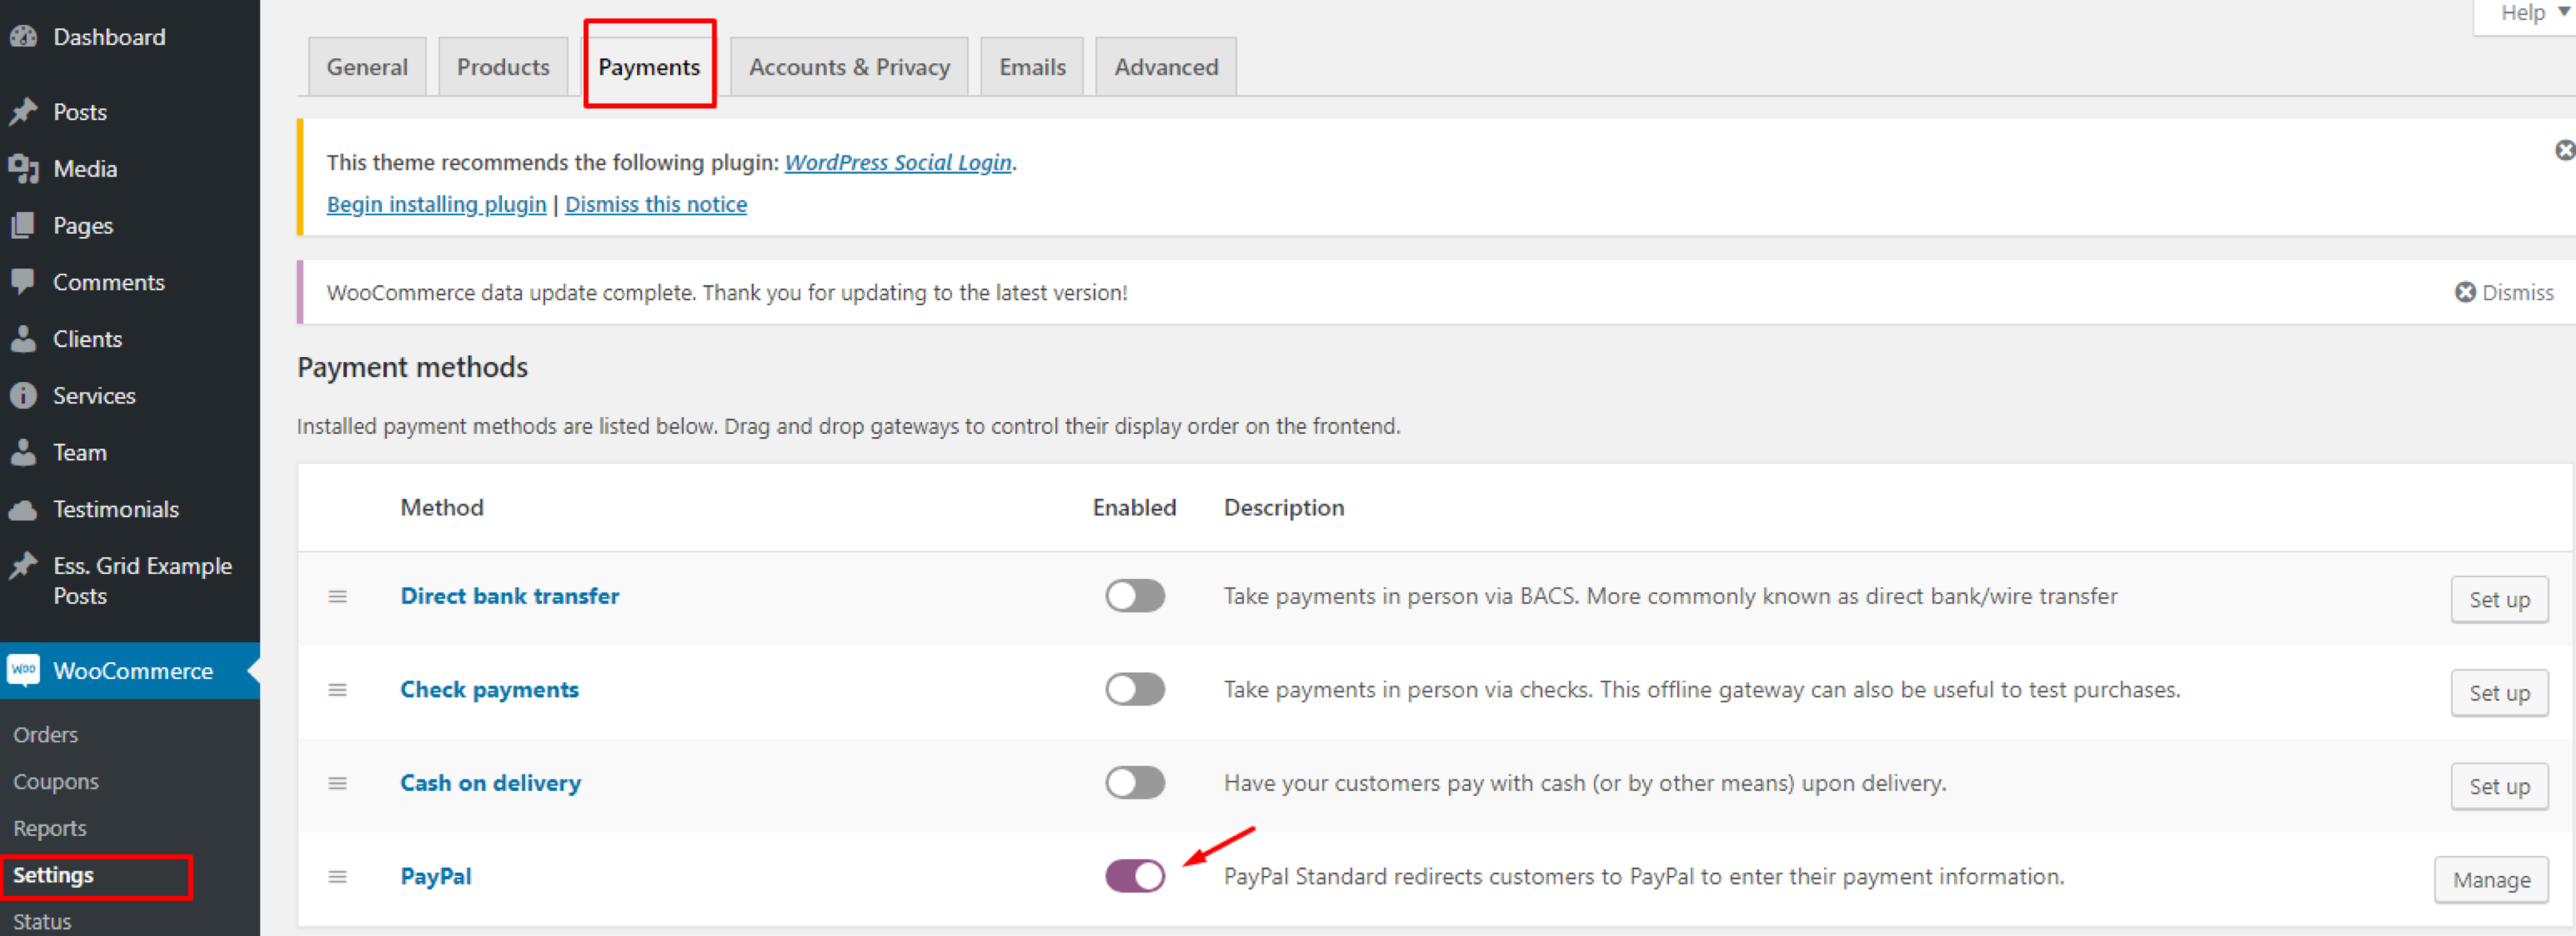
Predefined options will appear, scroll down, and you’ll see PayPal is selected, click on manage as shown below:

The next thing you will see is the Settings page
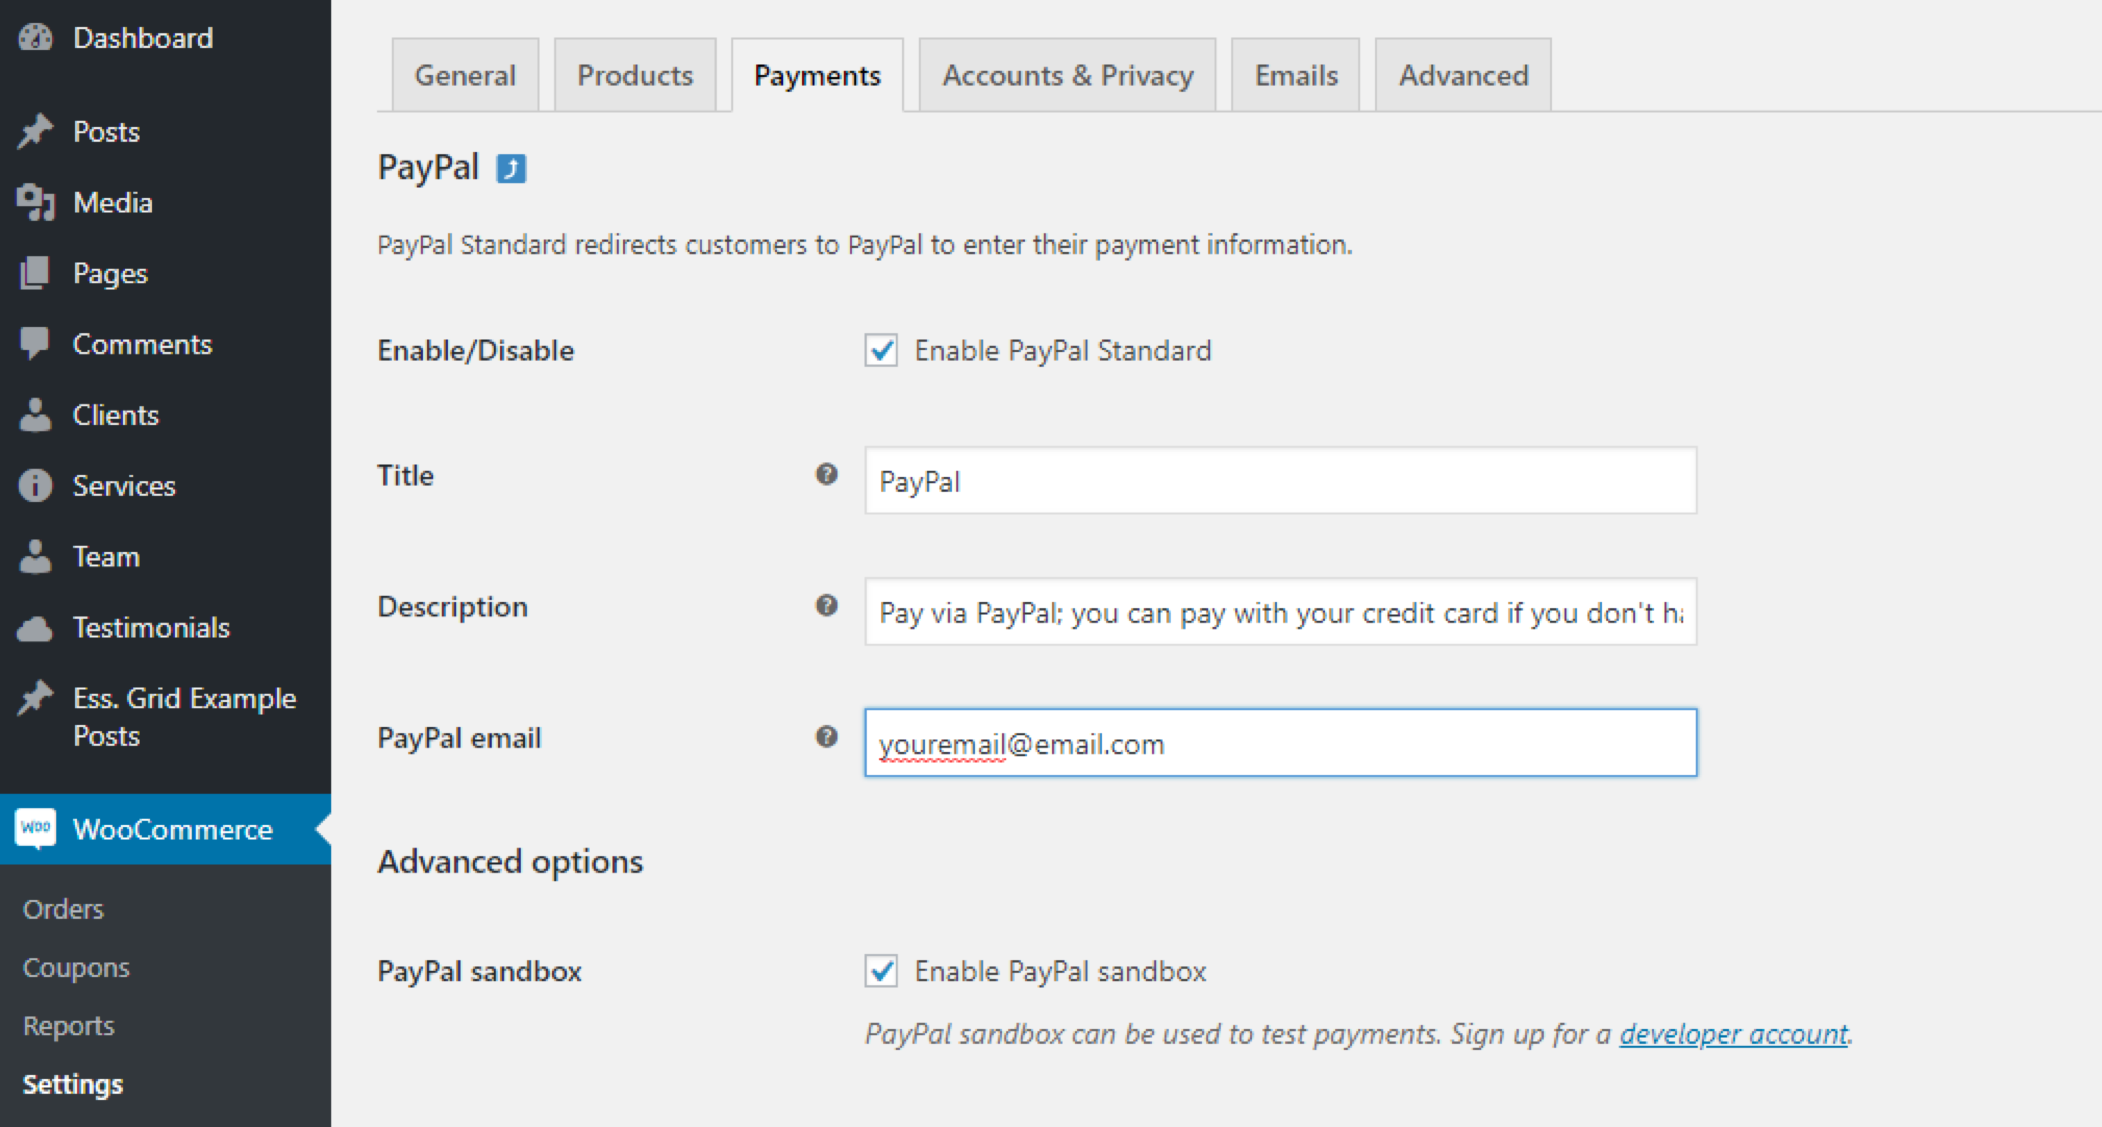
We are going to setup the basics here:
Enable/ Disable: Must be checked, sets Paypal as your payment gateway
Title: This is what your customers will see at the checkout
Description: Add extra information
Paypal Email: The email that you registered on PayPal
Check the Sandbox option, this way you can test and purchase to see if everything works fine before going live.
If you want to manage refunds, this is the way Paypal handles it.
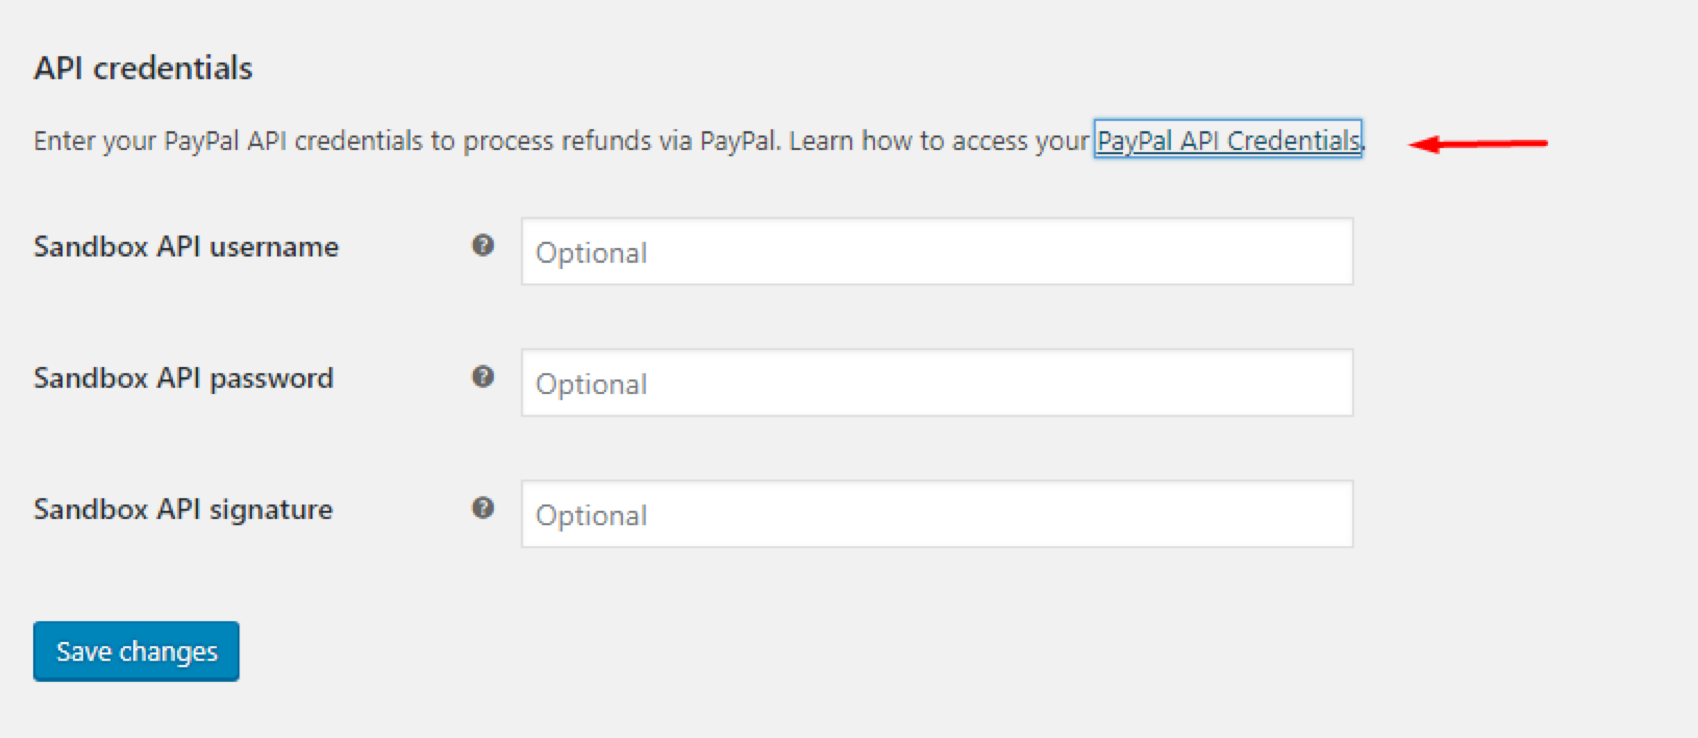
You have to enter to your Paypal Developer account to have access to this data.
Follow the instructions on the PayPal documentation by clicking on the link, so you are sure to be following the exact steps Paypal need for this.
ALSO READ: Install an SSL certificate on your WordPress site with WooCommerce.
Woocommerce Paypal Sandbox
NOTE: If you noticed this screenshot shows the “Sandbox API” credentials, that’s because in the previous steps we checked the Sandbox Mode if this is unchecked you will see that the API Credentials asked will be the Live ones.
Adding Products and Checkout
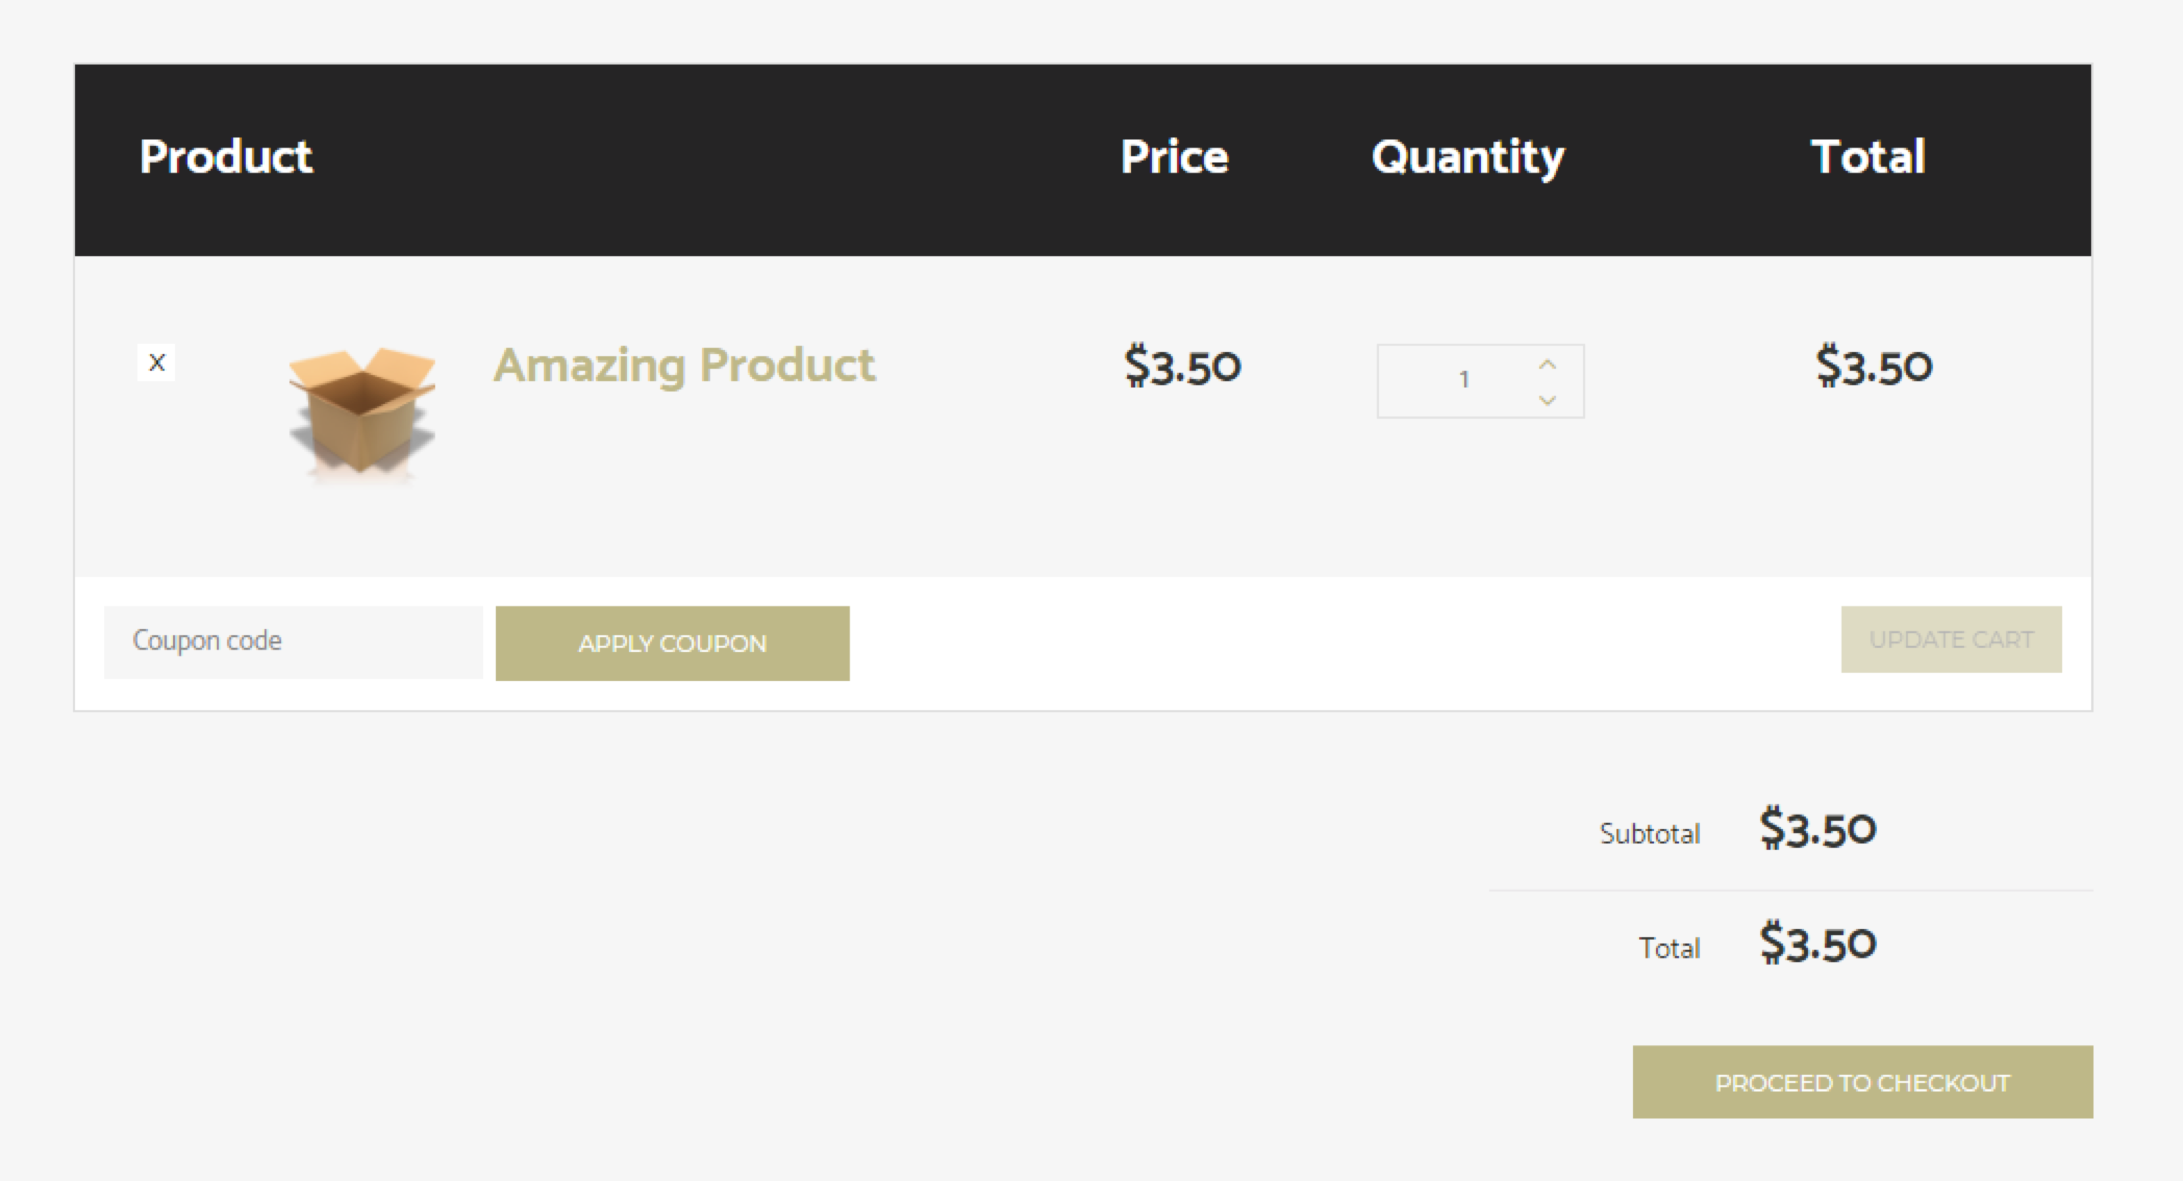
Now we can go through your website adding products to the cart and make the checkout process to test.
I’m adding a product to my cart.
Now, this is my checkout.
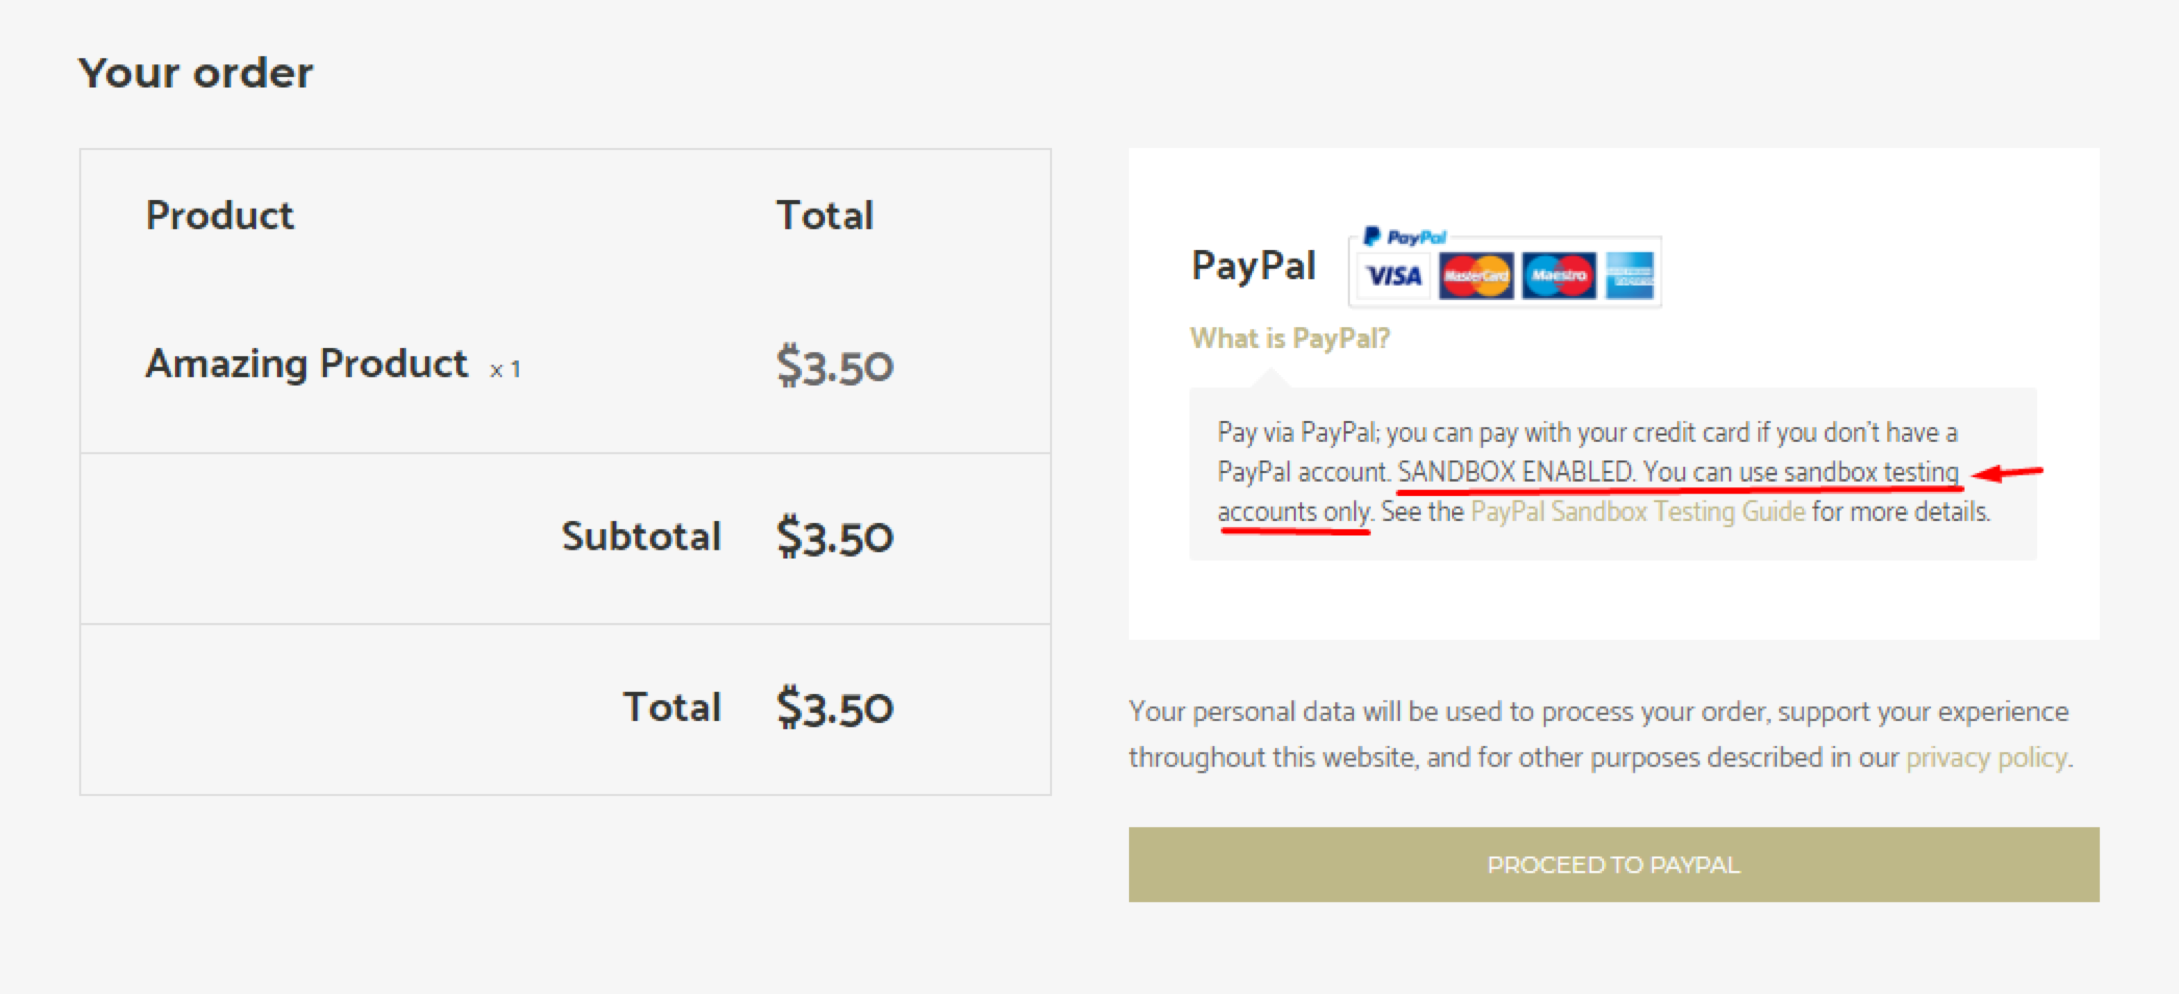
See that PayPal knows that sandbox is enabled so you will use your sandbox accounts to verify the purchase.
Making the payments
To make the purchase, you will use the personal sandbox account and to verify the payment, you will check it on the business sandbox account.
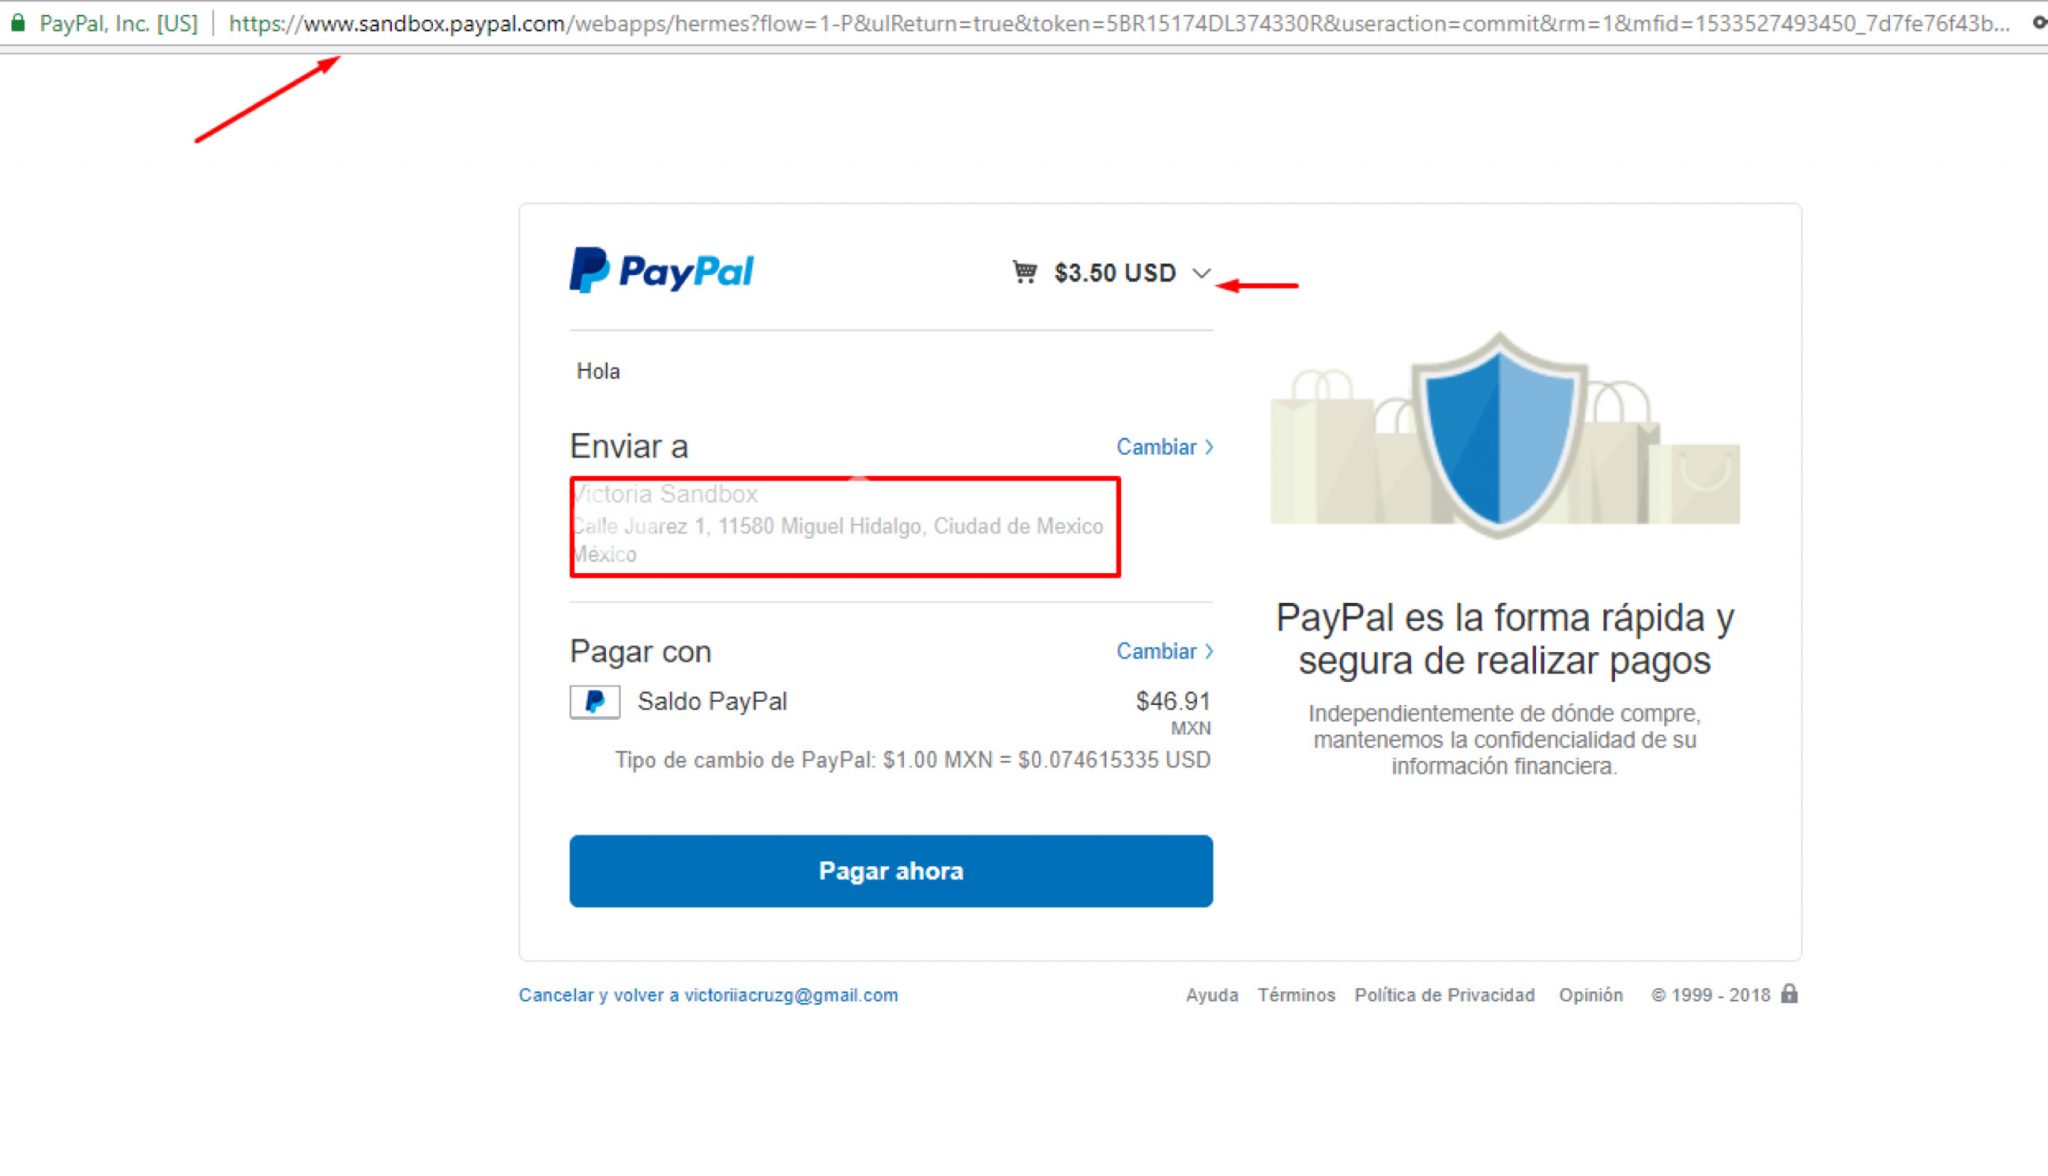
I logged in to the PayPal window with the personal sandbox account and then this window with the data of the payment is going to appear, you’ll see I’m on the sandbox environment, but the live environment is pretty much the same.
- The amount of money you pay according to what you purchased.
- The address of the store or the address the merchant wrote in this field.
- The type of payment, in this case, I’m going to pay with my PayPal credits, but you can pay with a credit card for example.
After payment a page with detailed information is shown, this can be different if you have set a URL to be redirected after payment, in this case, I don’t have one so the information is shown and then I can go back to the website.
I have my PayPal account in Spanish but pretty much what the page shows is:
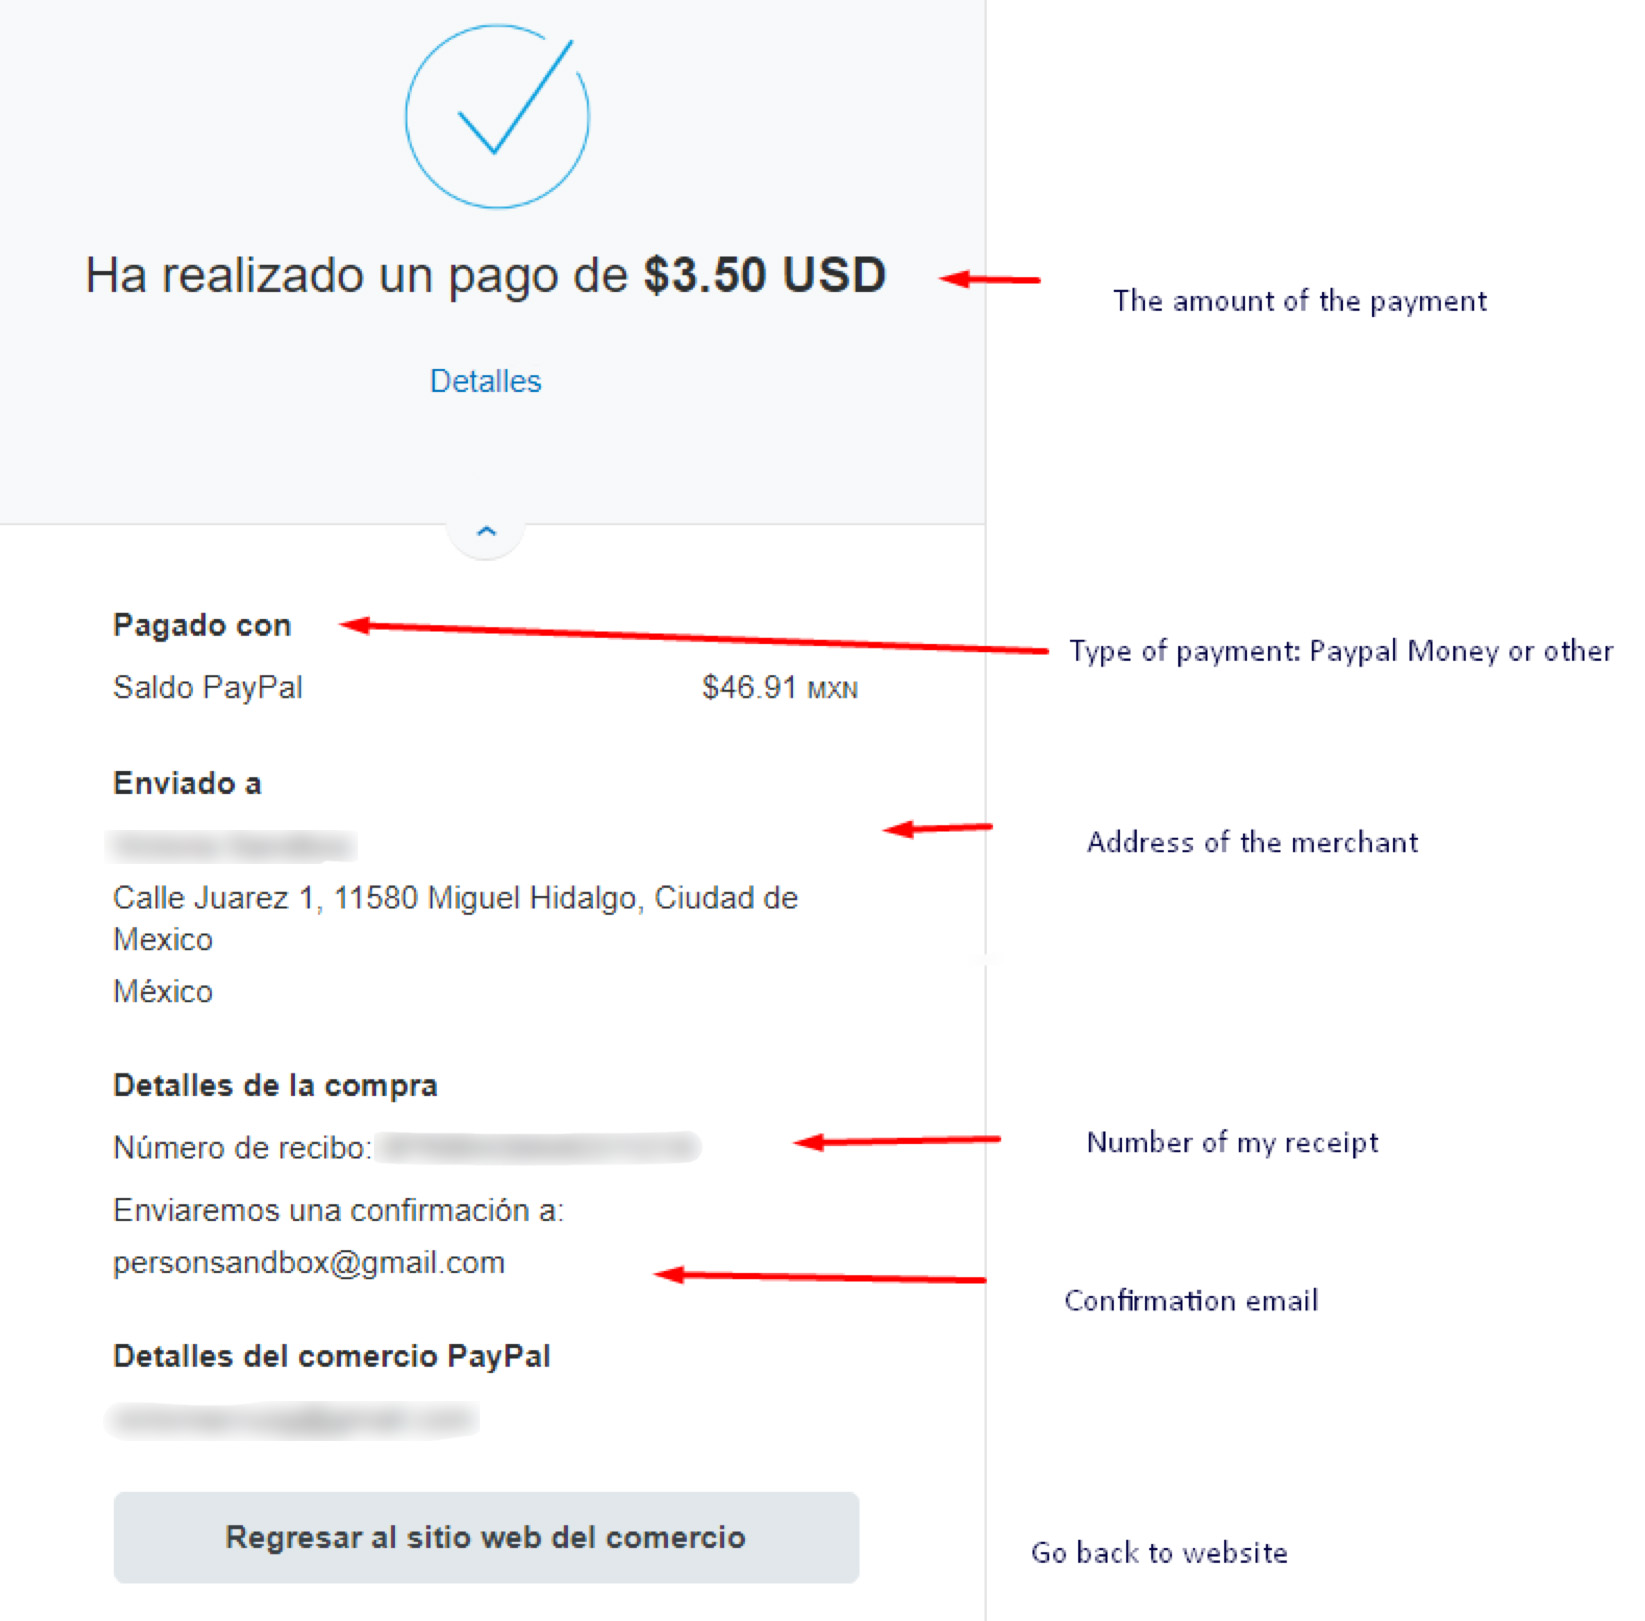
Now you can go to your business sandbox account and see that the money is now in your hands.NOTE: Remember that PayPal takes a percentage of the amount as a merchant.
This way we can be sure everything is per-fect! Just remember to uncheck the “Sandbox mode” before going live.
By finishing this tutorial you have discovered how to setup PayPal Payment Gateway on WooCommerce, I hope this tutorial was useful for you. We used WordPress as the main platform, and Woo Commerce as the e-commerce plugin. Both have lots of helpful resources, if you want more specific information or help with your WooCommerce don’t hesitate to chat with us.